Diagnostic display, Modbus setup – Multiquip DCA150SSJU3 User Manual
Page 33
DCA150SSJU3 50 HZ GENERATOR • OPERATION AND PARTS MANUAL — REV. #1 (02/01/10) — PAGE 33
DIAGNOSTIC DISPLAY
11. Touch the “Menu” button to return to “Utilities” menu.
Touch the “Menu button again to return to the “Main”
menu.
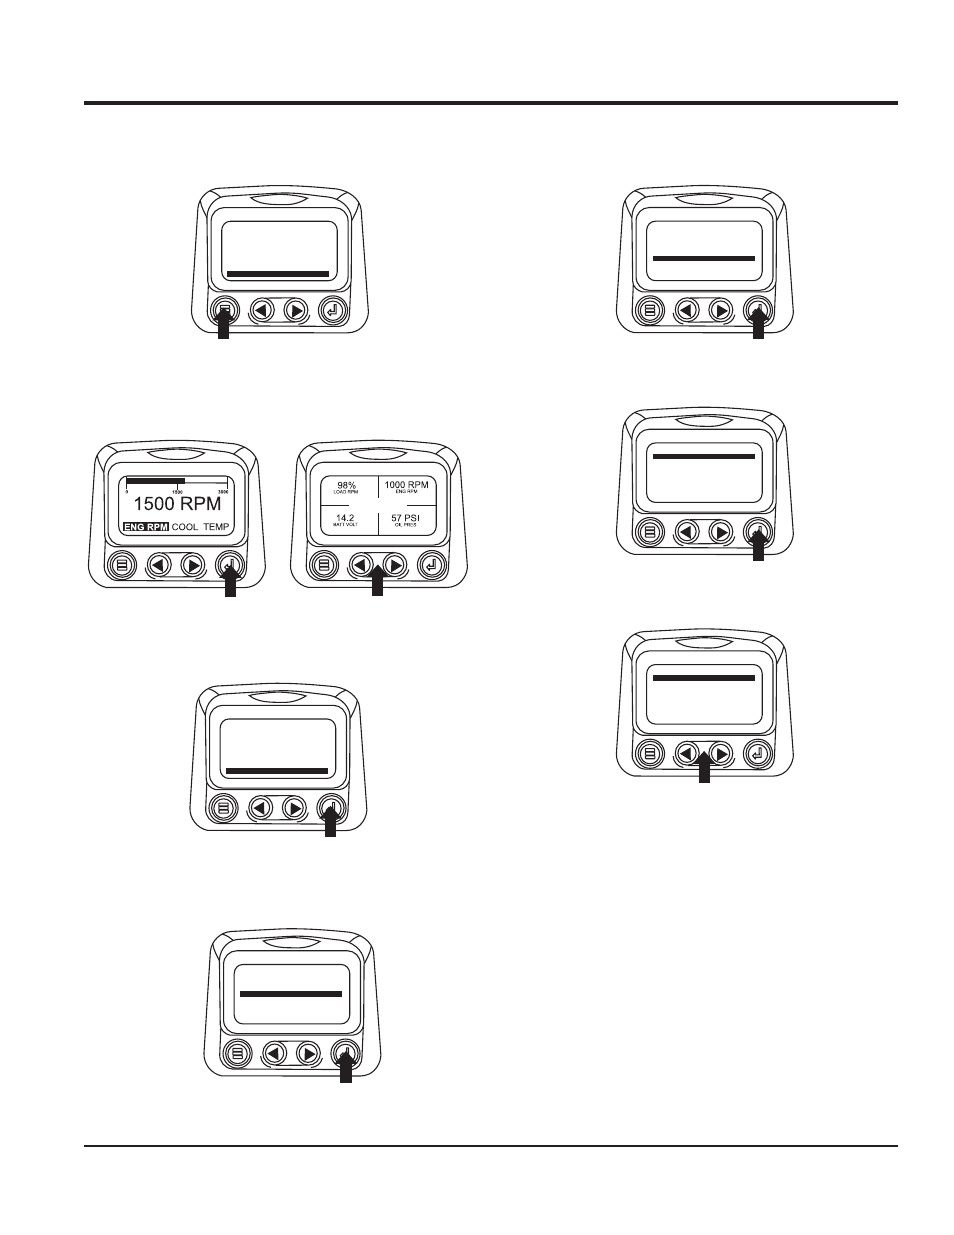
MODBUS SETUP
1. Starting at the single or four engine parameter display,
touch the “Menu Button”.
2. The main menu will be displayed. Use the “Arrow
Buttons” to scroll through the menu until the “Utilities”
is highlighted, then touch “Enter”.
3. Once in the “Utilities” menu use the “Arrows” to scroll
through the menu until the “Modbus Setup” menu is
highlighted, then touch “Enter”.
ENGINE CONF
SETUP-4-UP DISPLAY
SELECT UNITS
STORED CODES
G
SETUP 1-UP DISPLAY
ADJUST BACKLIGHT
UTILITIES
ENGINE CONF
SETUP-4-UP DISPLAY
SELECT UNITS
STORED CODES
G
SETUP 1-UP DISPLAY
ADJUST BACKLIGHT
UTILITIES
GAGE DATA
REMOVE ALL GAGES
SOFTWARE VERSION
FAULT CONVERSION
MODBUS SETUP
4. Use the “Arrows” to scroll down to and highlight either
the “Slave Active or Master Active” modes. Touch the
“Enter” button to toggle between master and slave.
5. Use the “Arrows” to scroll to the “Serial Port” menu to
highlight it, then touch “Enter”.
6. Use the “Arrow” button to scroll to each selection to
confi gure the MODBUS values for your application.
7. When fi nished, touch “Menu” to return to the previous
screen.
USE FACTORY DEFAULT
SERIAL PORT SETUP
SOFTWARE VERSION
SLAVE ADDRESS SETUP
MASTER ACTIVE
USE FACTORY DEFAULT
SOFTWARE VERSION
SLAVE ADDRESS SETUP
MASTER ACTIVE
SERIAL PORT SETUP
BAUD RATE
DATA BITS
STOP BITS
PARITY