Insert snap pins, Install endgate side latch & position endgate, Wiring: routing and connections – Let's Go Aero LittleGiant Trailer LGT 1107 - T (Torsion based model) User Manual
Page 17
– 17 –
l
iTTle
G
ianT
T
railer
™
LGT1107rev0614
14. Insert Snap Pins
Insert the Snap Pins (S) into the End Gate
Latch Angles.
If the pins are too tight and a looser fit is
desired drill out the hole in the endgate latches.
13.
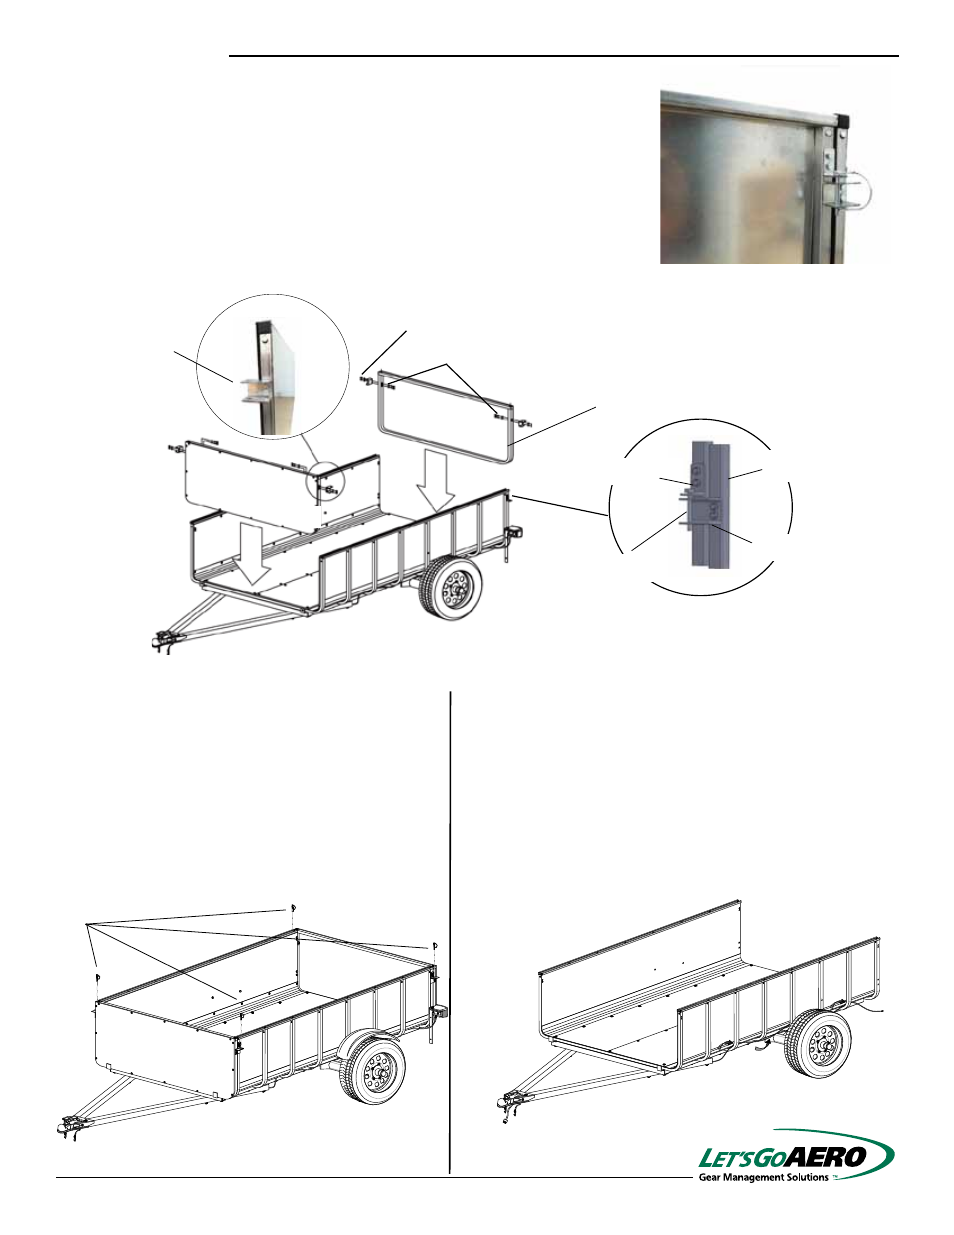
Install Endgate Side Latch & Position Endgate
Locate the two (2) Foam Roll, 2" End Gate Latch Angles (W), eight (8) 5/16” x
1-3/4” Bolts (LL), eight (8) 5/16” Nylon Lock Nuts, eight (8) 1/4” Flat Washers
(HH) and the four (4) Snap Pins (T).
Install Foam on the inside edge of the End Gate. Wipe End Gates with rubbing
alcohol prior to install for better results.
Loosely install the End Gate Latches as shown. Use the Snap Pins to check
the alignment of the latches. Once the latches are aligned properly, tighten the
hardware.
15.
Wiring: Routing and Connections
Make sure that the solid yellow lead is on the driver’s
side and the solid green lead is on the passenger side
per Step 4.
Where the wire harness exits the A-Frame, weave the
loose ends of the wire harness in and out of the U-Tubes
to the rear of the trailer. The plastic ties may be utilitized.
Snap Pins
olidWorks Student License
cademic Use Only
2" End Gate
Latch Angle
5/16” x 1-3/4” Bolts (outside)
1/4” Flat Washer
& Lock Nut (inside)
2" End Gate
Latch Angle
1" Body Latch
Rear End
Gate
Use Snap Pin to
align brackets
Place Foam on the inside edge
of the End Gate.