Install u-tubes, Install side panels and floor panels – Let's Go Aero LittleGiant Trailer LGT 1107 - T (Torsion based model) User Manual
Page 14
– 14 –
l
iTTle
G
ianT
T
railer
™
LGT1107rev0614
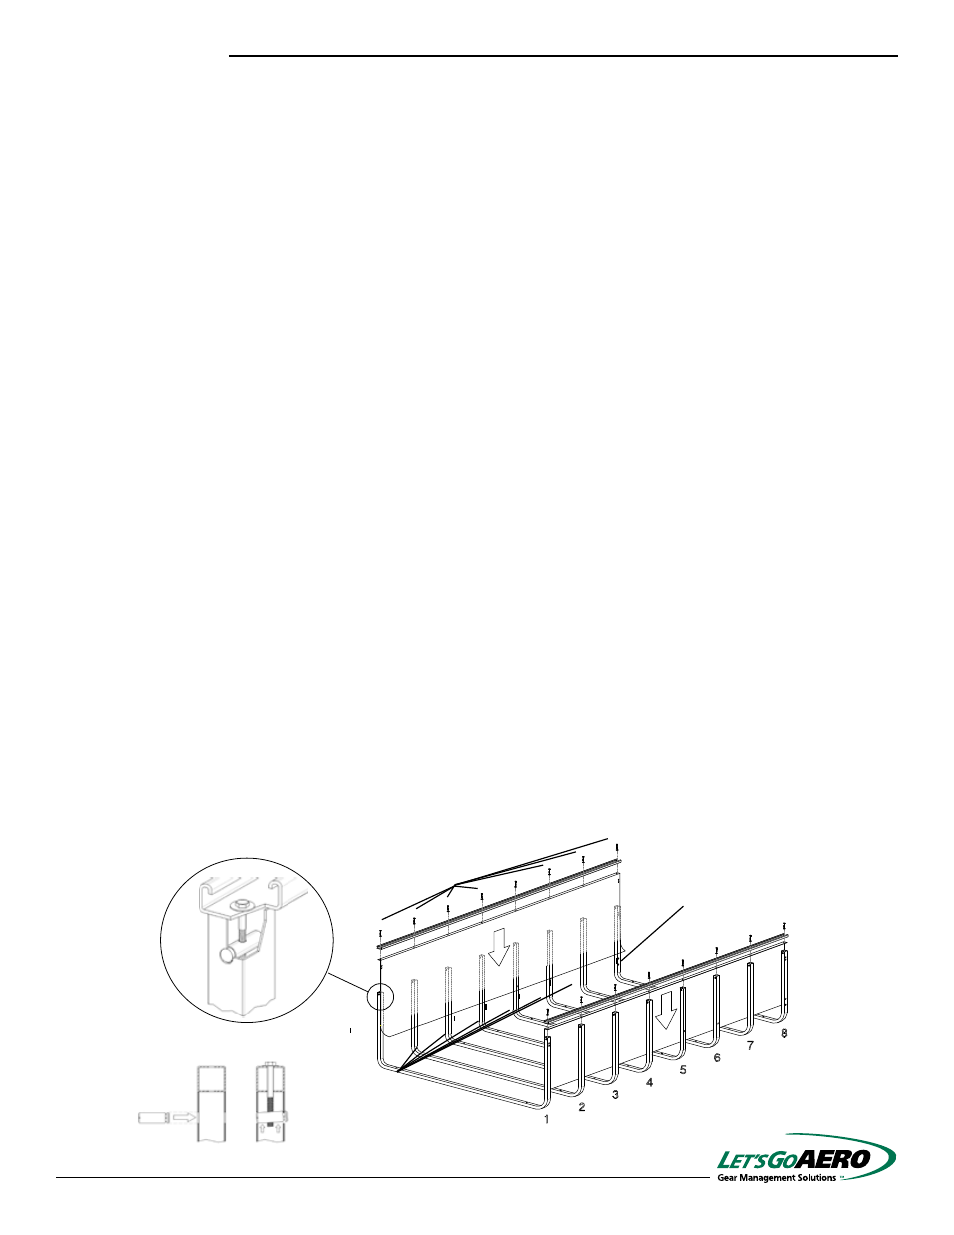
7. Install U-Tubes
Locate the U-Tubes, two (2) 5/16” X 2” Bolt assemblies (DD), twelve (12) 5/16” X 4” Bolt assemblies (EE) and
sixteen (16) Pin Nut assemblies in the parts kit (X).
The U-Tubes numbered 1 and 8 MUST be installed in these positions counting from the front (hitch side) to
back. The remaining U-Tubes are not numbered and may be placed in any position.
Remove the bolts in the front holes (nearest the hitch) in the Frame Tubes. Place U-Tube #1 over these holes and
secure it with the bolts. Place U-Tube #8 over the rear holes and use the two (2) 5/16” X 1-3/4” Bolts (DD) to hold it to
the Frame Tubes.
Use the twelve (12) 5/16” X 4” Bolt assemblies (EE) and use the bolts to hold the remaining U-Tubes to the Frame
Tubes. Do not install the washers and nylock nuts at this time.
Important: All bolts will fit properly if the undercarriage is square. The undercarriage has a loose fit to allow for adjustment
at this stage if it is necessary.
5/16” X 1” Bolts,
Stainless Steel Flat
Washers, SS Split Ring
Washers (X)
5/16” X 2”
Bolts (DD) with
Washers &
Lock Nuts
5/16” X 4”
Bolts (EE) with
Washers &
Lock Nuts
8. Install Side Panels and Floor Panels
Once the U-Tubes are mounted on the Frame Assembly in the proper order, place a Pin Nut into the openings in the
top of each U-Tube. Align the slot in the Pin Nut with the side of the U-Tube so that the side of the tube will go into
the nut when it is tightened. If necessary, lightly tap the Pin Nut into place with a plastic hammer to avoid damaging
the Pin Nut.
Locate the 84” x 20” side panels and position the 1” panel return on top of the U-Tubes, with the 20” portion of panel
resting on the inside of the U-Tubes.
Place the two C-Channels on top of U-Tubes/panel profile and install the sixteen (16) bolts and hardware from the
Pin Nut assemblies (5/16” X 1” Bolts, Stainless Steel Flat Washers, Lock Washers). Thread the bolts through the
C-Channels, side panels and into the Pin Nuts.
Secure all hardware for Assembly Fit (Tighten later).