Unpack crate for assembly, Attach frame tubes to axle – Let's Go Aero LittleGiant Trailer LGT 1107 - T (Torsion based model) User Manual
Page 11
– 11 –
l
iTTle
G
ianT
T
railer
™
LGT1107rev0614
1. Unpack Crate for
Assembly
Remove the trailer parts from the crate. Remove
the 2 - 84” steel trailer body panels, 2 - 84” Side
Panels with corner coves and the 84” C-Channels.
l
iTTle
G
ianT
T
railer
™ a
SSeMbly
Important Notice on Assembly Tightening of Trailer’s Under Carriage:
The LittleGiant Trailer (LGT) is a precision built product and some consideration of “alignment” is necessary when first
assembling the trailer’s under carriage. The LGT uses “symmetry” in a balanced manner, so when bolting the under
carriage together for the first time, tighten all hardware in a two step process. First, tighten the trailer frame assembly to
set the components in position, referred to as “Assembly Fit”. Final Tightening occurs at Step 9. Final Tightening of 5/16”
bolts should be to 15 foot lbs of torque. Final Tightening of 1/2” bolts should be to 30 foot lbs of torque.
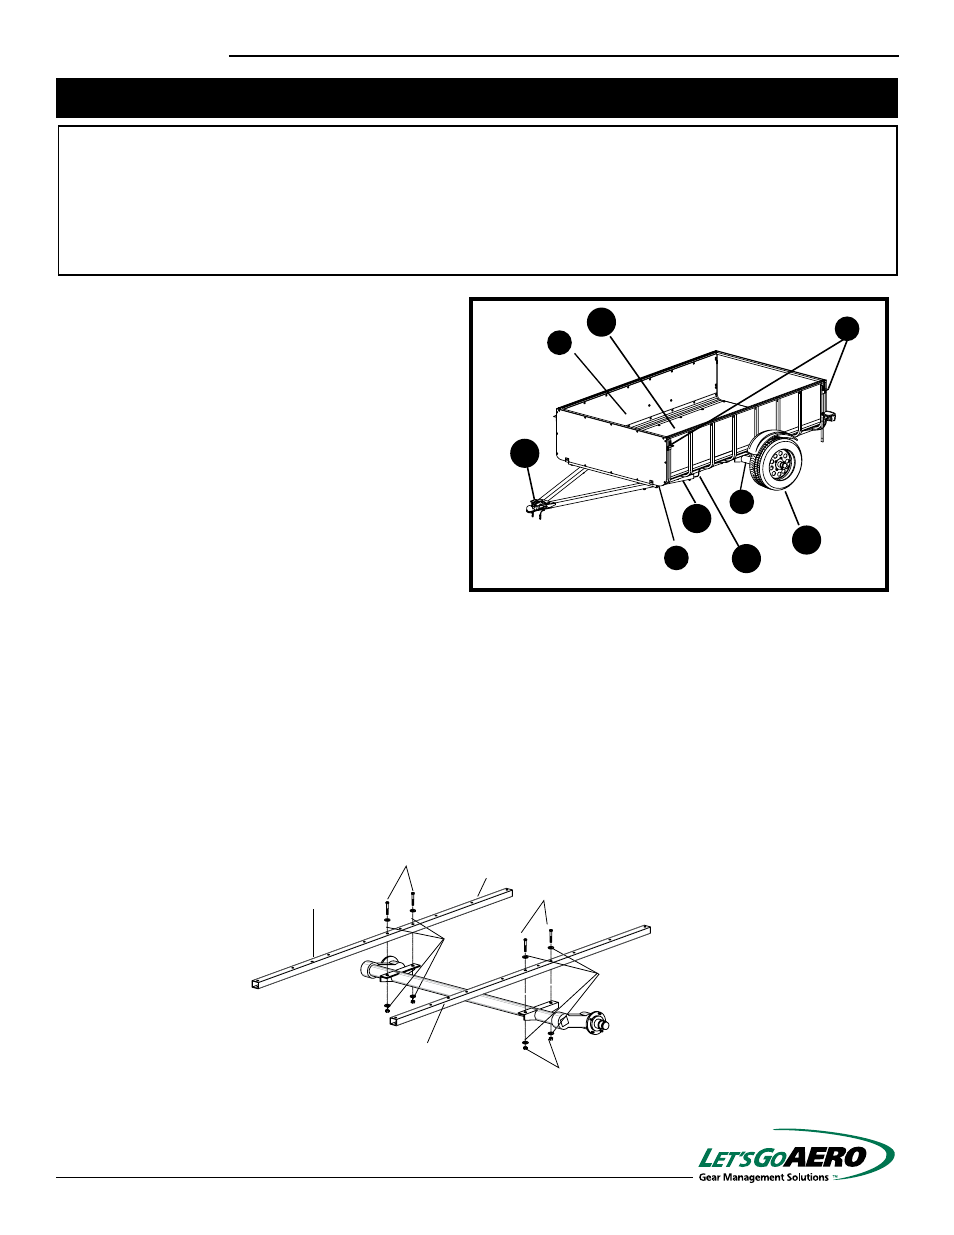
2. Attach Frame Tubes to Axle
Locate the Torsion Axle (B) and the two Trailer Frame Tubes (H) in the parts kit.
Place the Trailer Frame Tubes over the mounting brackets on the axle and line up the holes in the tubes with the
holes in the brackets.
Secure the tubes to the axle with four (4) 1/2” x 3” Bolts (AA), eight (8) 1/2” Flat Washers (BB) and four (4) 1/2”
Nylon Lock Nuts (CC). Tighten the hardware for “Assembly Fit”, but wait until later in the assembly process
to “Final Tighten” this hardware. This will allow for easier alignment and assembly.
Front
1/2” Hole
1/2” X 3” Bolts
(BB)
Torsion
Axle (B)
Trailer Frame
Tube (H)
1/2” X 3”
Bolts (AA)
1/2” Nylon
Lock Nuts
(CC)
1/2” Flat
Washers
(BB)
1/2” Flat
Washers
(EE)
1/2” Nylon Lock
Nuts (CC)
Rear
1/2” Hole
2
3
5
6
4
12
11
10
9