Chapter two quick startup guide, 1 cmx, Overview – Dakota Ultrasonics CMX DL plus User Manual
Page 6
2
CHAPTER TWO
QUICK STARTUP GUIDE
Turn the CMX
DL+
on and off using the switch located on the bottom right corner of the
keypad. When CMX
DL+
is initially turned on, a flash logo and blinking lights will be
displayed, followed by attempting to identify the transducer (probe) currently plugged
into the gauge. The CMX
DL+
is equipped with an “Auto Probe Recognition” feature
that attempts to identify special transducers with this built in feature. If the CMX
DL+
doesn’t find a transducer equipped with this feature, the user will be advanced to a
list of transducers requiring the user to select a specific transducer type. The
following sections outline each scenario. Note: This section is primarily written as a
basic startup guide only.
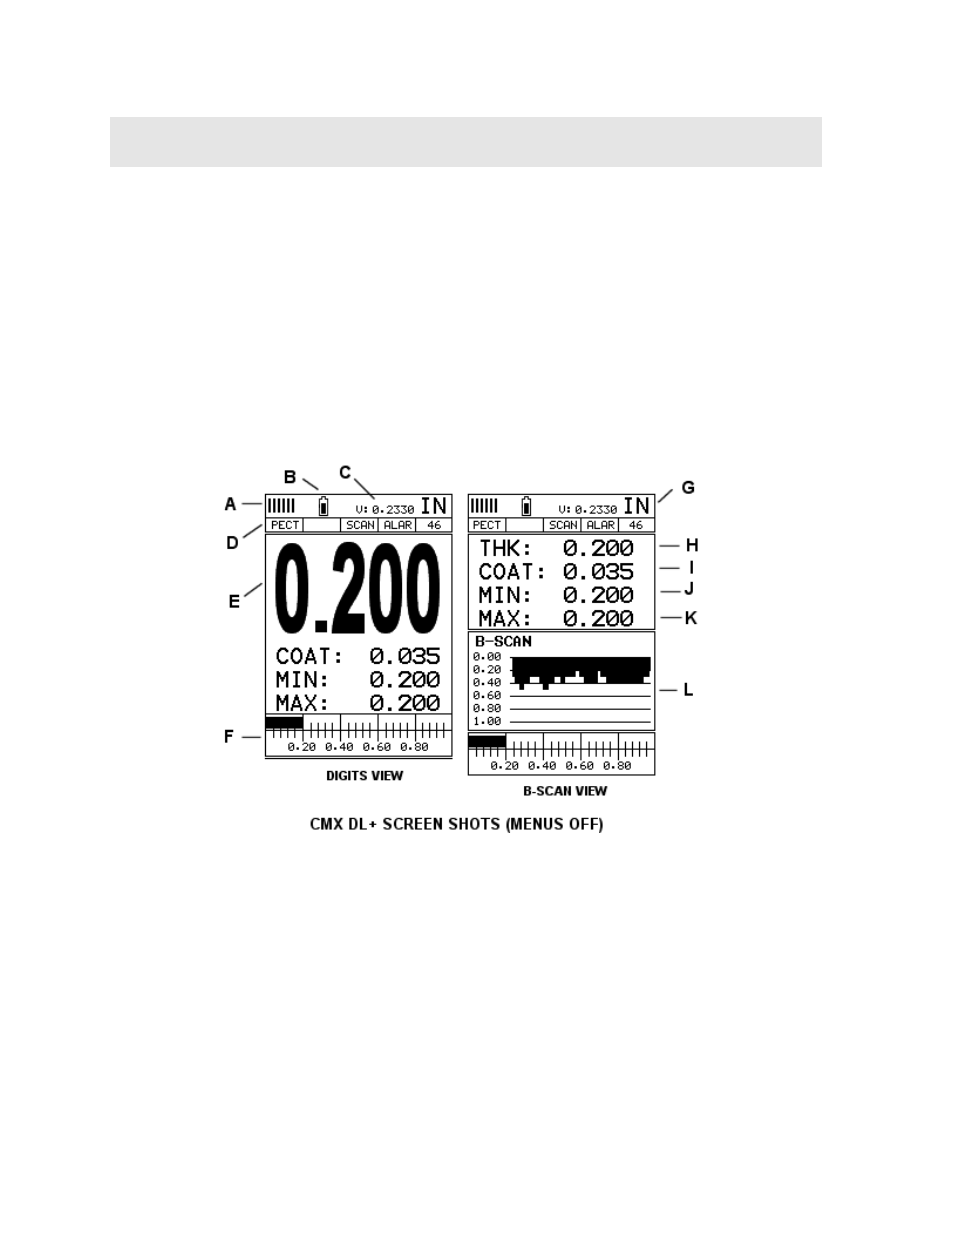
2.1 CMX
DL+
Overview