Condux CableGlider FO Cable Puller User Manual
Page 12
12
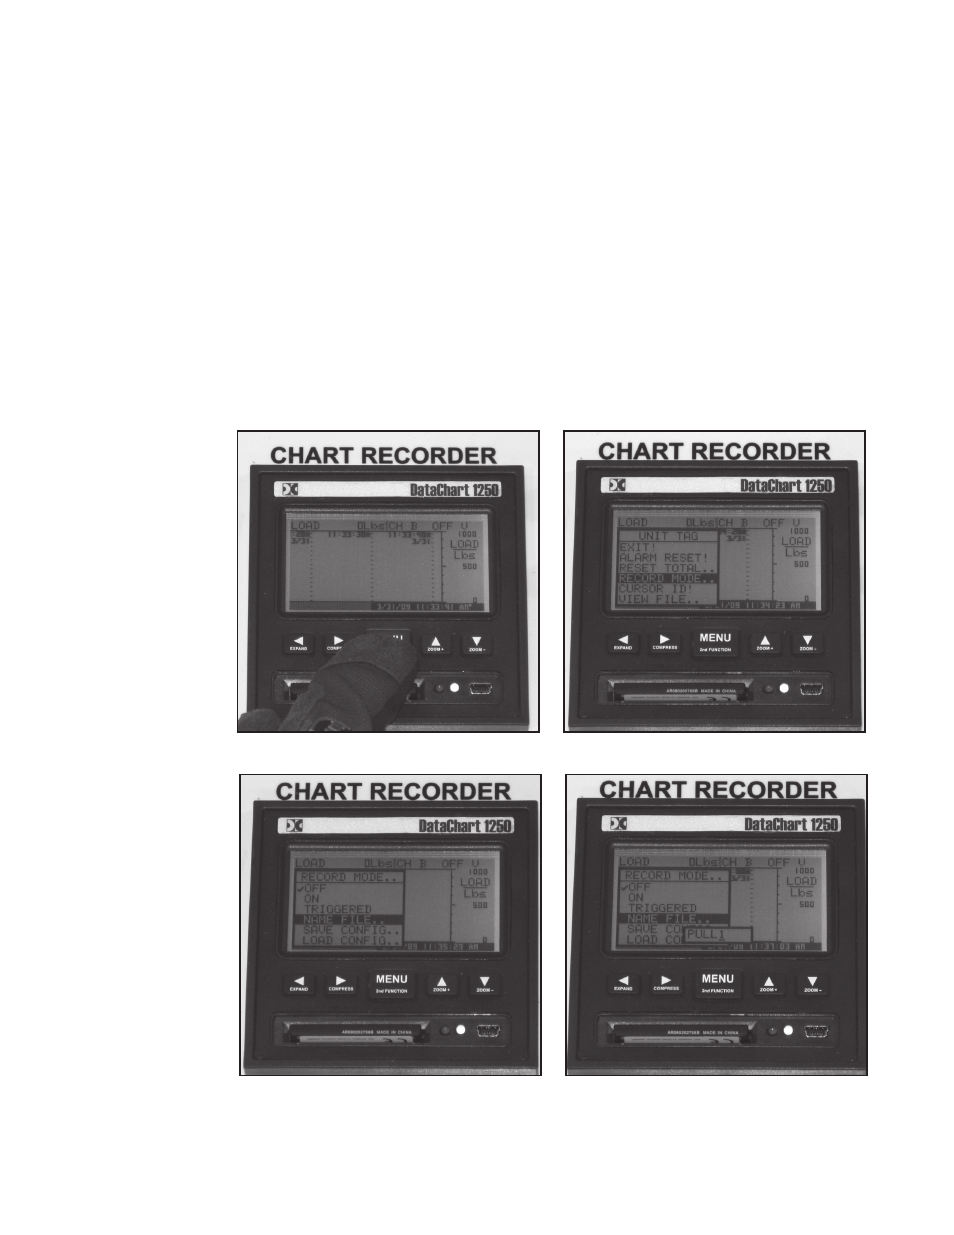
scroll through letters and the ◄ and ► buttons to move spaces. (See Figures 11-14). Once the name is
set press “MENU” button to go back to Record Mode. From Record Mode, ◄ or ► will return to Menu
screen. Pressing ◄ or ►again will return to charting screen.
2. Set to Record Mode: If you are already in the Record Mode screen, use the ▲ and ▼ buttons to scroll
to “ON”. If you are starting from the charting screen, press “MENU” and scroll to Record Mode. Press
“MENU” again to enter Record Mode, and scroll to ON. Push the “MENU” button to put a check mark next
to “ON”. Your unit is now ready to record. The red light on the Chart Recorder panel should turn on when
unit is recording. Press the ◄ or ► to return to the Menu screen. Press ◄ or ► again to get back to the
charting screen.
!NOTE: The recorder is time based, meaning if the recorder is not switched to "OFF" between pulls, the data
recorder will report long time periods of zeros.
3. Set Sample Rate: Press the “MENU” button and the menu screen will appear. Using the ▲ and ▼button,
scroll to SAMPLE RATE. Press the “MENU” button and your list of sample rate options will appear. Select
the sample rate you desire and press “MENU” to select. Press the ◄ or ► buttons twice to get back to the
charting screen.
NOTE: See Data Chart 1250 Manual on included CD for more information.
Figure 13. Name File
Figure 14. Enter Pull Name
Figure 11. menu button Activation
Figure 12. Record mode