COATS ProGuard Leverless Plus Tire Changer User Manual
Page 22
Operation Manual
-
COATS PRO GUARD PLUS
- 22
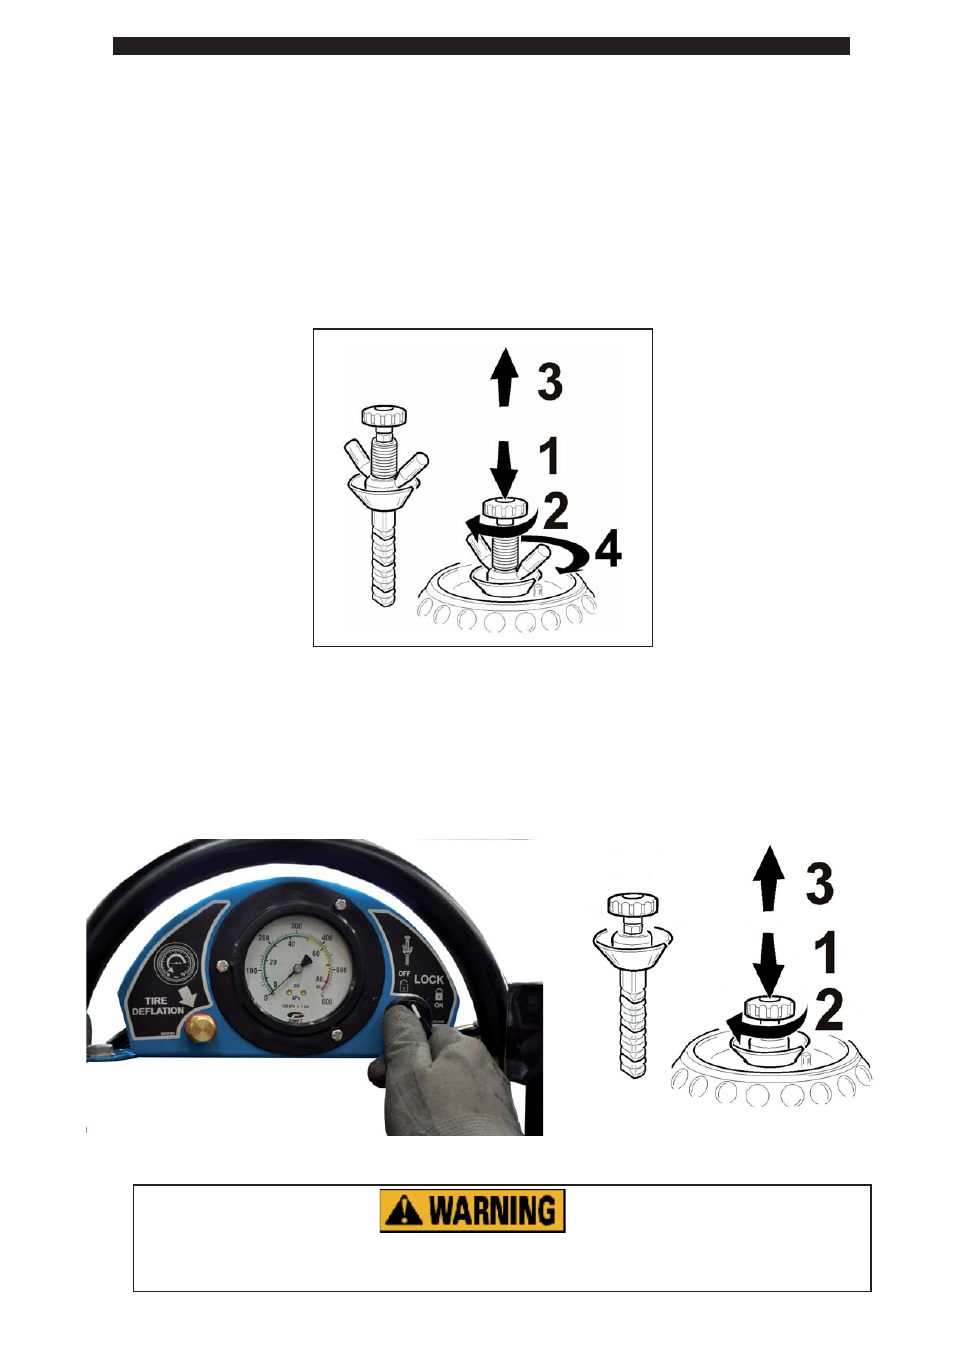
1.
Insert the ring nut hub correctly (the cone plastic cover preserving the alloy rims from damages)
2.
Turn the ring nut hub clockwise by hand until you fi nd the exact coupling position, then press the hub and
turn it clockwise by 90° to its full-stroke
3.
Release the ring nut and make sure it raises by 0,40° (10 mm) approximately, otherwise turn it slightly
clockwise or counter-clockwise lifting up the hub.
4.
Make sure the plastic cone is in contact with the rim, perfectly centerd with the drop-center hole, the split of
the nose matching up with the driving pin.
Tighten the ring nut so that it moves up to the cones and continue tightening so that the wheel is pushed
fi rmly on the fl ange of the spindle.
If the tire changer is provided with the optional pneumatic locking system:
1.
Insert the ring nut hub correctly (the cone plastic cover preserving the alloy rims from damages).
2.
Turn the ring nut clockwise by hand until the exact coupling position, press the ring nut until its end-stroke
and rotate the ring nut hub 90° by hand.
3.
Release the ring nut and make sure thet it raises by 0,40° (10 mm) approximately.
4.
Rotate the pneumatic locking switch onto the manometer panel to the locking position.
4
16.1_Wheel locking
16.2_Pneumatic locking system (optional)
16.0_WHEEL CLAMPING
Before you start any work on the wheel, make sure it is
mounted securely on the spindle