Mounting–valve-type sensor – COATS Extended Mobility (EMT) RunFlat Tires User Manual
Page 22
G–2
Mounting–Valve-Type Sensor
6
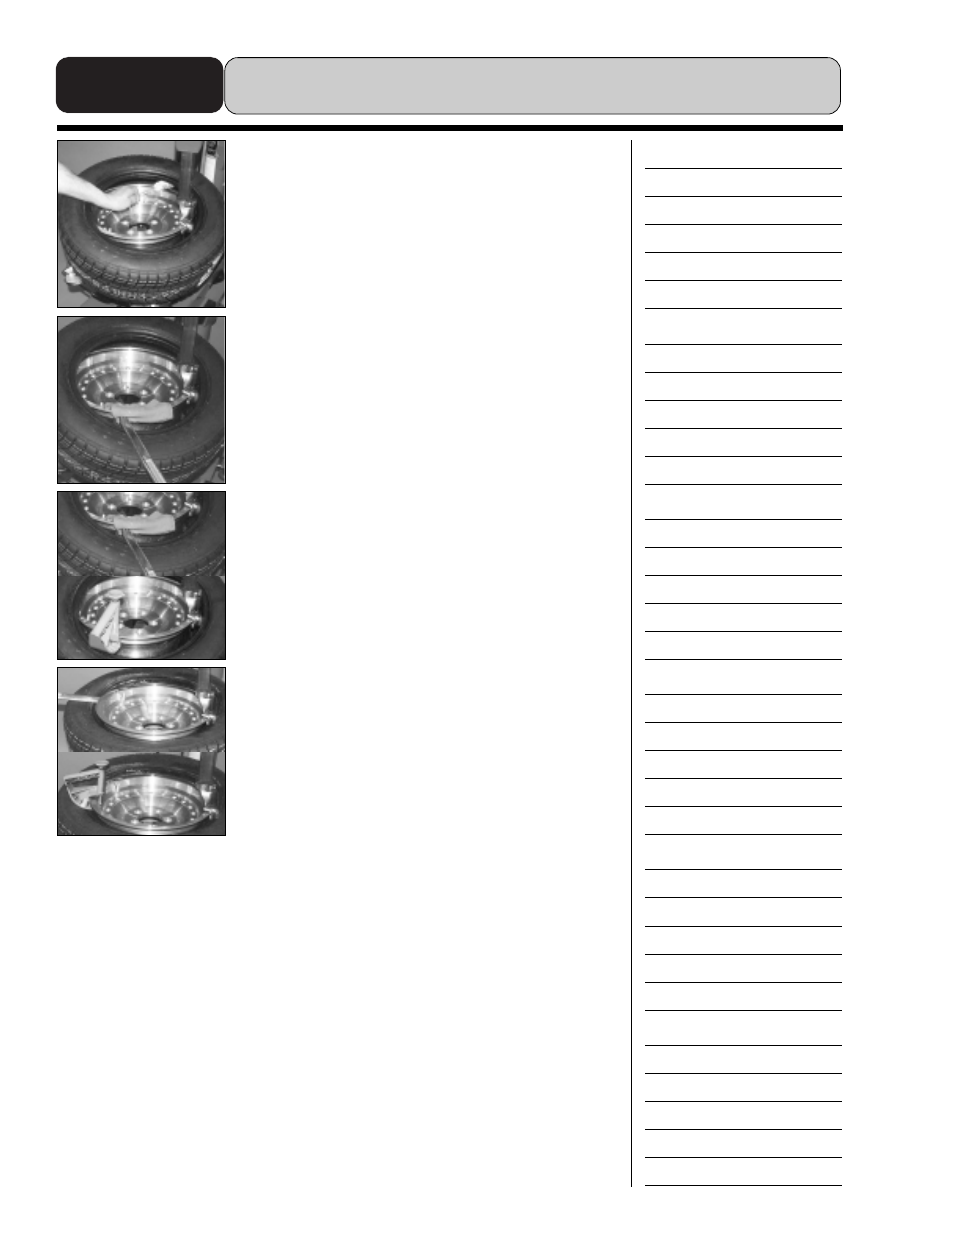
Once the lower bead is mounted, rotate the table top
until the valve stem and pressure sensor are once again
in the 6 o’clock position.
Lubricate the upper bead liberally. Apply lubricant to both the
edge of the tire bead and the underside of the bead.
Adequate lubrication is vital to the upper bead mounting
process.
7
Position the upper bead over the duckhead. Put the tip of
the lift tool under the wheel rim flange and push the bar
down to hold the upper bead below the wheel and duckhead.
Use a shop towel on the lift tool to avoid damaging the wheel.
8
Rotate the wheel a short distance–only 3 to 4 inch-
es–and stop. Continue to hold the bead in the drop cen-
ter with the lift bar, or place a drop center tool on the wheel.
Remember that stiff sidewall tires are difficult to mount. The
top bead is always more difficult to work with because the
tire cannot be angled across the drop center and rim flange
as easily as the lower bead.
9
Continue rotating the wheel, moving only a few inches
and then stopping.
Continue to hold the bead in the drop center with the lift bar
or the drop center tool. When the bar or the drop center tool
reach the 10 o’clock position, remove them. Continuing with
either tool in place may cause them to be forcefully ejected
from the wheel.
Continue rotating the wheel until the upper bead is fully mounted.
This completes Section G.