COATS Kit 8560761701 Robo-Arm LR User Manual
Page 7
Tire Changers
• 7
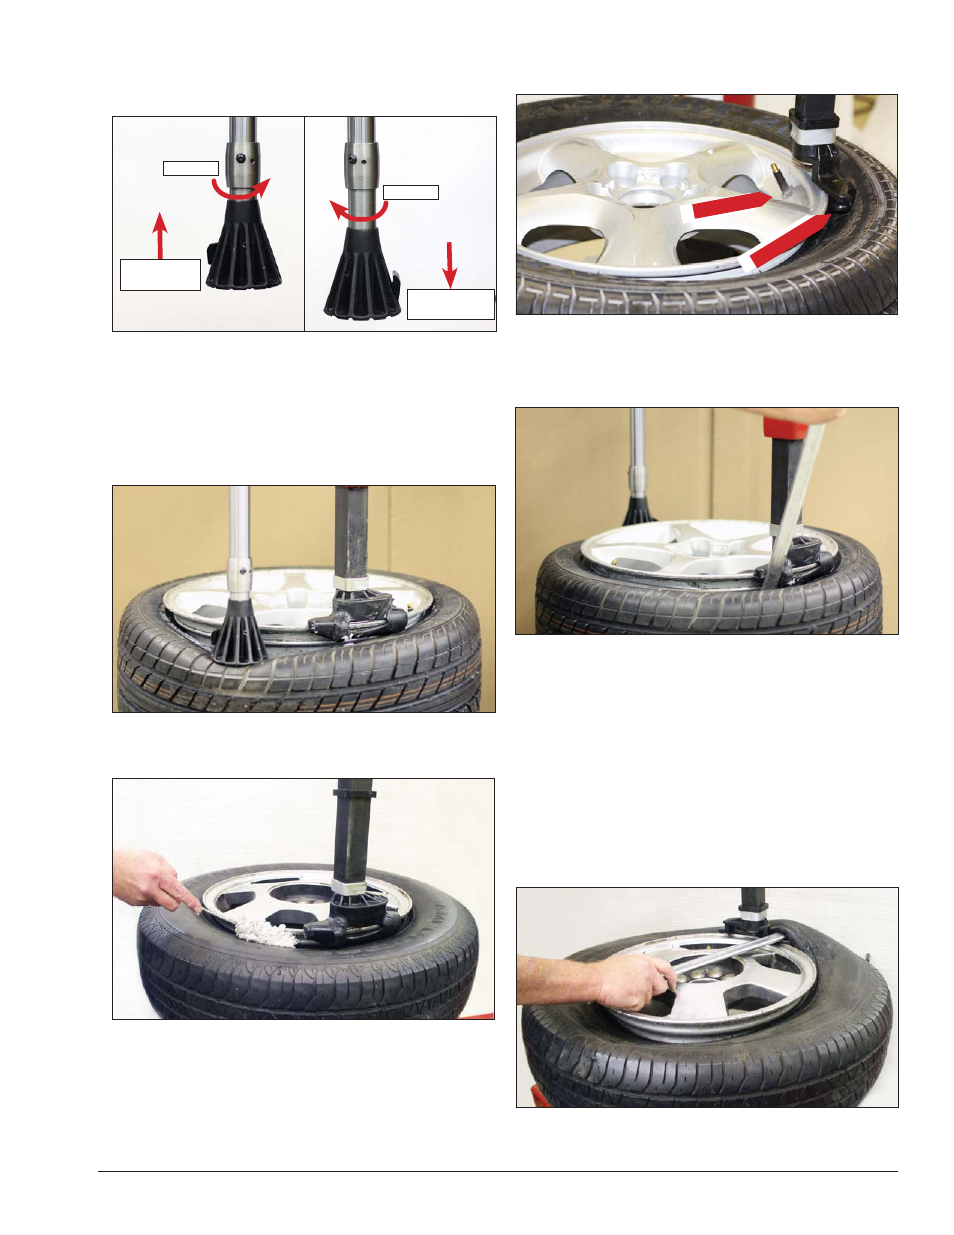
8.
Check helper foot positioning. Adjust helper foot
reach by rotating the extender up or down. Raise foot
for wide tires or lower foot for narrow tires.
Figure 8 - Using Helper Foot Extender
9.
Depress the tire sidewall downward with the
aid of the helper foot providing clearance for the
mount/demount head to be positioned (figure 9). Move
swing arm into place. Increase the horizontal distance
between the demount head and the wheel an additional
1/16 to 1/8 inch with the adjustment knob.
Figure 9 - Helper Foot Depressing Sidewall of Tire
10.
Lubricate upper bead liberally (Figure 10).
Figure 10 - Lubricate Upper Bead
11.
Locate the valve stem just before the demount
head before proceeding (Figure 11).
Figure 11 - Position Valve Stem Under Demount Head
12.
Place helper foot opposite the demount head and
push the bead into drop center. Insert bead lifting tool
between knob on demount tool and tire bead (Fig. 12).
Figure 12 - Insert Bead Lifting Tool
13.
Rotate lifting tool down over wheel to lift bead
up and over the knob and at the same time remove
helper foot.
14.
Hold lifting tool in place, depress the table top
rotation pedal momentarily to jog the wheel a short
distance. Check the wheel and tire to verify that opera-
tion is not causing damage. The lifting tool can usually
be removed after jogging the wheel a short distance
(Figure 13). Continue to jog the wheel to allow the tire
sidewall to flex as it crosses the rim edge. Continue
short rotations until top bead is completely demounted.
Figure 13 - Holding Lifting Tool in Place and Rotate Wheel
Valve Stem
Demount Head
Raise For
Wide Tires
Lower For
Narrow Tires
Rotate
Rotate