Direct drive, Caution – COATS 6401 Computer Truck Wheel Balancer User Manual
Page 19
COATS 6401 Truck Wheel Balancer • 13
Direct Drive
Wheel Mounting Options
Hubnut must engage threads for at least four full turns.
Failure to tighten hubnut securely or to force wheel
firmly against the faceplate may result in serious per-
sonal injury.
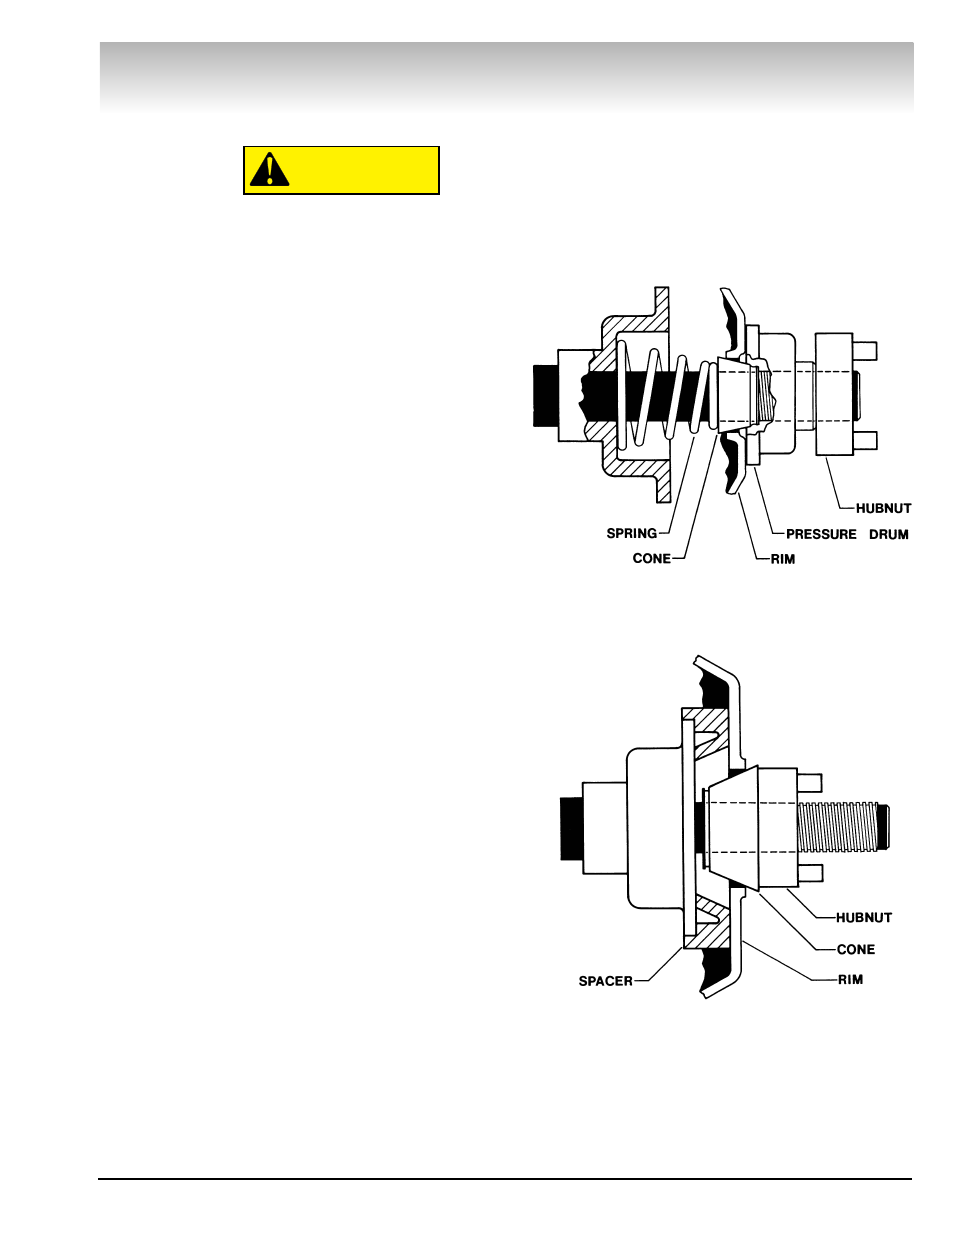
Back Cone Mounting
Use only small or medium cones.
1. Place spring over threaded stud with the large end inside
of the faceplate. Spring must be used.
2. Select a cone that best fits into wheel center hole.
Use only small or medium cones. If a larger cone is
required, use the front cone mounting system.
3. Slide selected cone onto threaded shaft with the large
end against the spring.
4. Lift wheel onto shaft and center on cone.
5. Slide pressure drum onto threaded shaft with the large end
against the wheel.
6. Thread hubnut on and tighten with hubnut wrench. If hubnut
won't tighten all the way down, use the front cone mounting sys-
tem. The wheel must be forced firmly against the faceplate.
7. If you still can't tighten hubnut because of a lack of threads, use
an additional cone to act as a spacer between the hubnut and pres-
sure drum.
Front Cone Mounting
Can be used with all cones (do not use spring). This method works
well with most truck wheels where the bolt circle is less than 275
mm.
1. Select a cone that best fits into wheel center hole.
2. Lift wheel onto threaded shaft.
3. Slide selected cone onto shaft with the small end against
the wheel.
4. By lifting wheel from bottom, center on cone.
5. Thread hubnut on and tighten with hubnut wrench. If hubnut
won't tighten all the way down, remove cone and wheel. Slide truck
cone spacer over faceplate and repeat steps 2 thru 5. The wheel
must be forced firmly against the faceplate.
6. If you still can't tighten hubnut because of a lack of threads,
use an additional cone to act as a spacer between the hubnut and
existing cone.
CAUTION