First steps – BURY Time Suite User Manual
Page 14
14
First steps
10. Create destinations / contacts
You can also store destinations/contacts here, such as your own address, that of your employer or your
office and frequently visited customers so you don‘t have to enter them separately for every journey.
In the destination/contact administration you are able to enter new contact data or import existing
contact data from other software programmes. There is a direct interface for this purpose for data
from Microsoft Outlook. It is also possible to import so-called CSV files.
Please note:
In the descriptions/instructions concerning the software programmes that you use, please read
X
about how you can export the contact data you have stored in a CSV file.
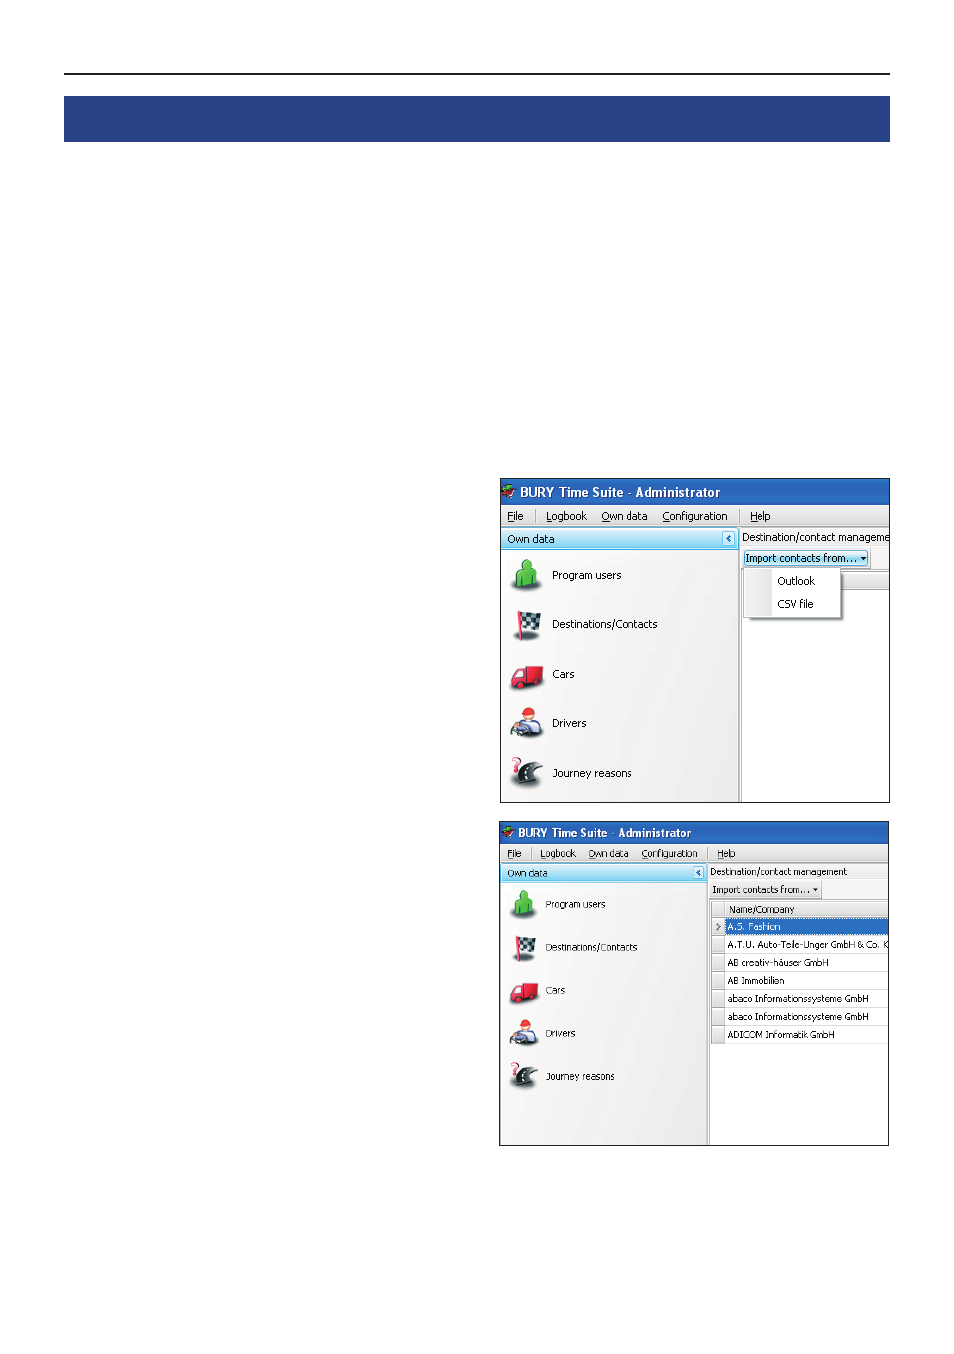
Importing contact data
Please click once on the „Import contacts from...“
button.
Select the ‚Outlook‘ entry if you use this programme
and you have stored contacts in it. Next please se-
lect the ‚Contacts‘ folder in the window that opens
and then click on ‚OK‘. The contact data are then
imported.
Please choose the entry ‚CSV file‘, look for the file
you want to import in the window that opens and
then click on ‚OK‘. The contact data are then impor-
ted.
After the import, the contacts are listed in the form
of a table. To edit a contact, please click on the
corresponding line. If you would like to enter ano-
ther contact, please click on the ‚Plus‘ symbol on
the lower image border. The
Details
window then
opens in both cases.