Unloading, Dc models, Descargando – Snorkel ULII40-sn15001-21372 User Manual
Page 11: Modelos de corriente continua
6
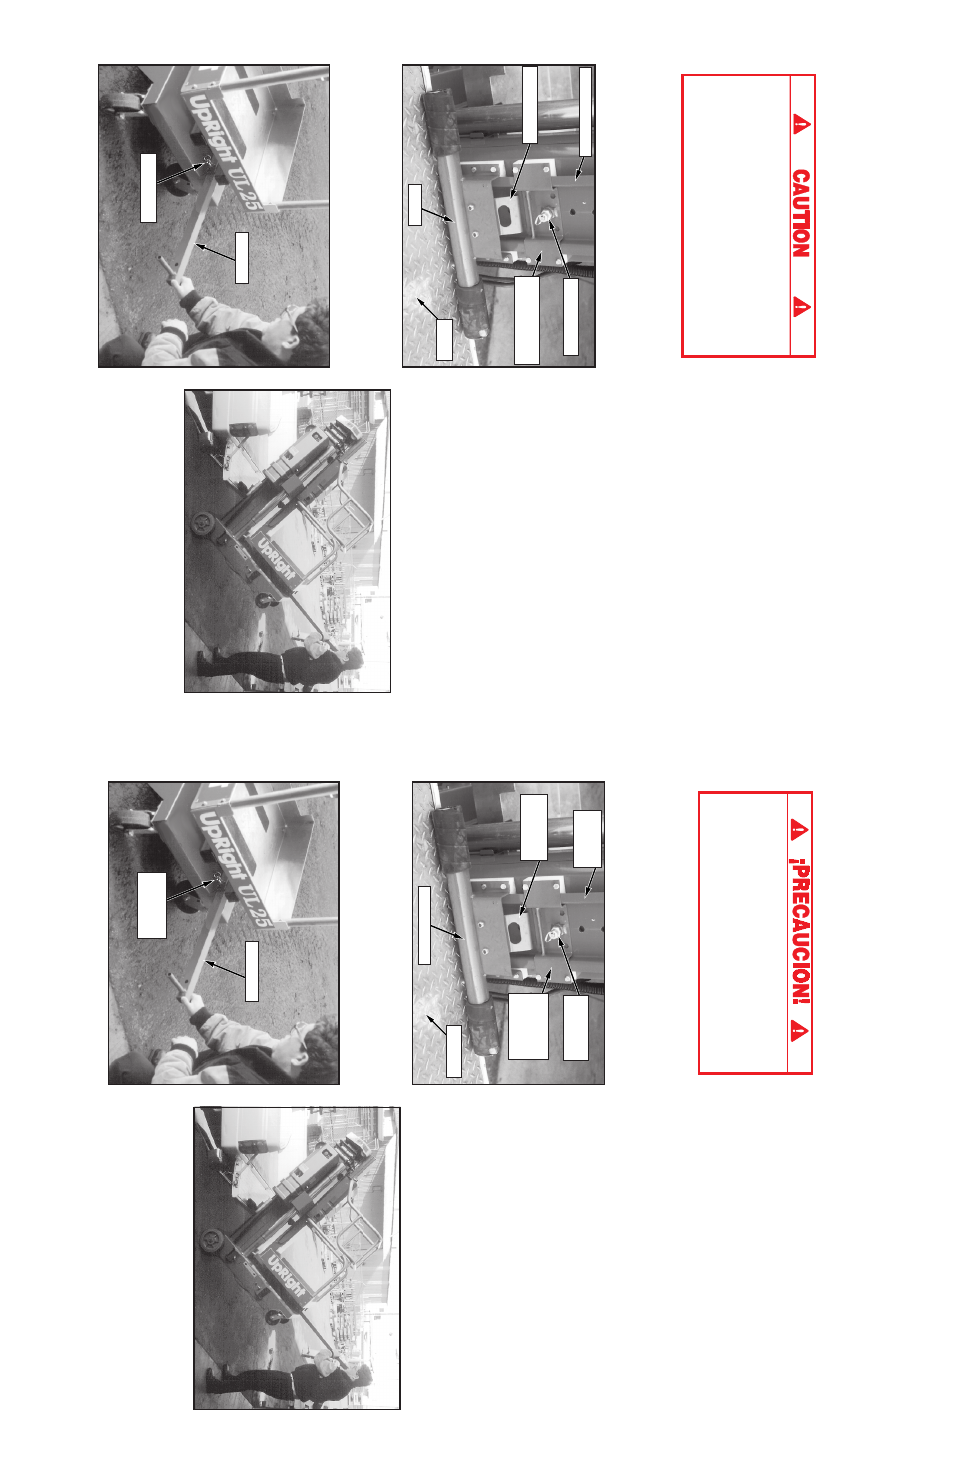
Figure
5:
T
-handle
positioning
8.
Return
the
T-handle
to
the
stored
position,
m
aking
sure
the
locking
pin
engages
the
T-handle.
9.
Secure
the
unit
with
suitable
strength
rope
or
tie
straps
using
the
forklift
pockets
located
under
the
base
of
the
unit
and
either
the
upper
caster
axle
on
UL25
models
or
the
tilt
back
frame
on
UL32
and
UL40
models.
To
prevent
damage
to
the
mast
assembly,
do
not
place
rope
or
tie
straps
across
the
mast
assembly
when
securing
the
unit
for
transportation.
DO
NOT
overtighten
the
rope
or
tie
straps,
damage
to
the
machine
will
result.
Figure
4:
Loader
in
load
position
Loader
Channel
Retaining Pin
Loader
Support
Bracket
Locking
Pin
Gravity
Hook
T-handle
Loader
Tailgate
UNLOADING
1.
Unsecure
the
unit.
2.
Release
the
locking
pin
and
pull
the
T-handle
out
until
the
locking
pin
engages
the
hole
in
the
end
of
the
T-handle.
3.
Roll
the
unit
back
until
the
rear
wheels
are
off
the
edge
of
the
tailgate
or
vehicle
bed.
4.
Pull
downward
on
the
T-handle,
allowing
the
unit
to
slide
on
the
loader.
As
the
unit
stops
sliding
on
the
loader,
it
will
pivot
on
the
loader
to
an
upright
position.
Gradually
counterbal-
ance
the
units
weight
by
applying
an
upward
force
on
the
T-handle.
This
allows
the
unit
to
settle
gently
on
the
wheels,
avoiding
undue
impact
on
the
unit.
5.
Return
the
T-handle
to
the
stored
position,
m
aking
sure
the
locking
pin
engages
the
T-handle.
DC Models
Replace
the
battery
and
reconnect
the
battery
box
plug
making
certain
it
is
fully
engaged.
Figure
6: T
ilting
m
achine
onto
or
off
of
a vehicle
27
Figura
5:
Ubicación
de
la
m
anilla
T
8.
Vuelva
la
manilla
T
a
la
posición
original,
cerciorándose
que
el
pasador
de
enganche
entre
en
la
manilla
T.
9.
Asegure
la
unidad
atándola
con
cables
o
correas
de
resistencia
adecuada
usando
las
cavidades
para
grúa
horquilla
ubicadas
en
la
base
de
la
unidad
y,
o
el
eje
de
las
ruedas
superiores
en
el
modelo
UL25
o
el
marco-soporte
en
los
modelos
UL32
y
UL40.
Para
no
dañar
el
ensamble
del
mástil,
no
tire
cables
ni
correas
a
través
del
ensamble
del
mástil
al
asegurar
la
unidad
para
transporte.
NO
sobreestire
cables
o
correas
para
no
dañar
la
máquina.
Figura
4:
C
argador
en
posición
de
cargar
Puntal
de
soporte
del
cargador
Pasador
de
enganche
Manilla
T
Cargador
DESCARGANDO
1.
Desate
la
unidad.
2.
Suelte
el
pasador
de
enganche
y
tire
la
manilla
T
hasta
que
el
pasador
de
enganche
entre
en
el
hoyo
del
final
de
la
manilla.
3.
Empuje
la
unidad
hasta
que
las
ruedas
traseras
estén
fuera
de
la
cama
o puerta
trasera
del
vehículo.
4.
Tire
la
manilla
T
hacia
abajo
para
que
la
unidad
se
deslice
sobre
el
cargador.
Cuando
deje
de
deslizarse,
rotará
sobre
el
cargador
a
una
posición
vertical.
Gradualmente
contrabalancee
el
peso
de
la
unidad
tirando
la
manilla
T
hacia
arriba.
Ello
permitirá
depositar
la
unidad
sobre
sus
ruedas
en
el
suelo
evitando
un
impacto
desmedido.
5.
Coloque
la
manilla
T
en
la
posición
inicial,
cerciorándose
que
el
pasador
enganche
esta
manilla.
MODELOS DE CORRIENTE CONTINUA
Coloque
la
batería
en
la
máquina
y
reenchufe
la
caja
de
la
batería
verificando
que
esté
bien
conectada.
Figura 6: Volcando la máquina sobre o de un vehículo
Canal
del
cargador
Pasador
de
retención
Gancho
por
gravedad
Puerta
trasera