MBW Blitzscreed User Manual
Page 15
13
REPEAT STEPS 6 - 10 UNTIL ENTIRE SCREED IS ASSEMBLED.
After all needed sections are assembled
the edging can be trued horizontally.
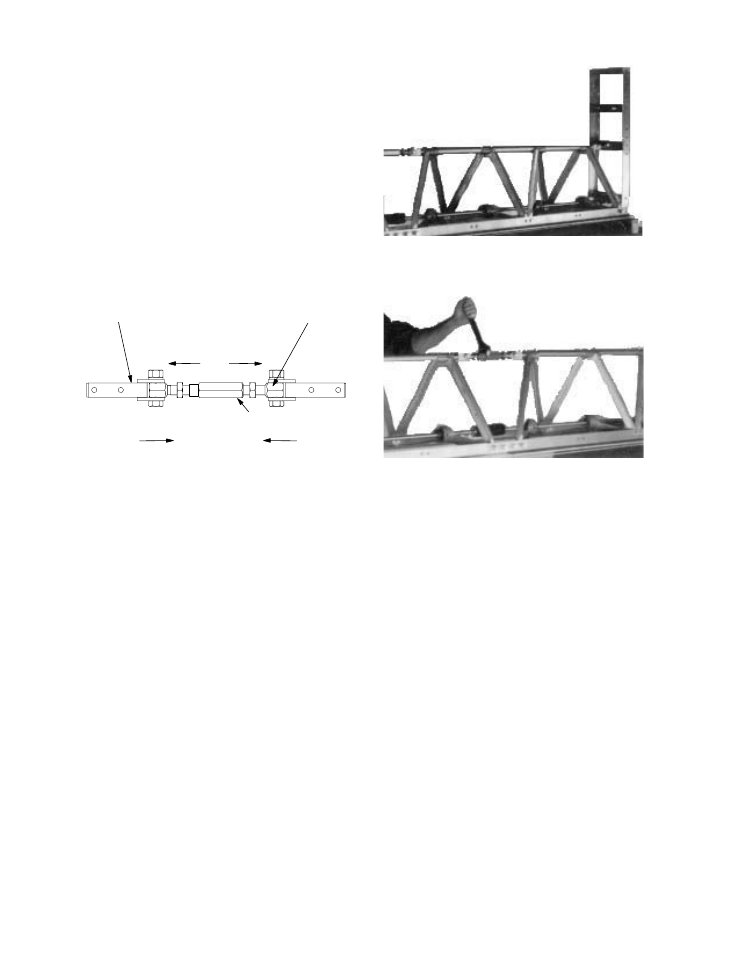
11.If the pour surface is to be crowned or
flat, rotate the turnbuckles so the turnĆ
buckle eyes are pushed away from
each other taking out the slack at the
clevis connections. If the pour surface
is a valley, rotate the turnbuckles so the
turnbuckle eyes are drawn towards
each other taking out the slack at the
clevis connections (see Figure 10).
Tighten down the 5/8 bolts going
through the clevises and turnbuckle
eyes HARD once the slack is removed.
FIGURE 10
Crowned or Flat
Valley
Turnbuckle Eye
Clevis
Turnbuckle
12. The screed is now ready for grade adĆ
justment. Place the assembled screed
on blocks or forms. String a taut chalk
line across the back of the float edge of
the screed (see Figure 11). Start with
the centermost turnbuckle and adjust it
so the bottom edge of the screed
moves up or down until it is adjusted to
the desired grade (see Figure 12). AdĆ
just each turnbuckle, working out from
the center, until the desired grade is
achieved. As the turnbuckles are adĆ
justed from the center out, previously
adjusted turnbuckles may need to be
readjusted to grade. Readjust the cenĆ
termost turnbuckles and continue adĆ
justing outward. When all adjustments
are completed, hold the turnbuckle
from further movement and tighten the
jam nuts.
FIGURE 11
FIGURE 12
CAUTION!
If there is a significant difference beĆ
tween the ambient temperature at set up
and the temperature of the concrete to
be screeded, the edgings may warp due
to thermal expansion. Recheck the
grade of the screed if this is the case.