Installing appleshareip software, Installed files – Apple AppleShare IP 6.1 User Manual
Page 25
Installing Your Software
25
1
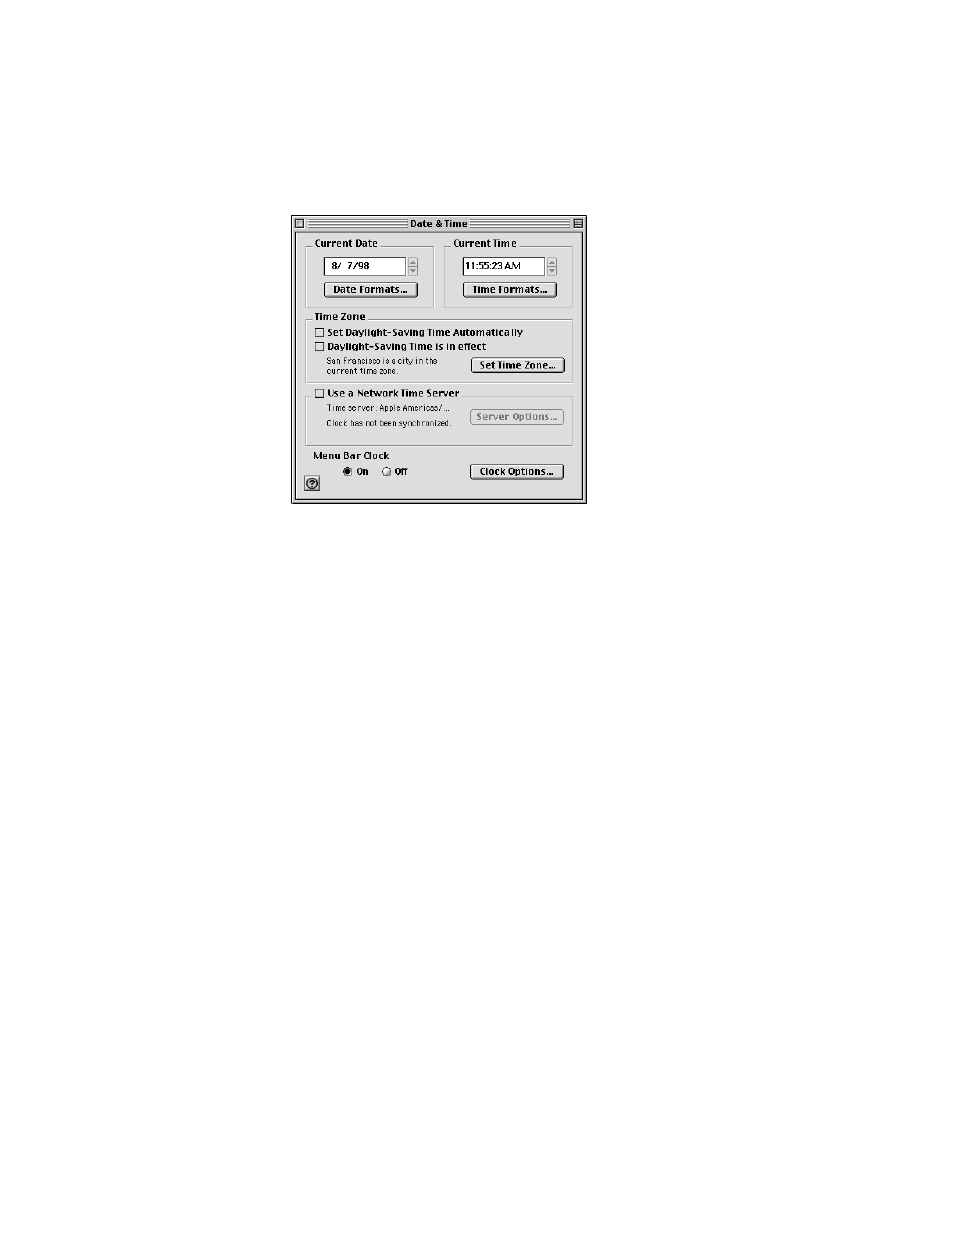
Open the Date & Time control panel.
2
Click the Set Time Zone button.
The city list appears.
3
Choose a city in your time zone. Then click OK.
4
Make sure your computer’s date, time, and daylight-saving time settings are correct for your
location.
5
If you want this server’s time to synchronize to another server’s time, select “Use a Network
Time Server.” Then click the Server Options button and select the server to synchronize to
and other options.
6
Close the Date & Time control panel.
Installing AppleShare IP Software
You can install the AppleShare IP software using either the Recommended Installation or the
Customized Installation procedure, as described in the following sections. Recommended
Installation is the most convenient procedure.
Installed Files
If you use the Recommended Installation procedure, the following files and folders are
installed at the root level of the hard disk.
m The AppleShare IP 6.1 folder is placed on each volume on which you install the
AppleShare IP software. It contains the following folders and files: