Baseplate setting (before piping), Grouting procedure, Alignment procedure – Goulds Pumps 3408A - IOM User Manual
Page 20
shimmed and grouted.
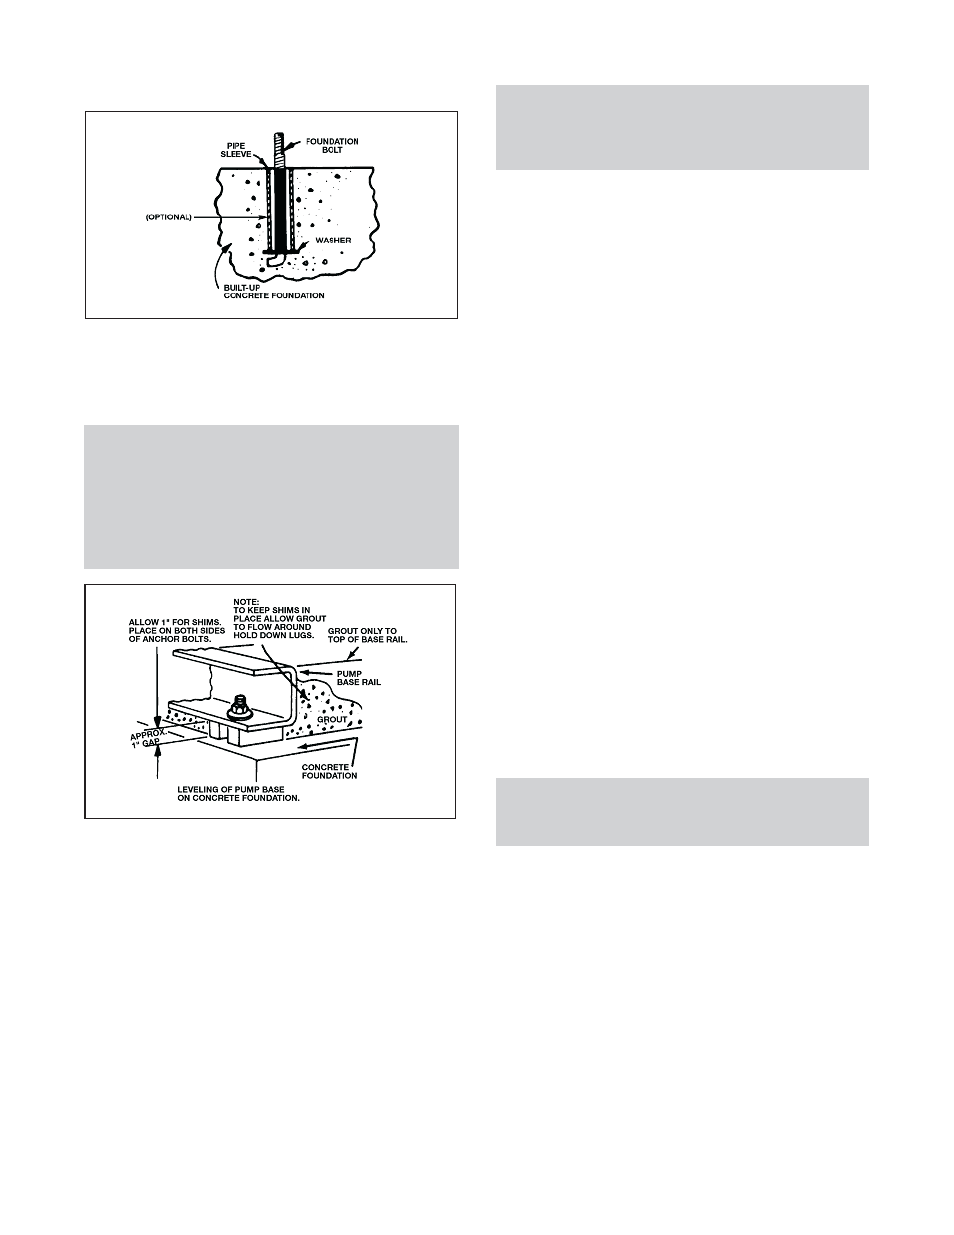
Figure 4: Foundation
BASEPLATE SETTING (BEFORE
PIPING)
NOTE: This procedure assumes that a concrete
foundation has been prepared with anchor or hold
down bolts extending up ready to receive unit. It must
be understood that pump and motor have been
mounted and rough aligned at the factory. If motor is
to be field mounted, consult factory for recommenda-
tions. Goulds Pumps cannot assume responsibility for
final alignment.
Figure 5: Setting Baseplate and Grouting
1.
Use blocks and shims under base for support at anchor
bolts and midway between bolts, to position base
approximately 1 inch above the concrete foundation,
with studs extending through holes in the baseplate.
2.
By adding or removing shims under the base, level and
plumb the pump shaft and flanges.
3.
Draw anchor nuts tight against base, and observe pump
and motor shafts or coupling hubs for alignment.
(Temporarily remove coupling guard for checking
alignment.)
4.
If alignment needs improvement, add shims or wedges
at appropriate positions under base, so that retightening
of anchor nuts will shift shafts into closer alignment.
Repeat this procedure until a reasonable alignment is
reached.
NOTE: Reasonable alignment is defined as that which
is mutually agreed upon by pump contractor and the
accepting facility (final operator). Final alignment
procedures are covered in the section entitled
Alignment Procedure.
5.
Check to make sure the piping can be aligned to the
pump flanges without placing pipe strain on either
flange.
6.
Grout in baseplate completely and allow grout to dry
thoroughly before attaching piping to pump. See the
section entitled Grouting Procedure. 24 hours is
sufficient time with approved grouting procedure.
GROUTING PROCEDURE
Grout compensates for uneven foundation, distributes
weight of unit, and prevents shifting. Use an approved,
non-shrinking grout, after setting and leveling unit. See
Figure 5.
1.
Build strong form around the foundation to contain
grout.
2.
Soak top of concrete foundation thoroughly, then
remove surface water.
3.
Baseplate should be completely filled with grout.
4.
After the grout has thoroughly hardened, check the
foundation bolts and tighten if necessary.
5.
Check the alignment after the foundation bolts are
tightened.
6.
Approximately 14 days after the grout has been poured
or when the grout has thoroughly dried, apply an oil
base paint to the exposed edges of the grout to prevent
air and moisture from coming in contact with the
grout.
ALIGNMENT PROCEDURE
NOTE: A flexible coupling will only compensate for
small amounts of misalignment. Permissible
misalignment will vary with the make of coupling.
Consult coupling manufacturer’s data when in doubt.
Allowances are to be made for thermal expansion during
cold alignment, so that the coupling will be aligned at
operating temperature. In all cases, a coupling must be in
alignment for continuous operation. Even though the
coupling may be lubricated, misalignment causes excessive
wear, vibration, and bearing loads that result in premature
bearing failure and ultimate seizing of the pump.
Misalignment can be angular, parallel, or a combination of
these, and in the horizontal and vertical planes. Final
alignment should be made by moving and shimming the
motor on the baseplate, until the coupling hubs are within
the recommended tolerances measured in total run-out. All
measurements should be taken with the pump and motor
foot bolts tightened. The shaft of sleeve bearing motors
should be in the center of its mechanical float.
12
3408A IOM 6/08