Balboa Water Group Euro Jet User Manual
Euro jet installation instructions, Caution, Warning
IMPORTANT SAFETY INSTRUCTIONS
READ AND FOLLOW ALL INSTRUCTIONS
SAVE THESE INSTRUCTIONS
Euro Jet Installation Instructions
Cut a hole in the spa wall 1-1/8 inches in diameter.
1.
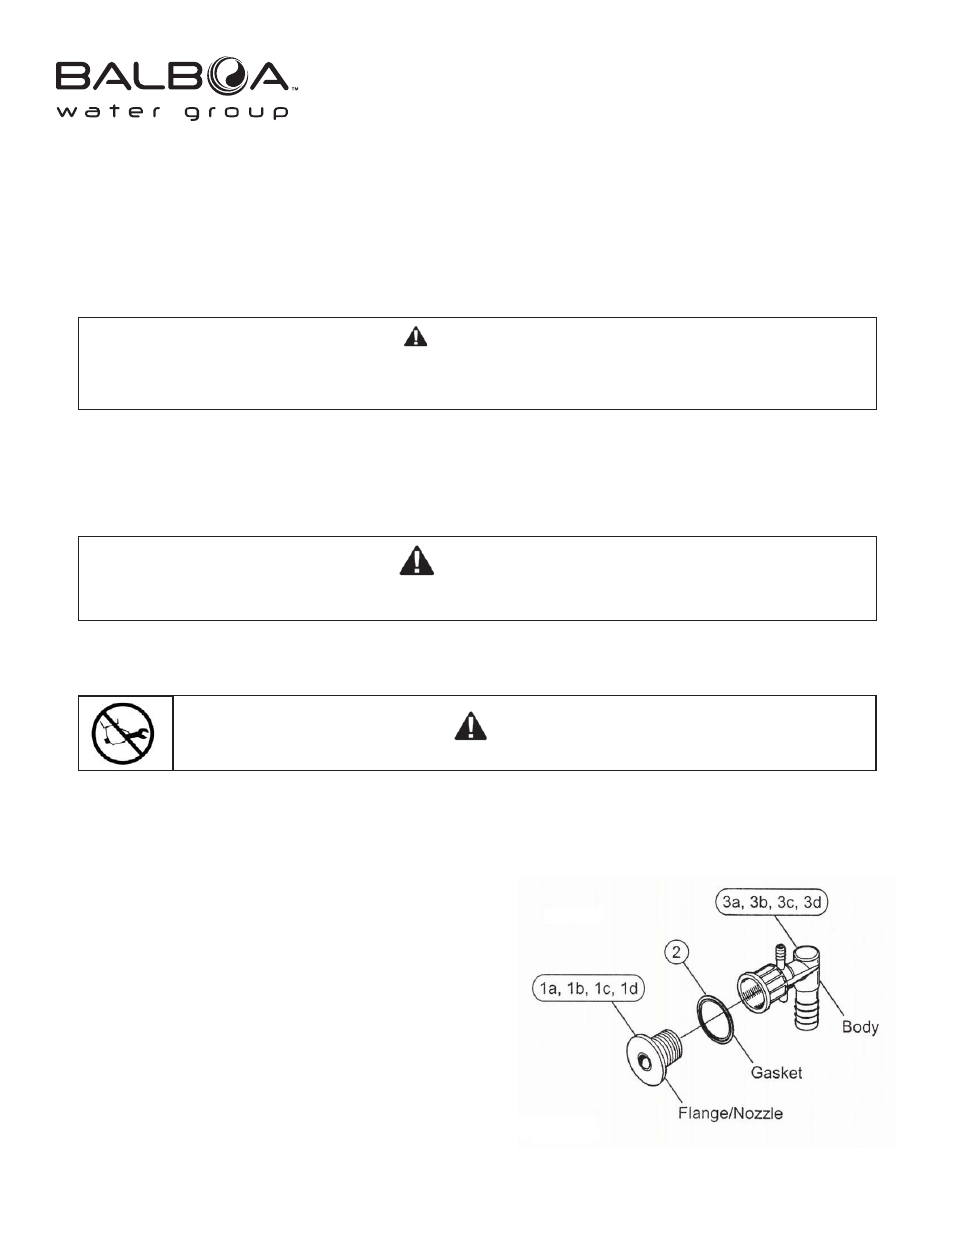
Position the GASKET on the FLANGE / NOZZLE, see Figure 1.
2.
Insert the FLANGE / NOZZLE into the drilled hole. It is very important that the spa surface is clean to insure
3.
a proper seal between the spa wall and the GASKET.
Apply a small amount of silicone to the FLANGE / NOZZLE threads from the back of the spa.
4.
CAUTION
Silicone is required to be used with the Euro gasket. Some Silicones are not compatible with the materials used
in this product. Refer to your Silicone Manufacturer’s specifications for material compatibility.
WARNING
Before installing this product, read and follow all warning notices and instructions accompanying this product.
Failure to follow safety warnings and instructions can result in severe injury, death, or property damage.
Call (714) 384-0384 for additional free copies of these instructions.
CAUTION
Do not over tighten as this may cause damage to parts and leakage may occur.
943585 Rev. B October 9 , 2009
Item
Part No.
Description
1a 469244XX FLANGE/NOZZLE,
STANDARD
1b 9621XX FLANGE/NOZZLE,
LS
1c
469283XX FLANGE/NOZZLE,
ADJUSTABLE
1d
469364XX
FLANGE/ NOZZLE, SWIRL
2 46926400 GASKET
3a
46927200
BODY, 3/8B X 3/4B ELBOW
3b
46927300
BODY, 3/8B X 1/2-3/4S ELBOW
3c
46927100
BODY, 3/8B X 1/2-3/4S STRAIGHT
3d
46927000
BODY, 3/8B X 3/4B STRAIGHT
(cont. other side)
Holding the FLANGE / NOZZLE, thread the jet BODY onto the FLANGE / NOZZLE from the backside of the
5.
spa until hand tight.
With the air and water plumbing ports orientated at their desired position, make the appropriate plumbing
6.
connections to the jet BODY. Be sure glue is not allowed to run into the jet body.
Figure 1