Save these instructions – Balboa Water Group Micro Jet Replacement Nozzle User Manual
Page 2
Page 2 of 2
STEP 7 – Re-installing Scalloped Adjusting Flange
Re-install scalloped adjusting flange. Be sure that the retaining ring is adjusting as described in Step 6 so that
drive legs of adjusting flange will pass through slots in retaining ring.
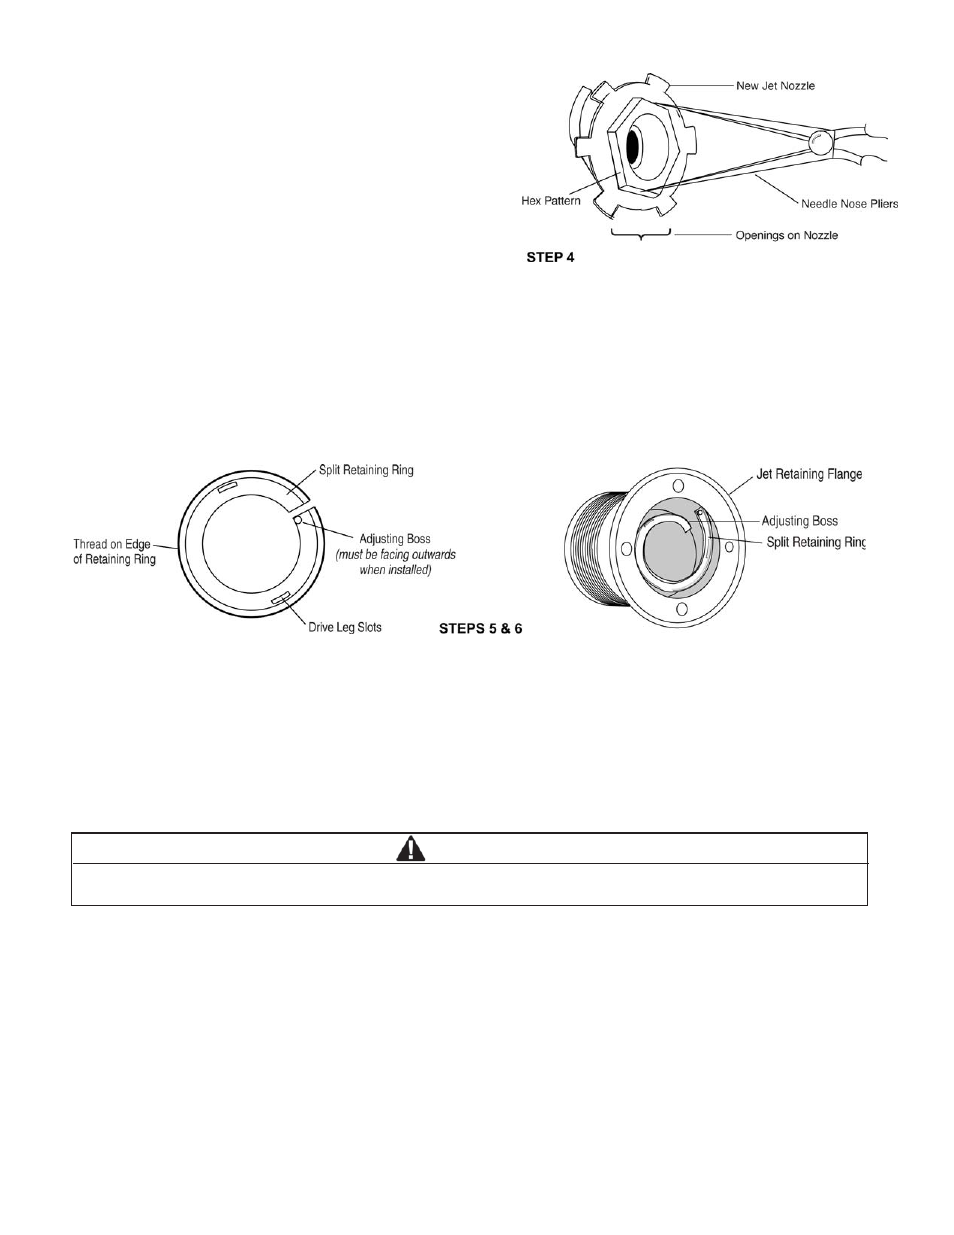
STEP 4 – Installing New Nozzle
Hold new nozzle with needle nose pliers by gripping
nozzle on hex pattern (not on orifice) and insert into jet
body. After nozzle is inserted, be sure nozzle is seated
properly and is rotated clockwise (looking into jet) until
it stops. You may need to push nozzle into final position
with your finger. This will help you to “feel” the seated
position of the nozzle.
STEP 5 – Installing Split Retaining Ring
Insert split retaining ring with adjusting boss facing outward by pushing first one end into jet body and then the
other. Be sure retaining ring has snapped into jet body behind jet retaining flange and is laying flat around hex of
nozzle. Thread on retaining ring must engage internal threads of jet body without crossthreading and turn freely.
STEP 6 – Adjusting the Split Retaining Ring
Rotate the split retaining ring in threads of jet body with tip of screwdriver until it touches the nozzle.
Additionally, turn the ring until drive leg slots in the ring expose the next set of openings on nozzle.
This is the proper adjustment for the retaining ring. Do not over tighten as this may cause damage to the jet or
cause the jet to not operate properly.
CAUTION
Do not over tighten split retaining ring. Over tightening the split retaining ring can cause damage to the jet, or cause
the jet to not operate properly. Tighten until alignment is reached and no further.
SAVE THESE INSTRUCTIONS