Ec declaration of conformity, Warranty – Karcher KM 130-300 BAT User Manual
Page 22
-
9
Clean the dust filter with the filter clean-
ing button.
ṇ
Warning
Empty waste container before replacing
dust filter. Wear a dust mask when working
around the dust filter. Observe safety regu-
lations on the handling of fine particulate
material.
1 Lock of appliance hood
2 Cover
Open the lock, remove the star grip
screw to do this.
Fold cover forwards.
Open filter cap.
Fold the filter vibrator forward.
Replace the dust filter.
Close the filter cover.
Unscrew the head lamps.
Take out the head lamps and pull out
the plug.
Note: Note the positions of the plugs.
Dismantle the head lamps.
Dismantle the head lamp casing and
hold it horizontally because the lamp
unit is not fastened.
Unlock the bracked and take out the
bulb.
Insert new bulb.
Reinstall in reverse sequence.
Note: Remove the glass of the direction-in-
dicator lamp from its casing to replace the
bulb.
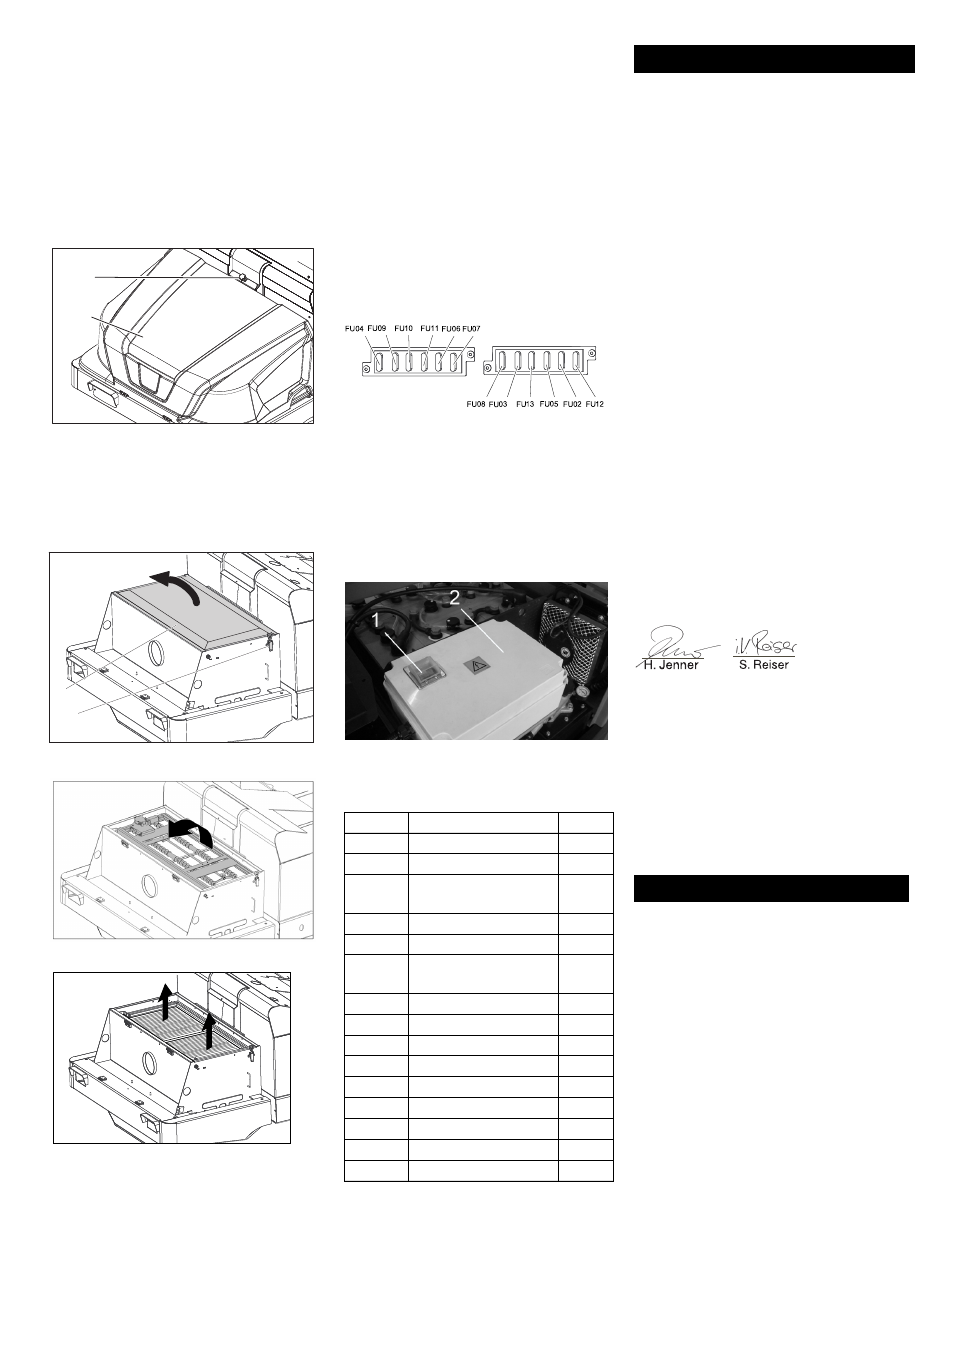
Open the fuse holder.
Check the fuses.
Replace defective fuses.
Note: The fuse FU 01 (main fuse) is locat-
ed on the electronics casing.
The fuses FU 14, FU 15 and FU 16 are lo-
cated in the electronics casing. Attention:
Opening of electronics casing and replac-
ing of fuses only by customer service.
1 Fuse FU 01 (main fuse)
2 Electronics casing
Note: Only use fuses with identical safety
ratings.
We hereby declare that the machine de-
scribed below complies with the relevant
basic safety and health requirements of the
EU Directives, both in its basic design and
construction as well as in the version put
into circulation by us. This declaration shall
cease to be valid if the machine is modified
without our prior approval.
The undersigned act on behalf and under
the power of attorney of the company man-
agement.
Authorised Documentation Representative
S. Reiser
Alfred Kärcher GmbH Co. KG
Alfred-Kärcher-Str. 28 - 40
71364 Winnenden (Germany)
Phone: +49 7195 14-0
Fax: +49 7195 14-2212
Winnenden, 2012/04/01
The warranty terms published by the rele-
vant sales company are applicable in each
country. We will repair potential failures of
your appliance within the warranty period
free of charge, provided that such failure is
caused by faulty material or defects in man-
ufacturing. In the event of a warranty claim
please contact your dealer or the nearest
authorized Customer Service centre.
Please submit the proof of purchase.
Manually clean the dust filter
Replacing dust filter
Changing the headlight bulb (option)
1
2
2
1
Changing the blinker bulb (option)
Replacing fuses
FU 01
Main fuse
220 A
FU 02
Seat contact switch
3 A
FU 03
Driver cabin (optional) 10 A
FU 04
Driving direction
switch
5 A
FU 05
Multifunction display
3 A
FU 06
Hydraulic oil cooler
25 A
FU 07
Program selection
switch
15 A
FU 08
Horn
10 A
FU 09
Left lighting
7.5 A
FU 10
Right lighting
7.5 A
FU 11
Working light
10 A
FU 12
Beacon lamp
5 A
FU 13
Vibrator system
10 A
FU 14
Motor
3 A
FU 15
Voltage converter
20 A
FU 16
Key switch
3 A
EC Declaration of Conformity
Product:
Sweeper
Type:
1.186-xxx
Relevant EU Directives
2006/42/EC (+2009/127/EC)
2004/108/EC
2000/14/EC
Applied harmonized standards
EN 55012: 2007 + A1: 2009
EN 61000–6–2: 2005
EN 60335–1
EN 60335–2–29: 2004+A2: 2010
EN 60335–2–72
EN 61000–3–2: 2006+A1: 2009+A2: 2009
EN 61000–3–3: 2008
EN 62233: 2008
Applied conformity evaluation method
2000/14/EC: Appendix V
Sound power level dB(A)
Measured:
90
Guaranteed: 93
Warranty
CEO
Head of Approbation
22
EN