Nikon 5700 User Manual
Page 53
Doing Mor
e with Y
our Digital Camera—Connecting to a Computer
41
Selecting Pictures for Transfer
To copy only pictures marked for transfer using the Auto Transfer option in the
PLAY BACK menu (
155), select Images marked for transfer from the Image
transfer rule menu before clicking the
button in the Nikon Transfer window.
Transferring Ultra HS Images
Before transferring pictures to the camera for the first time, make sure to click
Change... in the Image Transfer window to display the File Destination and
Naming dialog. Check Copy folder names from camera. This will ensure
that each sequence of pictures created at a setting of Ultra HS (
104) will
be copied to a separate folder on your computer. See the Nikon View 5
Reference Manual (on CD) for details.
3
Turn the camera on
Turn the camera on. Nikon View 5 will detect the camera and the Nikon
Transfer window will automatically be displayed. For details, see the Nikon
View 5 Reference Manual (on CD). While the UC-E1 USB cable is con-
nected, the camera monitor will remain off,
will appear in the control
panel and all controls except the power switch will be inactive.
4
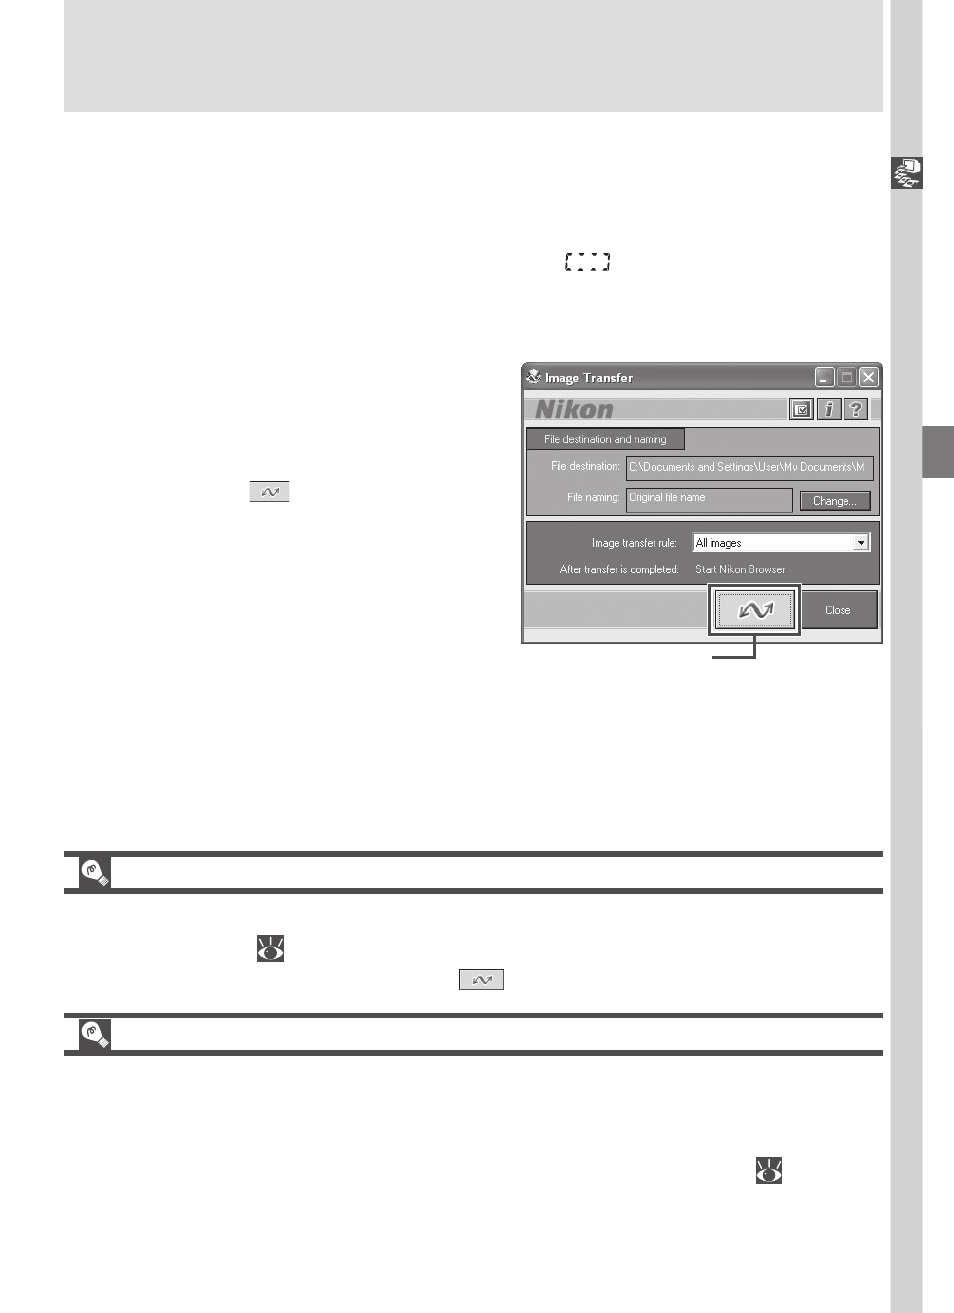
Transfer pictures to your computer
To copy all pictures on the memory
card to your computer, select All im-
ages from the Image transfer rule
menu in the Nikon Transfer window
and click the
button to begin
transfer.
While pictures are being
copied to the computer, do not:
• Disconnect the USB cable.
• Turn the camera off.
• Remove the memory card.
Transfer button
5
View pictures
When transfer is complete, the pictures that have been copied to your
computer’s hard disk will be displayed in Nikon Browser. See the Nikon View 5
Reference Manual (on CD) for details of the operations that can be performed.