Aiphone FK1629 B 0811YZ User Manual
Page 24
24
Setting transfer schedule
[Transfer setting – Transfer schedule setting]
You can set a weekly transfer schedule and individual daily
schedule.
The settings can be made 1 year ahead.
*
Click
1
Transfer schedule setting in the table of
contents.
Make the settings by clicking
2
Weekly schedule
and
Individual schedule
respectively to open the
corresponding window.
Individual schedule
*
should be clicked after the target
date is clicked on the calendar.
Make the settings in the displayed window(s).
3
See the detailed instructions for E or F on the
right column of this page.
After the setting is fi nished on the corresponding
4
window, click
Close
to close the window.
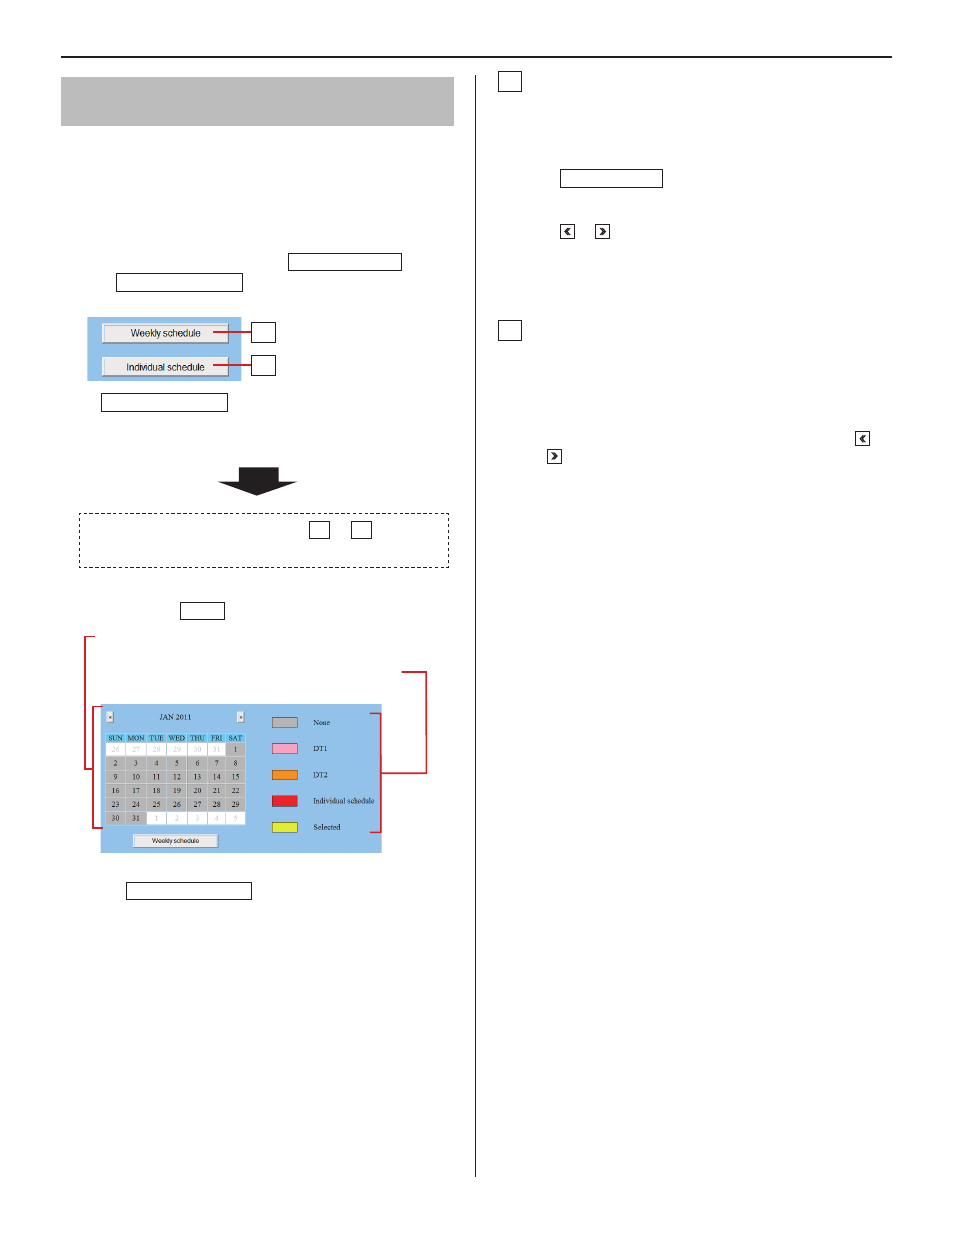
Calendar and setting status can be checked for the
selected month.
The registered daily transfer schedules are
identifi ed by colors and shown on the calendar.
Click
5
Temporarily stored
to save the current setting
results temporarily.
If you wish to cancel the setting results you have made,
*
click a title in the table of contents or “Refresh” in the
web browser menu.
When the settings on this window have fi nished, update
6
the system from [Updating the system]. (→P. 28)
E
Settings on [Weekly schedule] setting window
Select either [Every week] or [Every other week].
1)
Set the schedule start and end dates.
2)
The monthly calendar is displayed by clicking
*
Refer calendar and you can select the start and
end dates.
If necessary, you can change the month by clicking
*
or .
Set one of the registered daily transfer schedules or no
3)
schedule to each day of the week. (Select one from the
pull-down menu.)
F
Settings on [Individual schedule] setting window
Set an individual schedule to the target date.
[Individual schedule] setting window will not open if you
*
have not selected the target date on the calendar in the
[Transfer schedule setting] window.
If necessary, you can change the date by clicking
1)
or
repeatedly.
[Daily transfer schedule]:
2)
Select either of the registered daily schedules (DT1 or
DT2) or no schedule from the pull-down menu.
[Call transfer time]:
3)
When “DT1” or “DT2” is selected:
•
The call transfer time is automatically entered.
If necessary, change the [Start time (hour and
minute)] and [End time (hour and minute)] of
transferring manually.
When no schedule is selected:
•
Enter the call transfer time manually.
When the time is entered or changed manually, [Daily
*
transfer schedule] changes to “Individual schedule”.
E
F