Troubleshooting _ 130 – Samsung SCX-8128NA-XAA User Manual
Page 130
Troubleshooting_ 130
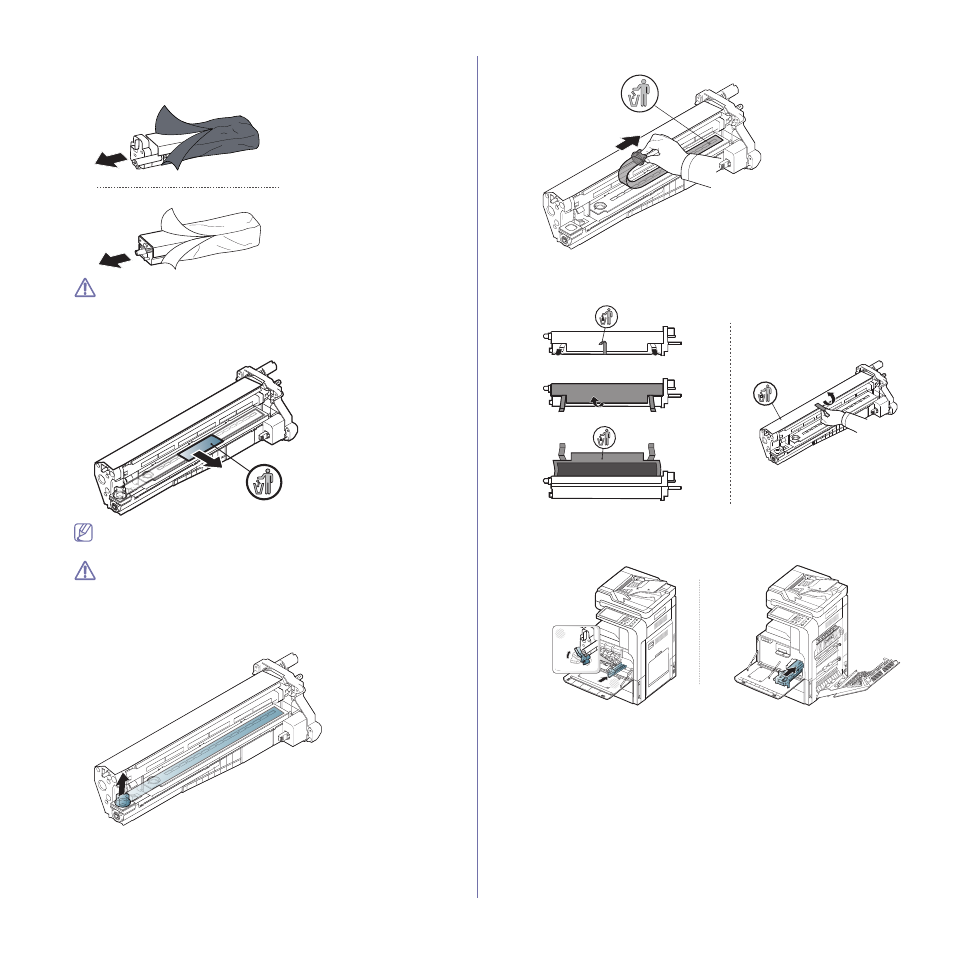
4. Remove the new imaging unit from its package.
SCX-812x Series
CLX-92x1 / 93x1 Series
Do not use sharp objects, such as a knife or scissors, to open the
imaging unit package. You could damage the surface of the
imaging unit.
5. Go to step.9 (CLX-92x1 Series only).
6. Pull out the protecting pad (SCX-812x Series only).
If toner gets on your clothing, wipe it off with a dry cloth and wash
clothing in cold water. Hot water sets toner into fabric.
•
Be careful not to scratch the surface of the imaging unit.
•
To prevent damage, do not expose the imaging unit to light for
more than a few minutes. Cover it with a piece of paper to
protect it if necessary.
7. Pull the rubber stopper out of the developer (SCX-812x Series only).
8. Remove the tape on the imaging unit (SCX-812x Series only).
9. Remove the paper protecting the imaging unit.
SCX-812x Series
CLX-92x1 / 93x1 Series
10. Hold the handles on the new imaging unit, and push the imaging unit
until it locks into place.
CLX-92x1 / 93x1 Series
SCX-812x Series
2
1