Tripod installation, 1 tripod base – Campbell Scientific Solar1000 Station User Manual
Page 8
CM106 Tripod
1.5. Tripod Installation
1.5.1 Tripod Base
Tripod installation near power lines is dangerous. The
minimum safe recommended distance from overhead
power lines is 2 times the height of the tripod and mast
combined. Call Blue Stakes to locate buried utilities
prior to installation.
WARNING
The tripod base has three legs, which are individually adjustable, that allow the
tripod to be installed over non-level terrain.
Prepare the area where the tripod will be installed. The tripod requires an area
approximately 9.3 ft (2.8 m) in diameter. Natural vegetation and the ground
surface should be disturbed as little as possible, but brush and tall weeds should
be removed.
Stand the tripod base up on end, and rotate the feet perpendicular to the legs.
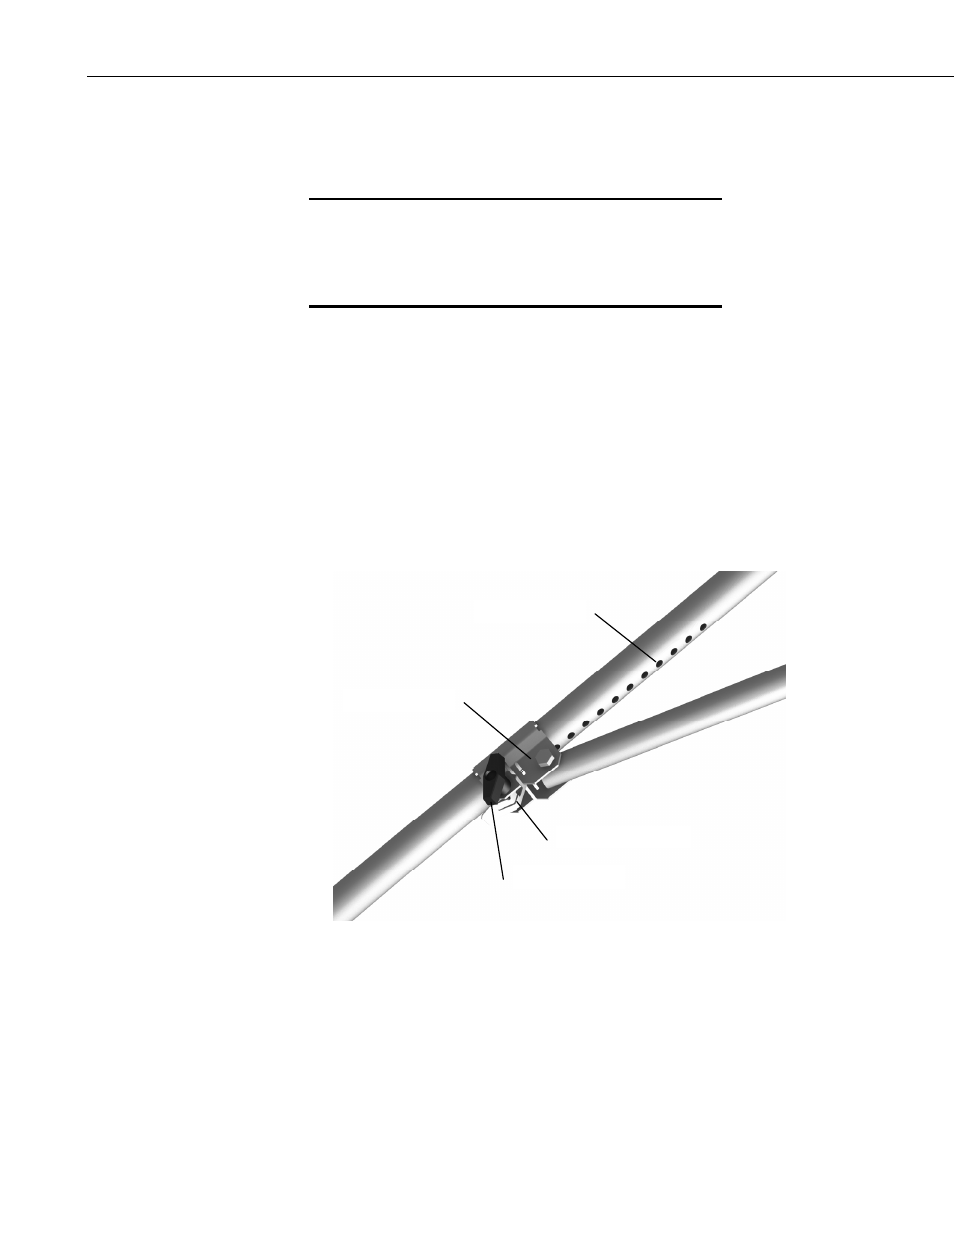
Each leg has a slide collar and T-knob with a spring loaded pin that locks into
holes located on the underside of the leg as shown in Figure
1.5-1.
Holes for Pins
Slide Collar
Spring-Loaded Pin
T-Knob
FIGURE
1.5-1. Tripod Leg, Slide Collar Components
1.5.1.1 Mounting on a Relatively Flat Area
Loosen the T-knob and extend each leg until the pin engages in a hole (depress
the tab to disengage the pin from a hole). With the legs extended, orient the
tripod so that one of the legs points South (assuming the instrument enclosure
with -MM Mast Mount bracket will face North). If the instrument enclosure
has the -LM Leg Mount bracket, orient the tripod so that the enclosure will
4