Attaching ec100 electronics enclosure to mounting, Structure, Left) and a tripod leg (right) – Campbell Scientific EC150 CO2 and H2O Open-Path Gas Analyzer and EC100 Electronics with Optional CSAT3A 3D Sonic Anemometer User Manual
Page 27
EC150 CO
2
/H
2
O Open-Path Gas Analyzer
Use caution when handling the EC150 gas analyzer head.
The optical source may be damaged by rough handling,
especially while the EC150 is powered.
The CSAT3A sonic anemometer is an updated version of the
CSAT3, designed to work with the EC100 electronics. An existing
CSAT3 may be upgraded to a CSAT3A. Contact a Campbell
Scientific application engineer for details.
6.2.4 Attaching EC100 Electronics Enclosure to Mounting Structure
The EC100 electronics enclosure can be mounted to the mast, tripod leg, or
other part of the mounting structure but must be mounted within 3.0 m (10.0 ft)
of the sensors due to restrictions imposed by the cable length.
1. Attach the EC100 enclosure mounting bracket (pn 26604) to the pipe
of the mounting structure by loosely tightening the u-bolts around the
pipe. The u-bolts are found in the mesh pocket inside the EC100
enclosure.
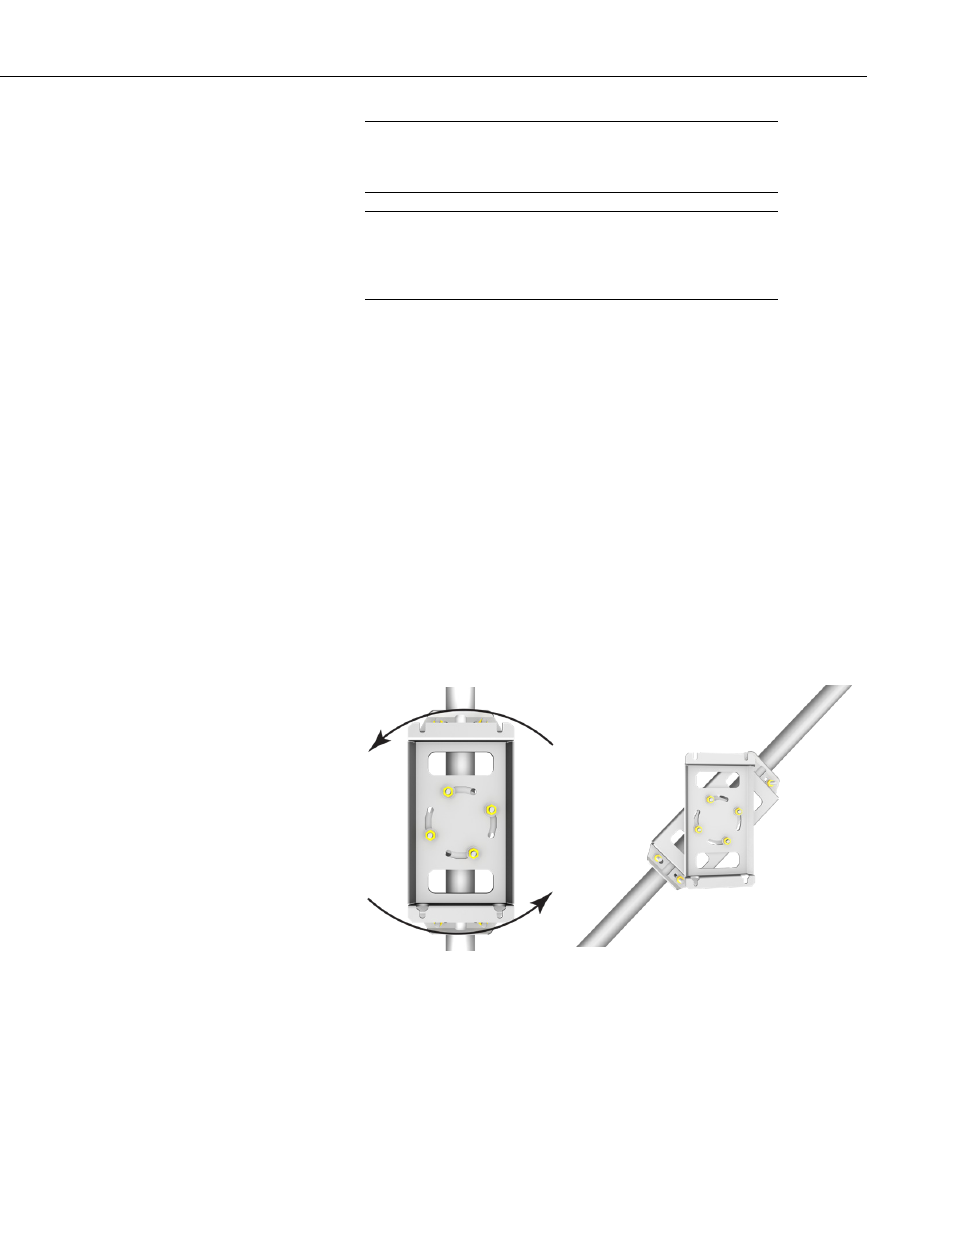
2. For configurations in which the pipe is not vertical (such as a tripod
leg as in FIGURE 6-7) rotate the bracket to the side of the pipe so that
when the enclosure is attached it will hang vertically upright. Make
any necessary angle adjustments by loosening the four nuts and
rotating the bracket plates relative to one another. If the necessary
angle cannot be reached in the given orientation, remove the four nuts
completely and index the top plate by 90° to allow the bracket to
travel in the other direction (see FIGURE 6-7).
FIGURE 6-7. EC100 enclosure mounting bracket mounted on a vertical
mast (left) and a tripod leg (right)
3. Tighten all nuts after final adjustments have been made.
4. Attach the EC100 enclosure to the bracket by loosening the bolts on
the back of the enclosure, hanging the enclosure on the mounting
CAUTION
NOTE
17