U.S. Products TREADMASTER User Manual
Page 27
21 - TreadMaster Information and Operating Instructions
EN
6. Slide the restraining arms in their channel to position the cleaning head over the
tread. Notice that the pin in the end of the arm will fit into one of the holes in the
channel, locking the arm into place. Extend the restraining arms to their full locked
position (see Figure 12 and Figure 13).
7. Slide the TreadMaster into the treadwell,
making sure the restraining arms are
firmly seated against the balustrades
(see Figure 13).
8. Use the leveling adjustment knob
to ensure proper contact with the
tread surface (see Figure 12). Check
the cleaning head level to ensure
proper adjustment (see Figure 12 and
Figure 14).
9. Adjust the depth of the cleaning head
with the fluted knobs on the cleaning
head (see Figure 15).
10. Remove the power cord, vacuum hose
and warning sign from the storage compartment.
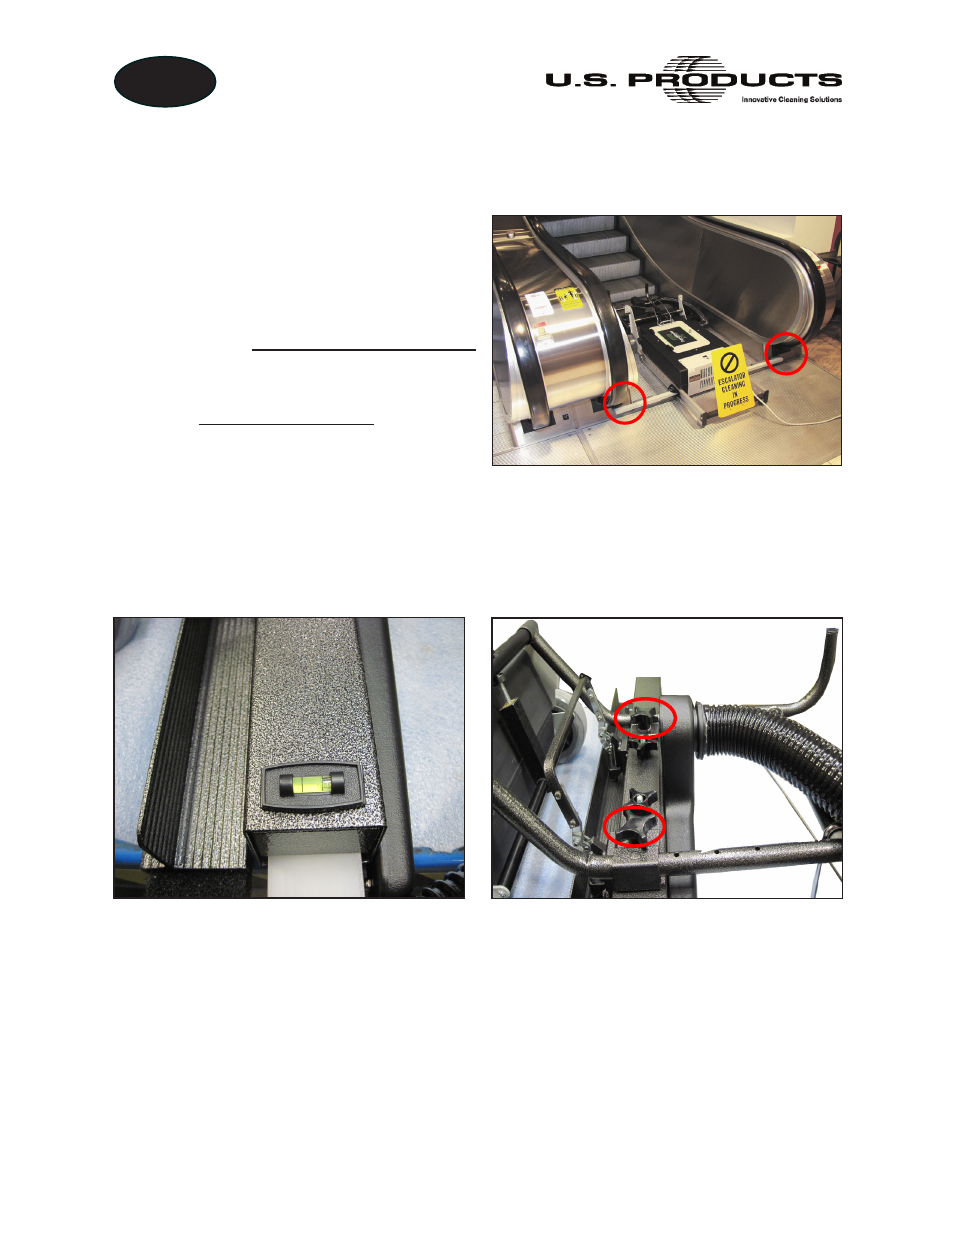
11. Attach the vacuum hose between the cleaning head and the tank nozzle (see
Figure 13. Ensure Restraining Arms
are Firmly Seated Against Balustrades
Figure 14. Location of Cleaning
Head Level
Figure 15. Adjust Depth of Cleaning
Head with Fluted Knobs