Setting up, Monitor screen setup, System setup – Kenwood DNX9210BT User Manual
Page 35: Monitor screen setup system setup, Setting up (p.68), External d, Etting up
68
68
69
Monitor Screen Setup
You can adjust image quality in iPod video,
picture file, menu screen, etc.
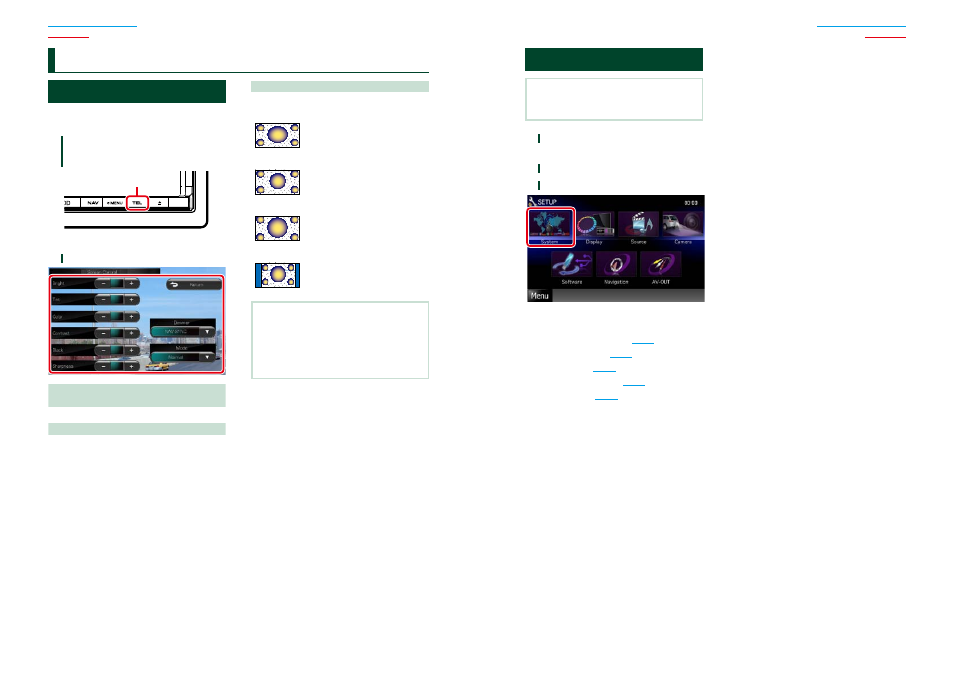
1
Press the button instructed in each
diagram when the desired screen is
displayed.
Press for 1 second
Screen Control screen appears.
2
Adjust each item as follows.
Bright / Tint / Color / Contrast / Black /
Sharpness
Adjusts each item.
Dimmer
Select dimmer mode.
ON: The display and buttons dim.
OFF: The display and buttons do not dim.
SYNC (Default): Turns the dimmer function on
or off when the vehicle light
control switch is turned on
or off.
NAV-SYNC: Turns the dimmer function on or
off according to the Navigation
Day/Night display setting.
Mode (Playback screen only)
Select screen mode.
Full: Full picture mode
Just: Justify picture mode
Zoom: Zoom picture mode
Normal: Normal picture mode
NOTE
• Adjusting items are different depending on the
current source.
• You can perform this function only when you
have applied the parking brake.
• The image quality can be set for each source.
S
etting Up
System Setup
NOTE
• Each operation in this section can be started from
the multi function menu.
1
Touch [Menu] on any screen.
TOP Menu screen appears.
2
Touch [SETUP].
3
Touch [System].
System screen appears.
See the following section for each setting.
• Set up the user interface
• Adjust touch panel
• Set up security
• Set up external switch
• Set up memory