G307k2 s, Nstalling, Owering – Red Lion G307K2 7" Operator Interface with TFT Display User Manual
Page 2: Pecifications, Dimensions in inches (mm), Mounting instructions
2
1. POWER REQUIREMENTS:
Must use Class 2 or SELV rated power supply.
Power connection via removable three position terminal block.
Supply Voltage:
24 VDC ±20%, Class 2
Maximum Power:
250 mA @ 24 VDC
Fuse:
Fast-blow 800 mA, 5x20 mm
2. BATTERY: Lithium coin cell. Typical lifetime of 10 years.
3. LCD DISPLAY:
SIZE
7-inch
TYPE
TFT
COLORS
32K
PIXELS
800 X 480
BRIGHTNESS
375 cd/m
2
BACKLIGHT TYPE
LED
BACKLIGHT LIFE
30,000 HR TYP.
4. TOUCHSCREEN: Four-wire resistive analog
5. MEMORY:
On Board User Memory: 128 Mbyte of non-volatile Flash memory.
Memory Card: SD slot accepts standard capacity cards up to 2 Gbyte.
6. COMMUNICATIONS: Three Serial Ports - One RS-232 port, two
RS-232/422/485: One Ethernet Port
Serial Ports: Format and Baud Rates for each port are individually software
programmable up to 115,200 baud.
Ethernet Port: 10/100 Mbps
7. ENVIRONMENTAL CONDITIONS:
Operating Temperature Range: 0 to 45°C
Operating and Storage Humidity: 10-90% relative humidity (non-
condensing) from -20 to 60°C.
Vibration: Operational 10 to 25 Hz, in X, Y, Z direction, 30 minutes, 2 g’s.
8. CERTIFICATIONS AND COMPLIANCES:
SAFETY
UL Listed, File #E302106, UL508
UL Type 4 Indoor Use Only Enclosure rating (Face only), UL50
IP65 Enclosure rating (Face only), IEC 529
ELECTROMAGNETIC COMPATIBILITY
Consult factory for EMC specifications
9. CONNECTIONS: Compression cage-clamp terminal block.
Wire Gage: 12-28 AWG copper wire
Communications: DB9 connectors
10. CONSTRUCTION: Plastic enclosure with NEMA 4/IP65 front panel when
properly installed.
11. WEIGHT: 30 oz. (850 g)
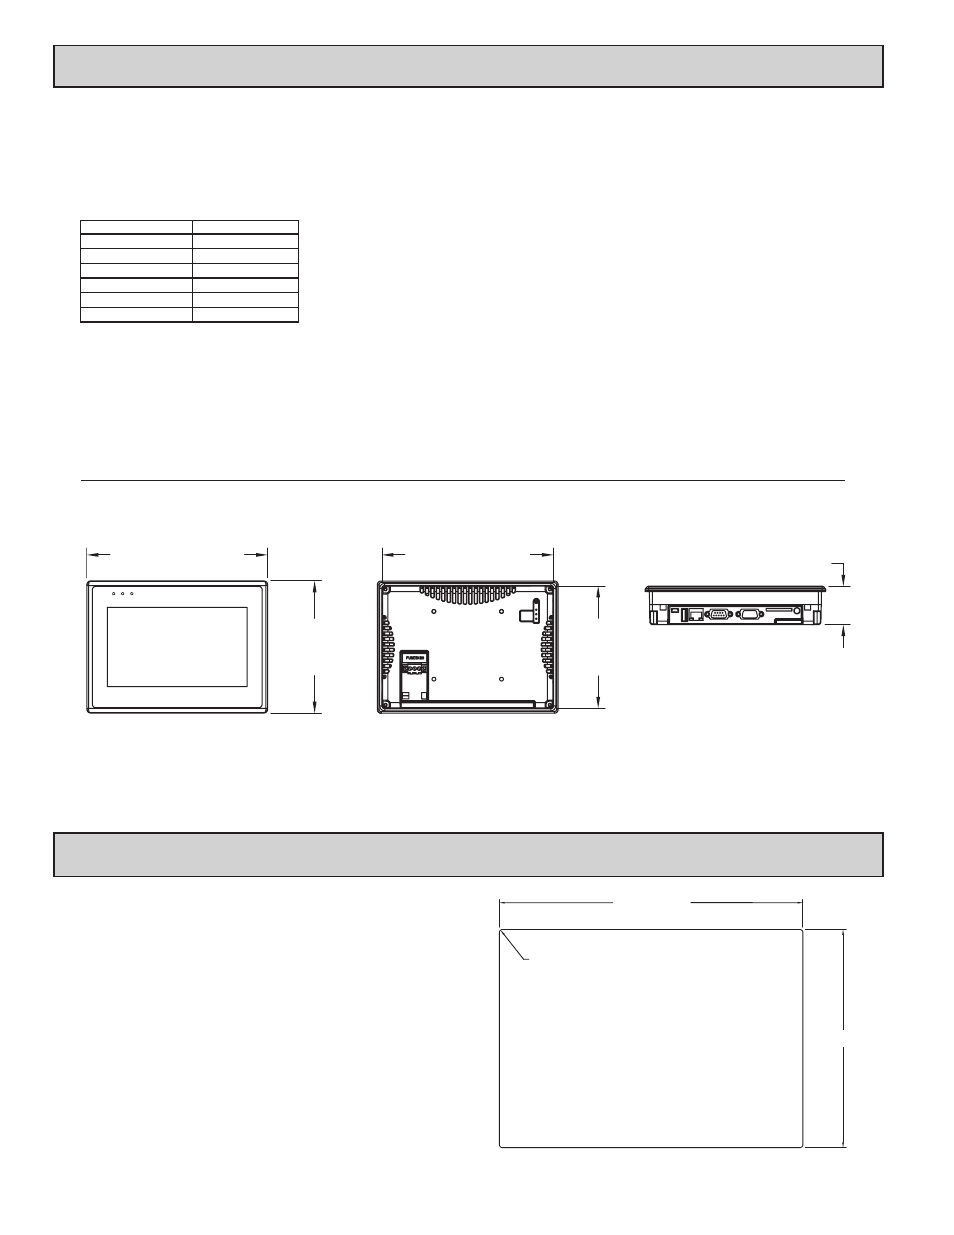
7.888 (200.35)
5.762
(146.35)
7.476 (189.9)
5.350
(135.9)
1.675 (42.55)
COM
CPU
PWR
DIMENSIONS In inches (mm)
I
nstallIng
and
P
owerIng
the
g307K2
s
PecIfIcatIons
MOUNTING INSTRUCTIONS
The unit can be mounted into enclosures with a depth of 4". It is recommended
that the unit be mounted on the front panel of a steel enclosure. Allow clearance
of 1" around the sides of the unit for the mounting hardware. Allow 2.5" along
the bottom edge if using Red Lion communication cables.
Place the unit in the panel cutout. Slide clamps into the four holes provided
at the top and bottom of the case. Tighten the clamping screws in an even pattern
until the unit is secured in the panel. Caution: Do not over tighten the clamps.
To seal to NEMA4 specifications, all supplied mounting clamps must be used.
(Torque is 2.6 – 3.5 in/lb.) The panel must not flex more than 0.010".
R.08 (R2)
7.56 (192)
5.43 (138)
VESA Mount: VESA 75 (75 mm x 75 mm). Use four screws (M4-0.7 mm) less than 8 mm long.