Changing the sensor – Vaisala DMT132 User Manual
Page 53
Chapter 5 ______________________________________________________________ Maintenance
VAISALA _______________________________________________________________________ 51
3.
Take the new filter, and insert it to the filter threads. The spring
washer should be under the filter. A new washer is not included
with the filter, so reuse the old one.
4.
Tighten the new filter by turning it clockwise. Do not use tools to
tighten the filter, finger tightness is enough.
Changing the Sensor
The user can replace the HUMICAP® 180R sensor with a new one. The
new sensor must be of the HUMICAP® 180R type. Do not attempt to use
a different sensor type.
NOTE
Replacing the sensor is repair maintenance, and it is not necessary in
normal operation. If the accuracy of the transmitter does not seem to be
within specification, it is more likely that the transmitter is in need of
calibration and adjustment, and not sensor replacement. Refer to section
Calibration and Adjustment on page 52.
1.
Remove the filter as instructed in section Changing the Filter on
page 49.
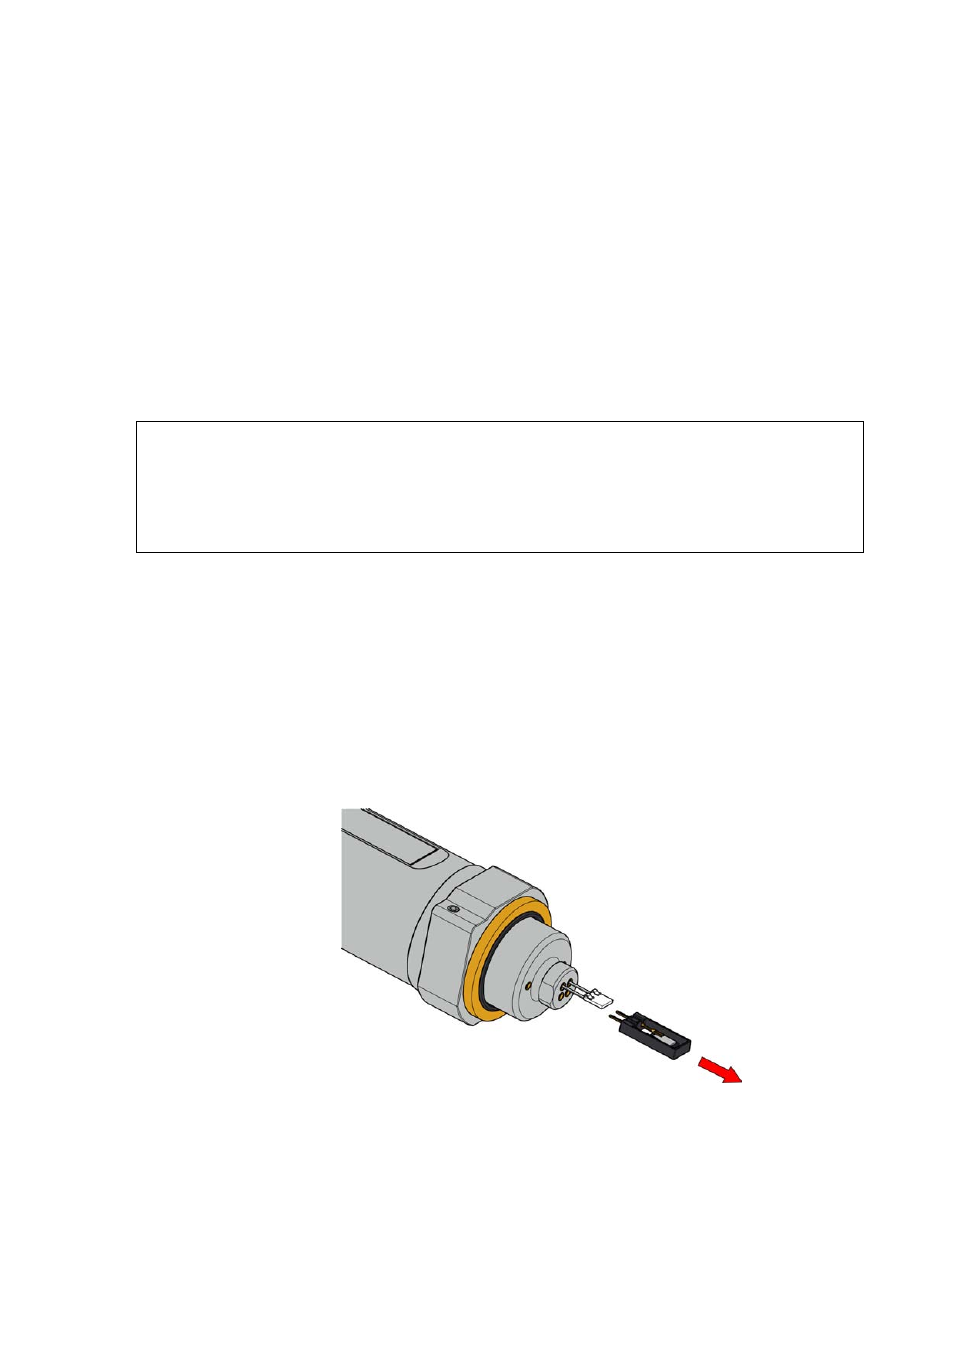
2.
Remove the damaged sensor and insert a new one. Avoid touching
the Pt1000 sensor. Handle the new sensor by the plastic socket.
DO NOT TOUCH THE SENSOR PLATE.
3.
Attach a new filter on the probe as instructed in section Changing
the Filter on page 49..
4.
Perform a two-point calibration and adjustment using the CRH
command as instructed in section Capacitance Adjustment (CRH)
on page 60.
1103-005
Figure 26
Removing the HUMICAP® 180R Sensor