Assembly, Mounting on the inverter – Outback Power Systems GS Load Center Installation Manual User Manual
Page 21
Assembly
900-0123-01-00 Rev B
19
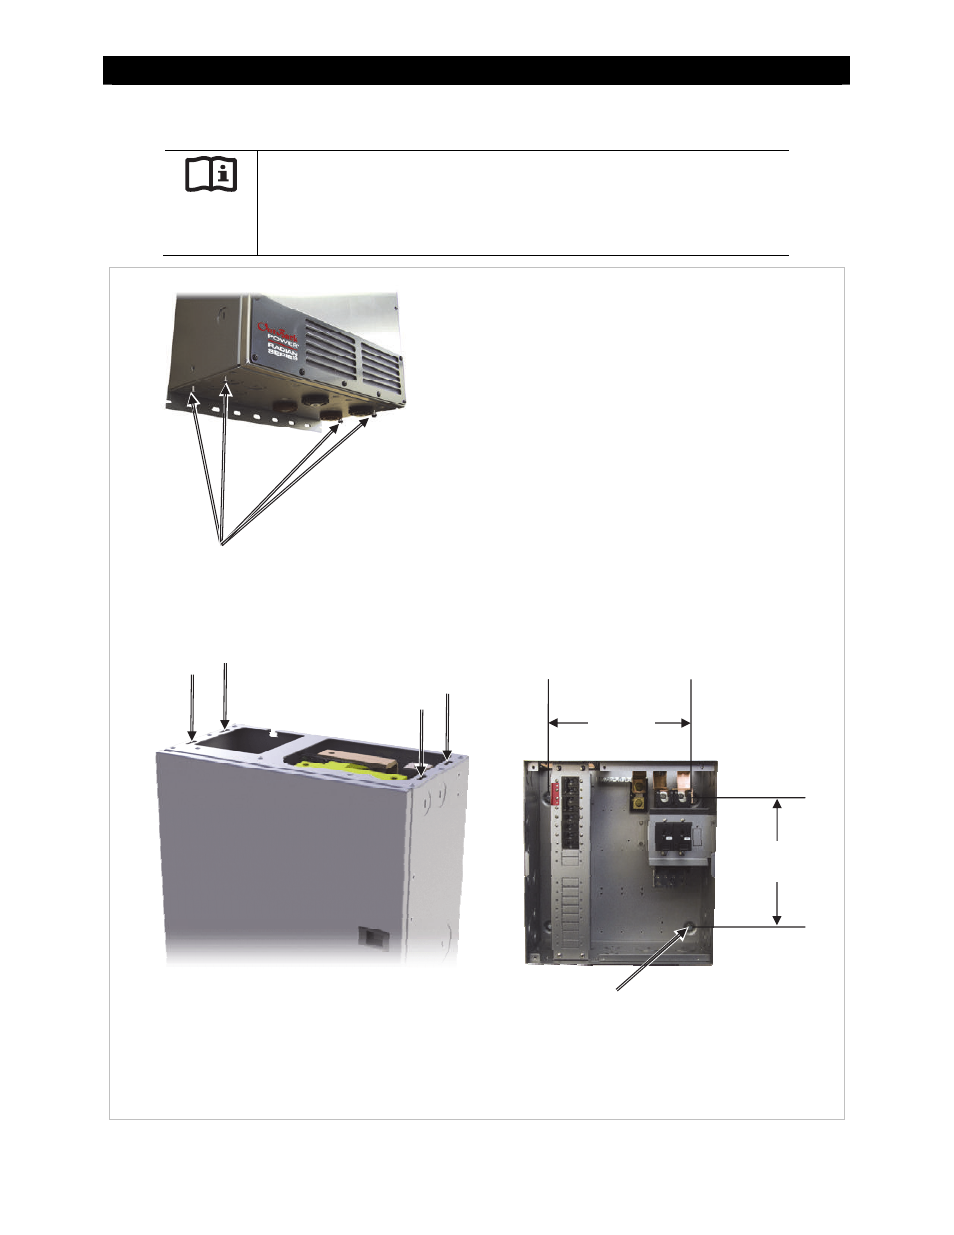
Mounting on the Inverter
IMPORTANT:
The Radian inverter and GSLC are intended for indoor use only. Ensure that the
mounting surface is strong enough to support the full weight of the Radian
inverter/charger and the GSLC. Use a minimum 3/4" (19 mm) sheet of plywood to
strengthen the wall surface if required.
Figure
20
Mounting the GSLC
To mount the GSLC to the Radian inverter:
1.
Install the Radian inverter onto the mounting bracket as
instructed in the Radian Series Inverter/Charger
Installation Manual.
2.
Back out bottom screw(s) approximately 1/4" (0.6 cm) to
3/16" (0.5 cm).
3.
Remove the front and interior covers from the GSLC if
necessary (as described on page 12).
4.
Align the GSLC along the bottom of the inverter and slide
the bottom screws into the keyhole slots.
5.
Hanging the GSLC from the screws and holding it flush
against the bottom of the inverter, mark the spots for the
holes for the mounting feet. These are located in the rear
of the GSLC and are marked below.
6.
If using wall anchors (included): Remove the GSLC. Using
a 3/8" (10 mm) drill bit, drill leader holes for the hardware
to be used to secure the GSLC to the surface. Install the
wall anchors. If mounting on a solid surface like plywood,
this step can be skipped.
Bottom Screws
Mounting Feet
Holes (x4)
14"
(35.6 cm)
12.5"
31.8 cm
Continued on the next page....
Keyhole Slots
Keyhole Slots