Securing the sensor array, Running the cable to the console, Mounting the console – DAVIS Weather Monitor II EZ-Mount User Manual
Page 7
Installing Your Station
Page 7
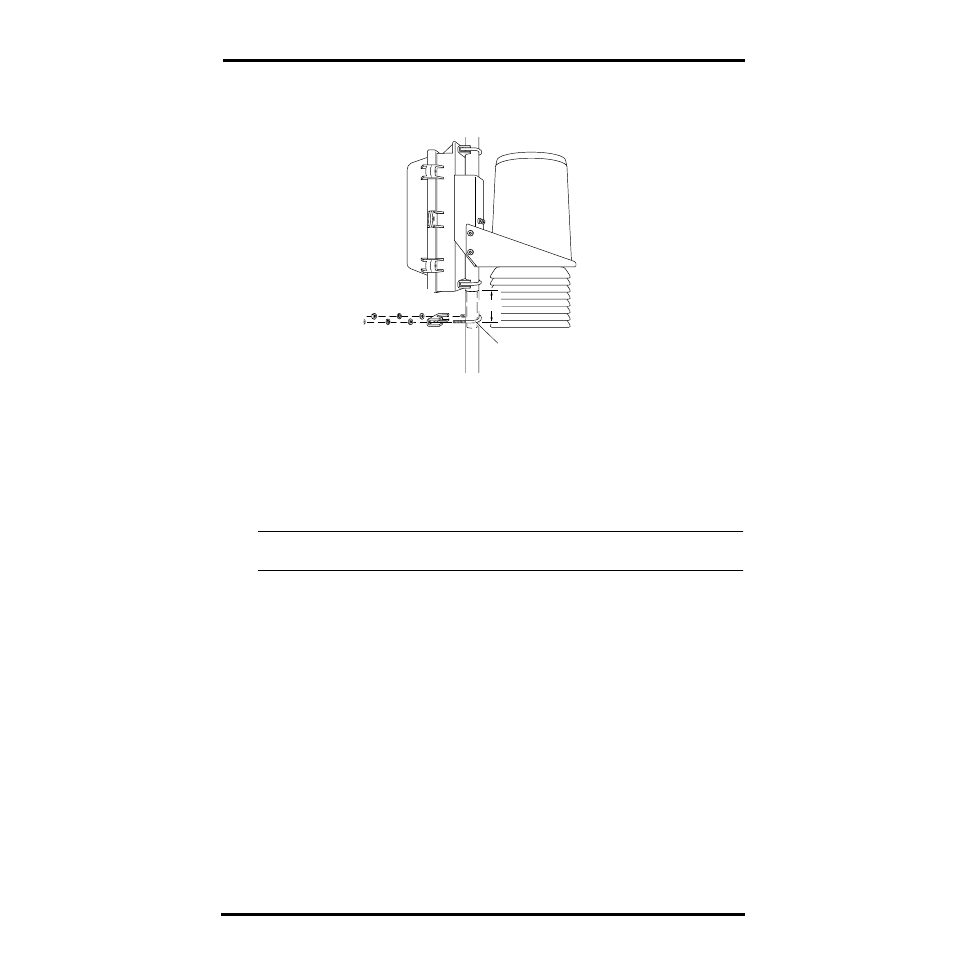
Securing the Sensor Array
After mounting the sensor array, secure the sensor array to the extension tube
as shown below.
Running the Cable to the Console
To prevent fraying or cutting of the 8-conductor cable, secure the cable so it
does not whip about in the wind. Secure it to the extension tube by wrapping
electrical tape around them both. Use cable clips or weather resistant cable ties
(see owner’s manual for illustration) to secure the cable underneath the eaves
of your house or in locations similarly shielded from rain. Make sure the cable
is secure by placing clips or ties approximately every 3-5 feet (1-1.6 m).
Note:
Do not use metal staples or a staple gun to secure the cable. Metal staples—especially when
installed with a staple gun—have a tendency to cut the cables.
Mounting the Console
1. Plug the 8-conductor cable into the JUNCTION BOX jack on the console (step 6 on
2. Apply power to the console (step 5 on page 4).
3. For instructions on installing a backup battery, refer to your owner’s manual.
If you plan to use an EZ-Solar Power Kit, do NOT install a backup battery.
4. For instructions on mounting the console on a wall, desk, or shelf, refer to your
owner’s manual. Or, if you want to mount the console inside the field case, see the
discussion on page 5.
Array
Extension
Hex
Nuts
Lock
Washers
Flat
Washers
1-1/8"
Saddles
1-1/2" x 5/16" U-Bolts;
torque until bolts dent
tubing slightly
2-1/2"