DAVIS Weather Monitor II EZ-Mount User Manual
E z - m, O u n t
Product # 7425EZ, 7440EZ, (EU, UK, M)
E Z - M
O U N T
W
E A T H E R
S
T A T I O N
I
N S T A L L A T I O N
M
A N U A L
This manual describes how to install the EZ-Mount weather station. Separate
manuals included with the station cover the operation of the console and sen-
sors. Some features discussed here (such as barometric pressure and humidity)
are only available with the Weather Monitor II
®
. Additional products—such as
the Mounting Tripod, EZ-Solar Power Kit, and WeatherLink
®
—are mentioned
here but are not required (contact Davis for more information).
C
OMPONENTS
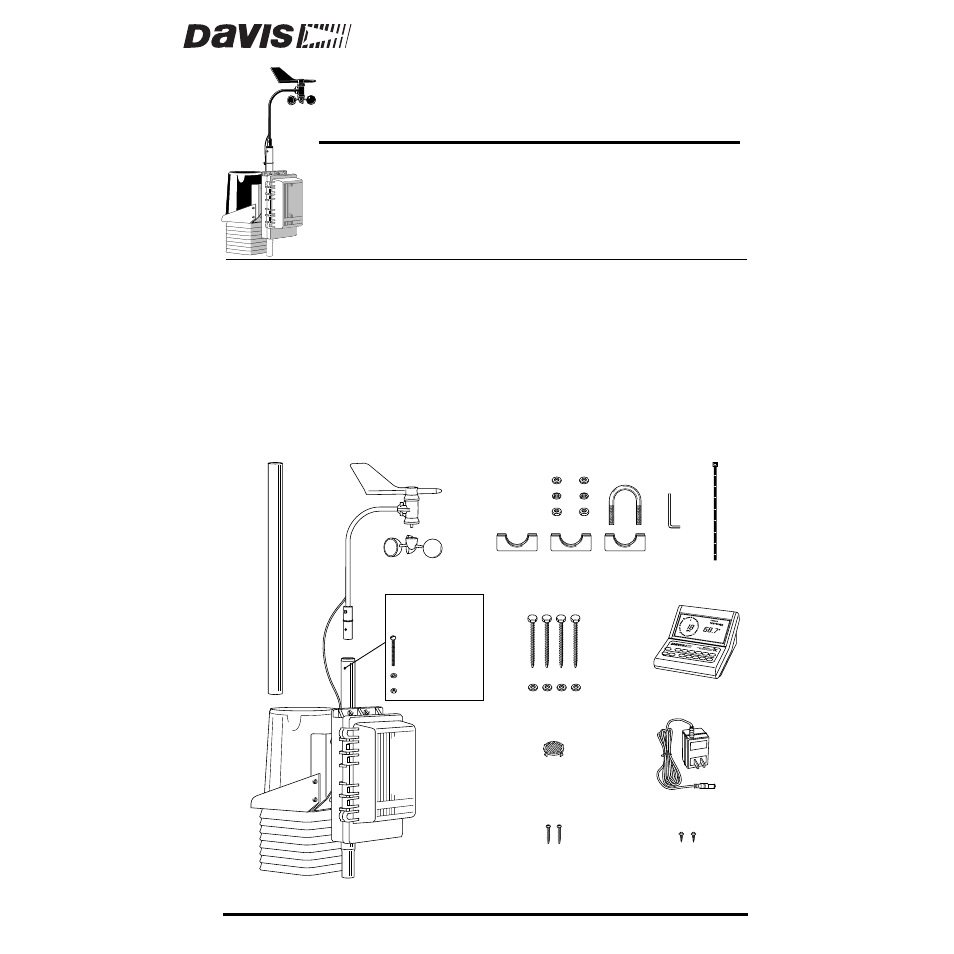
The EZ-Mount weather station includes the following components. Please
make sure you have everything you need before beginning.
Wind Cups
Anemometer
Weather Station
Sensor Array
Extension
Tube
1-1/8"
Saddles
5/16" Flat Washers
5/16" x 1-1/2"
U-Bolt
5/16" Lock Washers
5/16" Hex Nuts
5/16" x 3"
Lag Screws
Cable
Tie
Allen
Wrench
#8 x 3/4"
Pan Head Screws
(for mounting Console
on wall)
Debris Screen
(place inside
Rain Collector Cone
after installation)
This hardware
comes installed
on Sensor Array:
#12 x 1-1/2"
Pan Head Screw
#12 Lock Washer
#12 Hex Nut
Rain
Collector
Cone
[100' (30 m)
8-Conductor Cable
Not Shown]
Power Adapter
#6 x 1/4"
Pan Head Screws
(for mounting Console
on Field Case door)
Field Case
5/16"
Flat Washers
Weather Station Console