Installing the rain collector on a pole, Accessories for pole mounting, General guidelines for installing on a pole – DAVIS Rain Collector for Vantage Pro2 (with grip grooves and bird spikes) User Manual
Page 5
Installing the Rain Collector on a Pole
5
Installing the Rain Collector on a Pole
Accessories for Pole Mounting
• Use the Mounting Tripod (#7716) for easy roof-mounting.
• Use the Mounting Pole Kit (#7717) to raise the installation height of the rain
collector by up to 37.5" (0.95 m).
General Guidelines for Installing on a Pole
• With the supplied U-bolt, the rain collector can be mounted on a pole having an
outside diameter ranging from 1
1
/
4
" to 1
3
/
4
" (32 – 44mm).
• A larger U-bolt (not supplied) can be used to mount to a pole with a maximum
outside diameter of 2
1
/
2
" (64mm).
• To mount on a smaller pole, obtain a U-bolt that fits the base openings but that has
a shorter threaded section. If the included U-bolt is used with a smaller pole, the
bolt will interfere with the rain collector cone.
• Use the built-in bubble level to ensure rain collector is level.
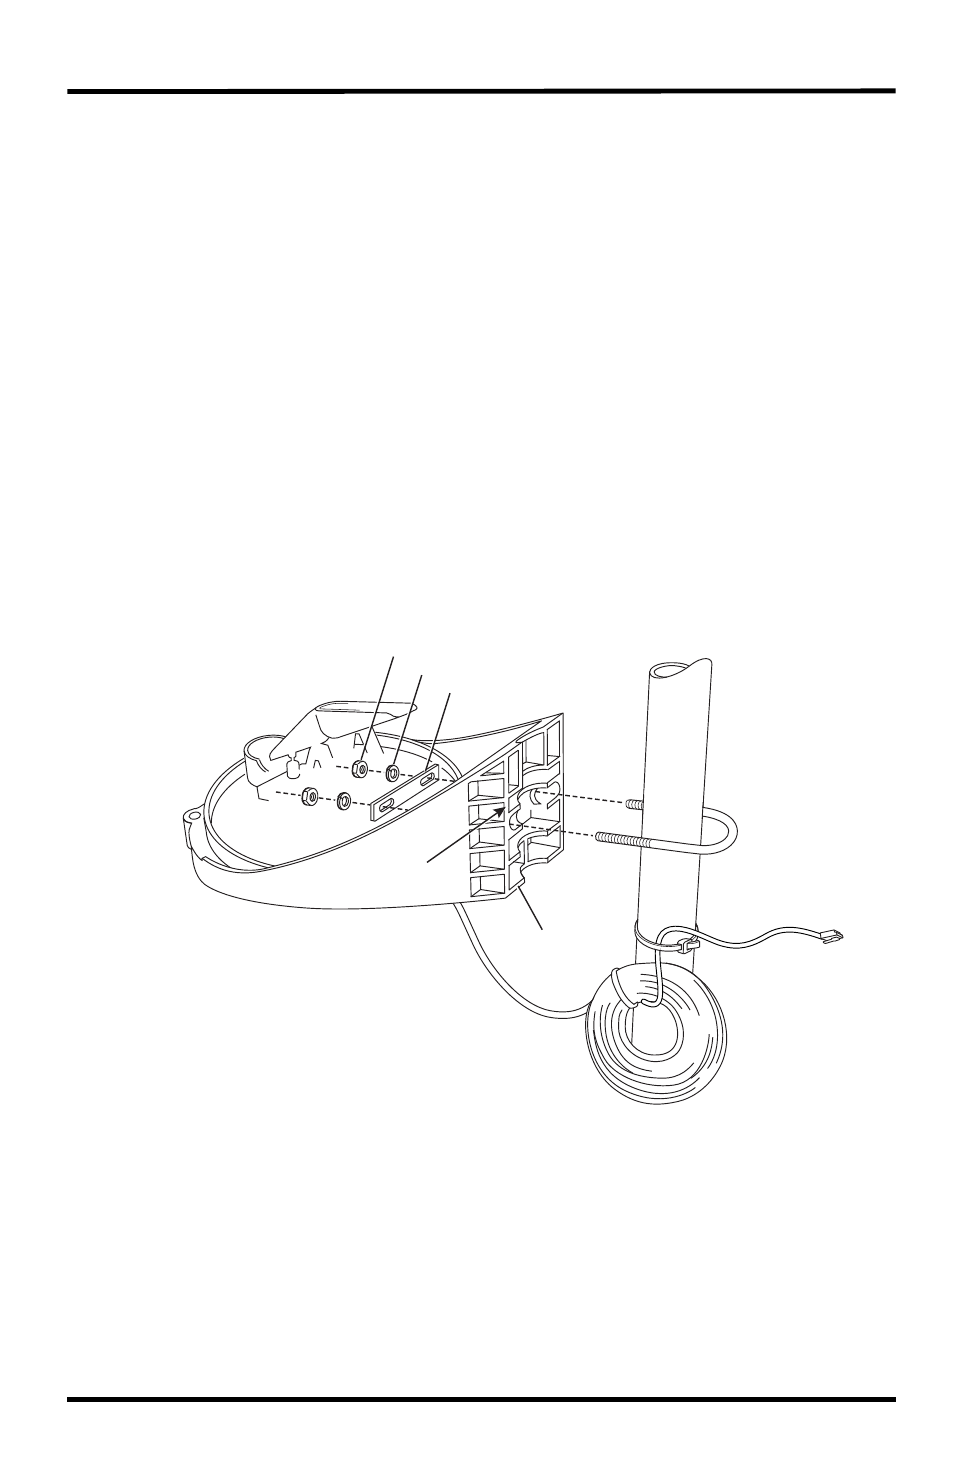
Refer to the following illustration when installing the rain collector on a pole.
1/4" Hex Nut
1/4" Lock Washer
Backing Plate
U-Bolt
Rain Collector
Base
Groove for
U-Bolt
1. While holding the mounting base against the pole, place the two ends of a U-bolt
around the pole and through the two holes in the base.
2. Slide the metal backing plate over the bolt ends as they stick out toward the rain
collector cone. Secure the backing plate with a washer, a lock washer, and a hex
nut on each of the bolt ends. Adjust the height of the rain collector, then tighten
the nuts.