DAVIS Rain Collector with Grip Grooves and Bird Spikes (flat base) User Manual
Page 5
Install the Rain Collector
5
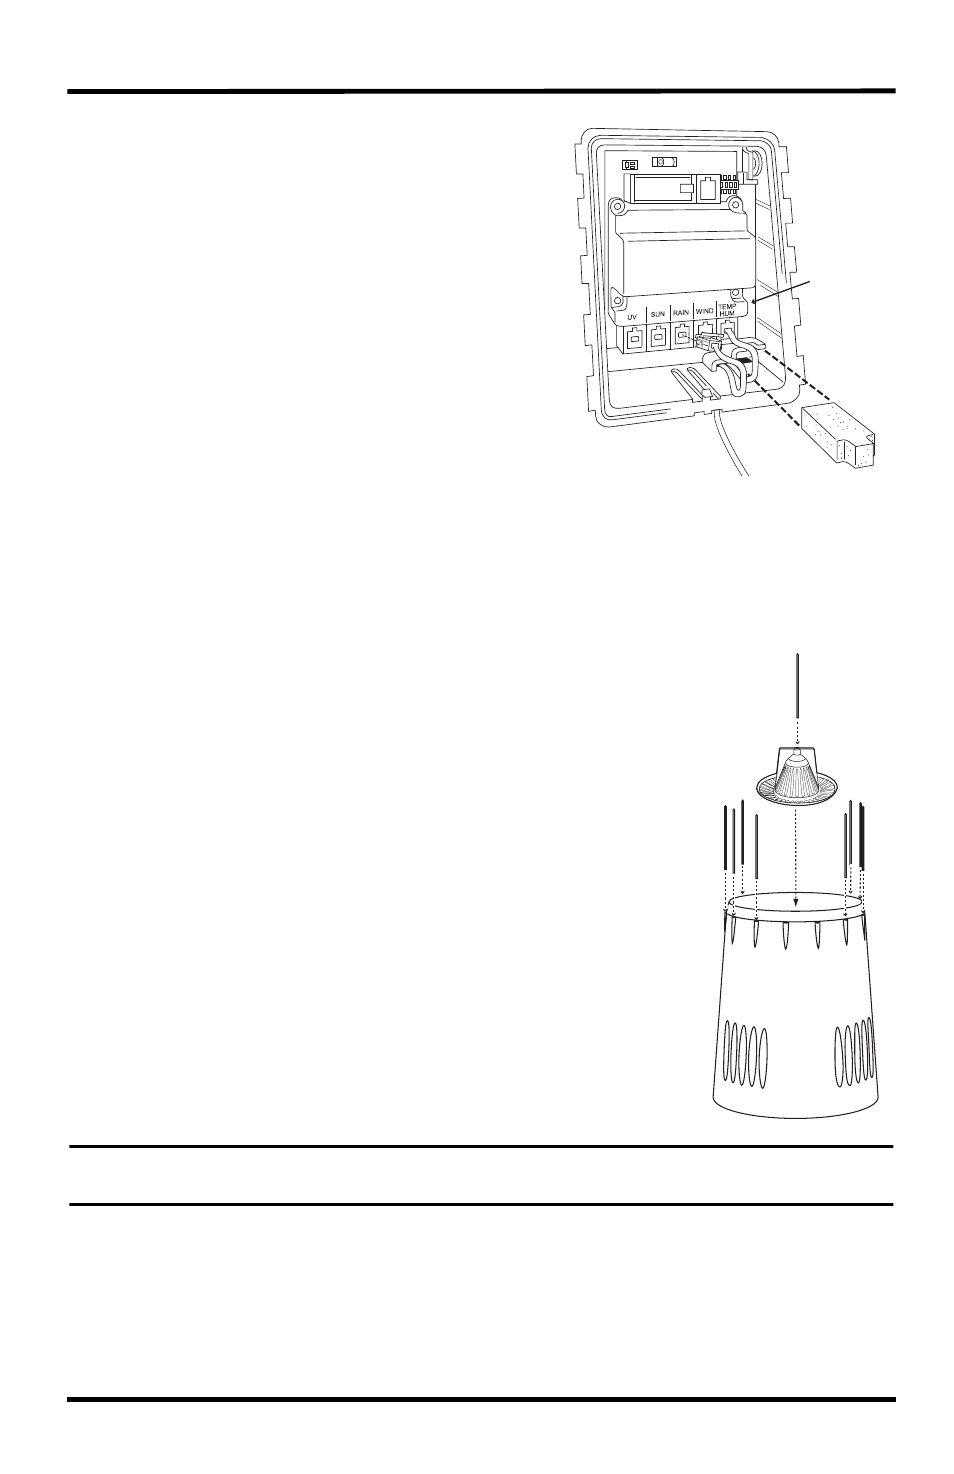
5. Open the transmitter shelter on the ISS.
Remove the foam insert and feed the rain
collector cable up through the opening.
Plug the cable to the appropriate connector.
Replace the foam and close the shelter.
Transmitter
Shelter
Sensor
Interface
Foam
Insert
6. To be certain the rain collector is functioning properly after installation, retest the
unit. See “Test the Rain Collector” on page
3.
7. To use the bird spikes, insert one spike in each socket around the rim of the cone.
The sockets are tapered: push firmly or tap lightly with a hammer for a more
secure fit.
8. Place the cone back onto the base by putting the latches
on the cone into the latch openings in the base and
rotating the cone clockwise until the latches “lock” into
place. As you reattach the cone, make sure to run the
cable to the cable slot in the base, or the cone will not
fit snugly against the base.
9. Place the debris screen, pointed end up, into the cone.
The screen prevents large bits of debris from blocking
the funnel hole. If bird nesting is a problem, you can
place a spike in the hole on top of the debris screen.
Note that using a bird spike in the debris screen may
make the screen more likely to be blown over or out in
a high wind gust.
Be careful; bird spikes may be sharp.
Note: If you choose not to install bird spikes now, keep the packet of spikes for possible future
use.
10.To prevent fraying or cutting of the cable where it is exposed to weather, it is
important that you secure it so it doesn’t whip about in the wind.
Use cable clips or weather resistant cable ties to secure the cable. Place clips or ties
approximately every 3 to 5 feet (1
to
1.6
m). Do not use metal staples or a staple gun
to secure cables. Metal staples—especially when installed with a staple gun—have a
tendency to cut the cables.