DAVIS Anemometer (7911, 7914) User Manual
Standard anemometer, Installation manual, Components
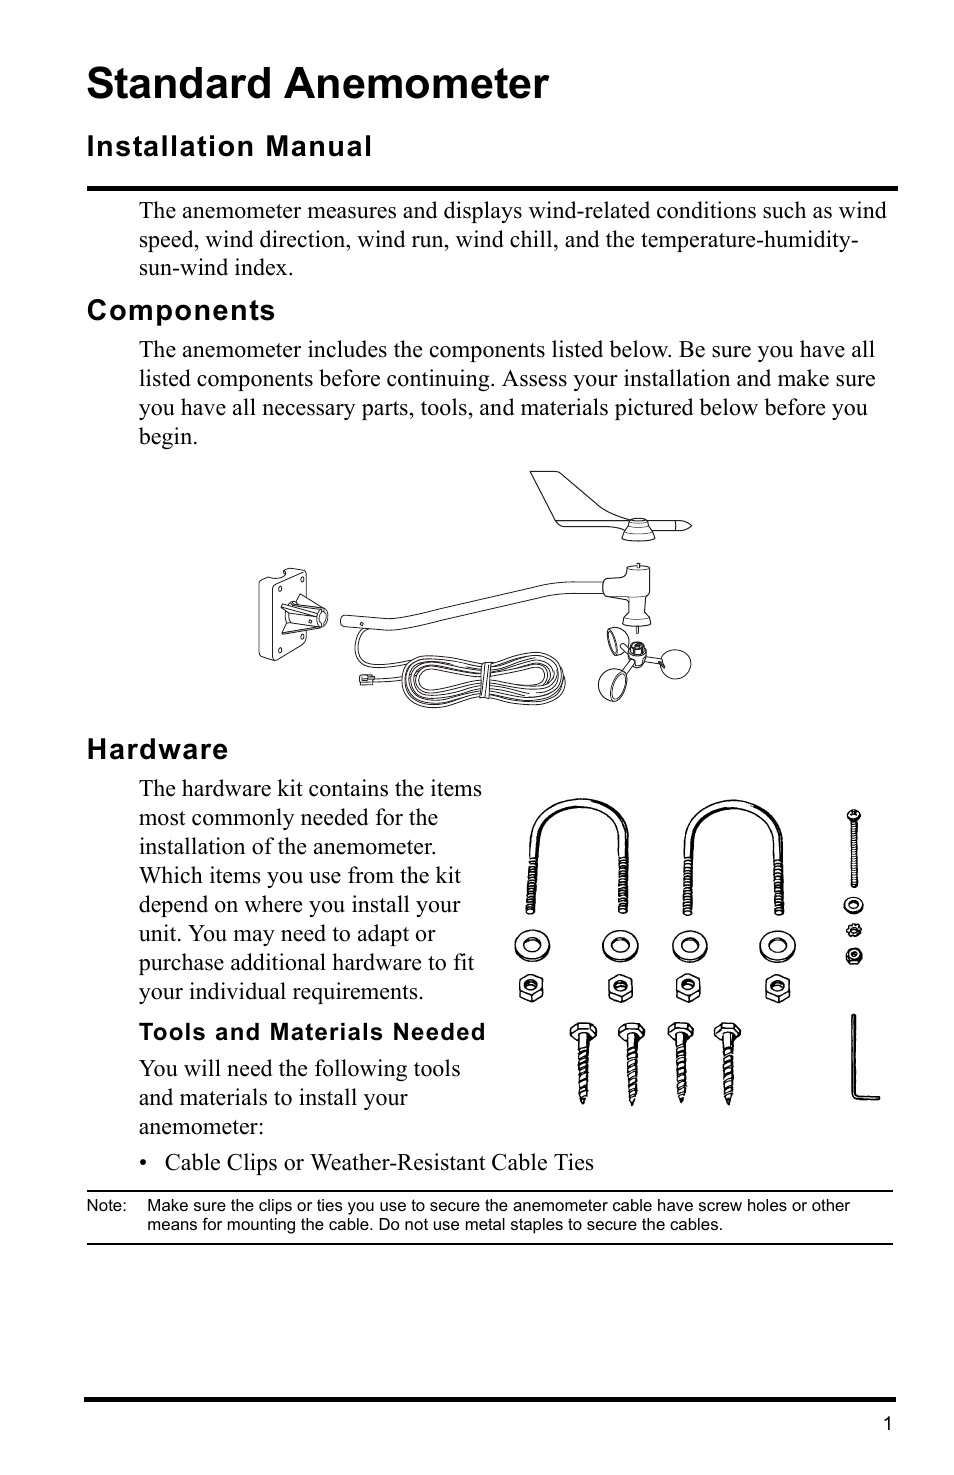
Table of contents
Document Outline
- Standard Anemometer
- Installation Manual
- Components
- Hardware
- Testing the Anemometer
- 1. Connect the anemometer cable to the appropriate connector on your junction box.
- 2. Push the wind cups onto the smaller of the two stainless steel shafts at the end of the arm.
- 3. Spin the wind cups gently. You haven’t secured them yet, and if you spin them too hard you may knock them off.
- 4. Check the display on your weather station to make sure you are getting a wind speed reading.
- 5. Grasp the upper, larger of the two stainless steel shafts at the end of the arm with your fingers and twist the shaft about 1/2 turn.
- 6. Check the display to make sure the wind direction reading on your display changes.
- Note: The wind direction readings will not change as rapidly as you turn the shaft. The station uses a low pass filter to smooth out the constant small shifts in wind direction and keep the direction display from jumping about in gusty winds.
- Assembling the Anemometer
- 1. Push the wind cups onto the smaller of the two stainless steel shafts.
- 2. Slide the wind cups as far up the shaft as possible.
- 3. Use the allen wrench provided to tighten the set screw on the side of the wind cups.
- 4. Spin the wind cups. If they do not spin freely, loosen the set screw, lower the cups slightly, then retighten the set screw.
- 5. Repeat Step 4 until the wind cups spin freely.
- Choosing the Best Anemometer Location
- Installing the Anemometer
- Installing on a Sensor Mounting Arm
- Check the Anemometer Base Orientation
- Installing the Base on a Wooden Post or Surface
- Installing on Antenna Mast or Metal Pipe
- 1. Hold the anemometer base against the pipe and insert the two U-bolts through the back of the base so that the U-bolts wrap around the pipe.
- 2. Place a 1/4" washer and a 1/4-20 hex nut over each end of the U-bolts and use a wrench to tighten the hex nuts.
- 1. Use two stainless steel hose clamps to attach the mounting base to masts or pipes larger than 1 1/4" diameter, large enough to fit around the mast or pipe and the anemometer base.
- 2. Hold the anemometer base against the pipe and fasten the hose clamps over the anemometer base and around the metal mast or pipe.
- Attaching Arm to Base
- Installing the wind vane
- 1. Slide the wind vane down onto the shaft as far as it will go. (Because of the shape of the shaft, the vane will only go on one way.)
- 2. Use the allen wrench provided to tighten the set screw on the side of the wind vane.
- 3. Test your assembly by pointing the wind vane in any direction and (using the compass or map as a guide) making sure the console displays the correct wind direction.
- 4. Because of the low pass filter used by the station, allow the wind direction reading approximately 5 seconds to stabilize after you turn the vane.
- 5. Spin the wind cups to make sure you get a wind speed reading. Readjust the cups if necessary.
- 6. Secure the cable to the metal mast or pipe with electrical tape. Secure the rest of the cable according to the directions below.
- Securing the Cable
- Securing cable
- Note: Do not use metal staples to secure cables. Metal staples can cut the cables.
- Maintenance
- Troubleshooting
- Contacting Davis Instruments Technical Support
- Specifications