Installing the anemometer, Installing on a sensor mounting arm, Check the anemometer base orientation – DAVIS Anemometer (7911, 7914) User Manual
Page 4: Insert the anemometer arm into the base, Installing the base on a wooden post or surface, Installing on antenna mast or metal pipe
Installing the Anemometer
4
default, the wind vane reports the correct wind direction if the anemometer
arm points true north.
To ensure correct orientation of the wind vane, mount the anemometer so that
the arm points true north.
Installing the Anemometer
Installing on a Sensor Mounting Arm
Consult the Sensor Mounting Arm manual for instructions.
Check the Anemometer Base Orientation
You will need to know which way to orient the base before installing it.
1. Insert the anemometer arm into the base.
2. Attempt to push the #4-40 x 1 1/4" pan head screw through the holes in the
arm and the base.
3. If the screw does not slide easily through the holes, rotate the base 180° to
line up the opposite holes, then try again.
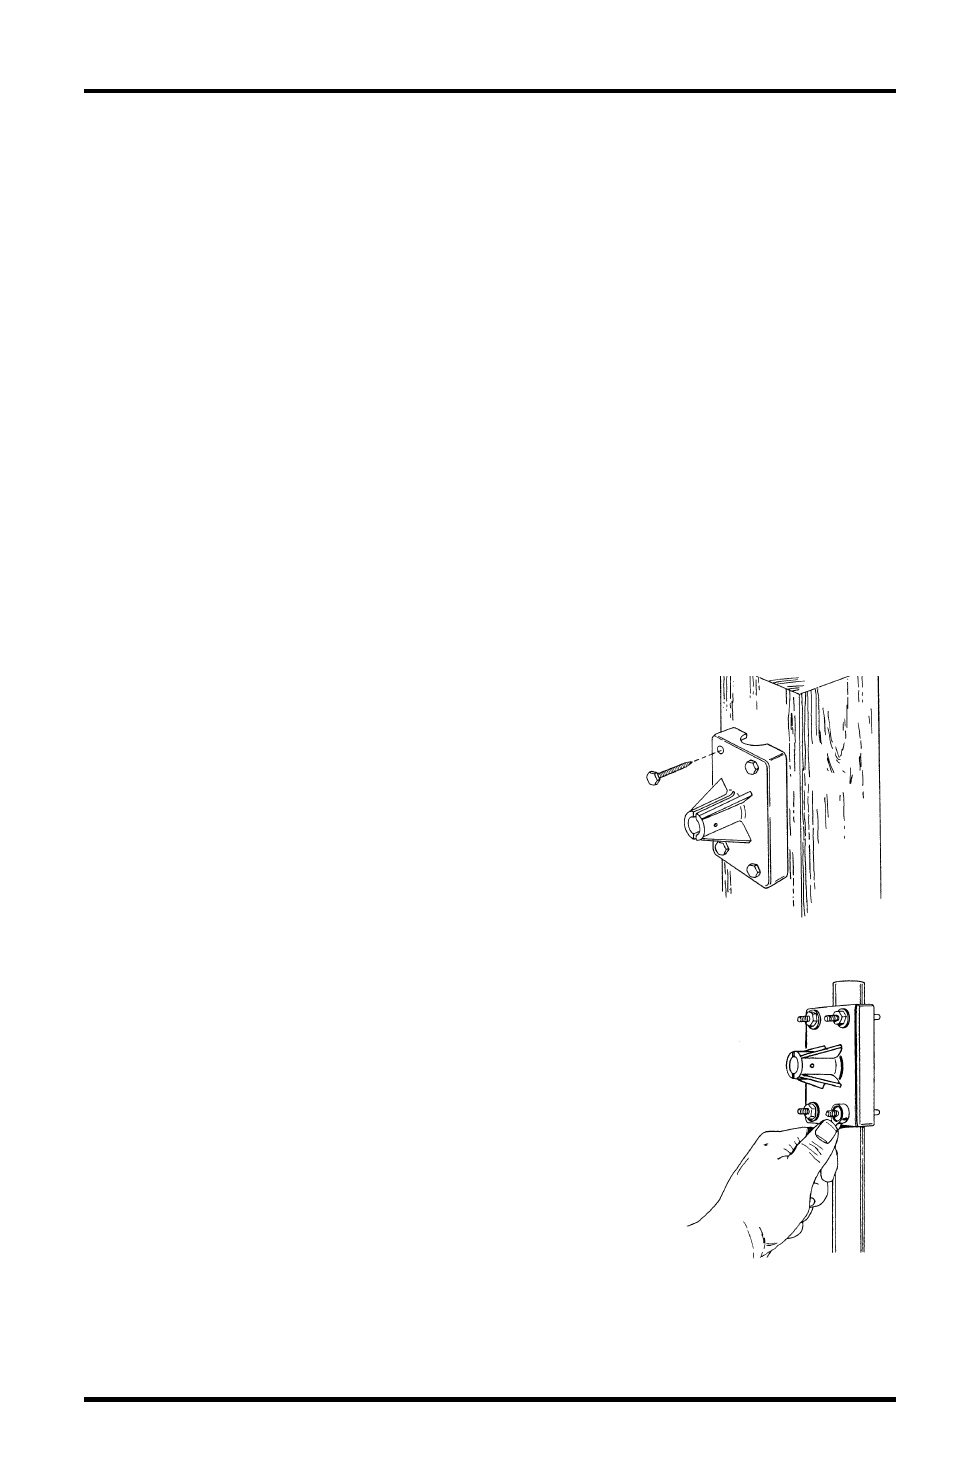
Installing the Base on a Wooden Post or Surface
1. Hold the anemometer base against the wood
surface and use a pencil to mark the location
of the four holes on the base.
Attaching base to wooden post
2. Use a drill with a 3/16" (5-mm) drill bit to
make pilot holes in these locations.
3. Drive the lag screws through the holes in the
anemometer base and into the wood.
Installing on Antenna Mast or Metal
Pipe
Attaching base to a pipe
using U-bolts
On an antenna mast or pipe with outside diameter of
7/8" to 1 1/4" (22 to 32 mm):
1. Hold the anemometer base against the pipe and
insert the two U-bolts through the back of the base
so that the U-bolts wrap around the pipe.
2. Place a 1/4" washer and a 1/4-20 hex nut over each
end of the U-bolts and use a wrench to tighten the
hex nuts.