Tighten the brace clamp using a wrench – DAVIS Solar Power Kit For Vantage Weather Stations and Envoy8X User Manual
Page 5
5
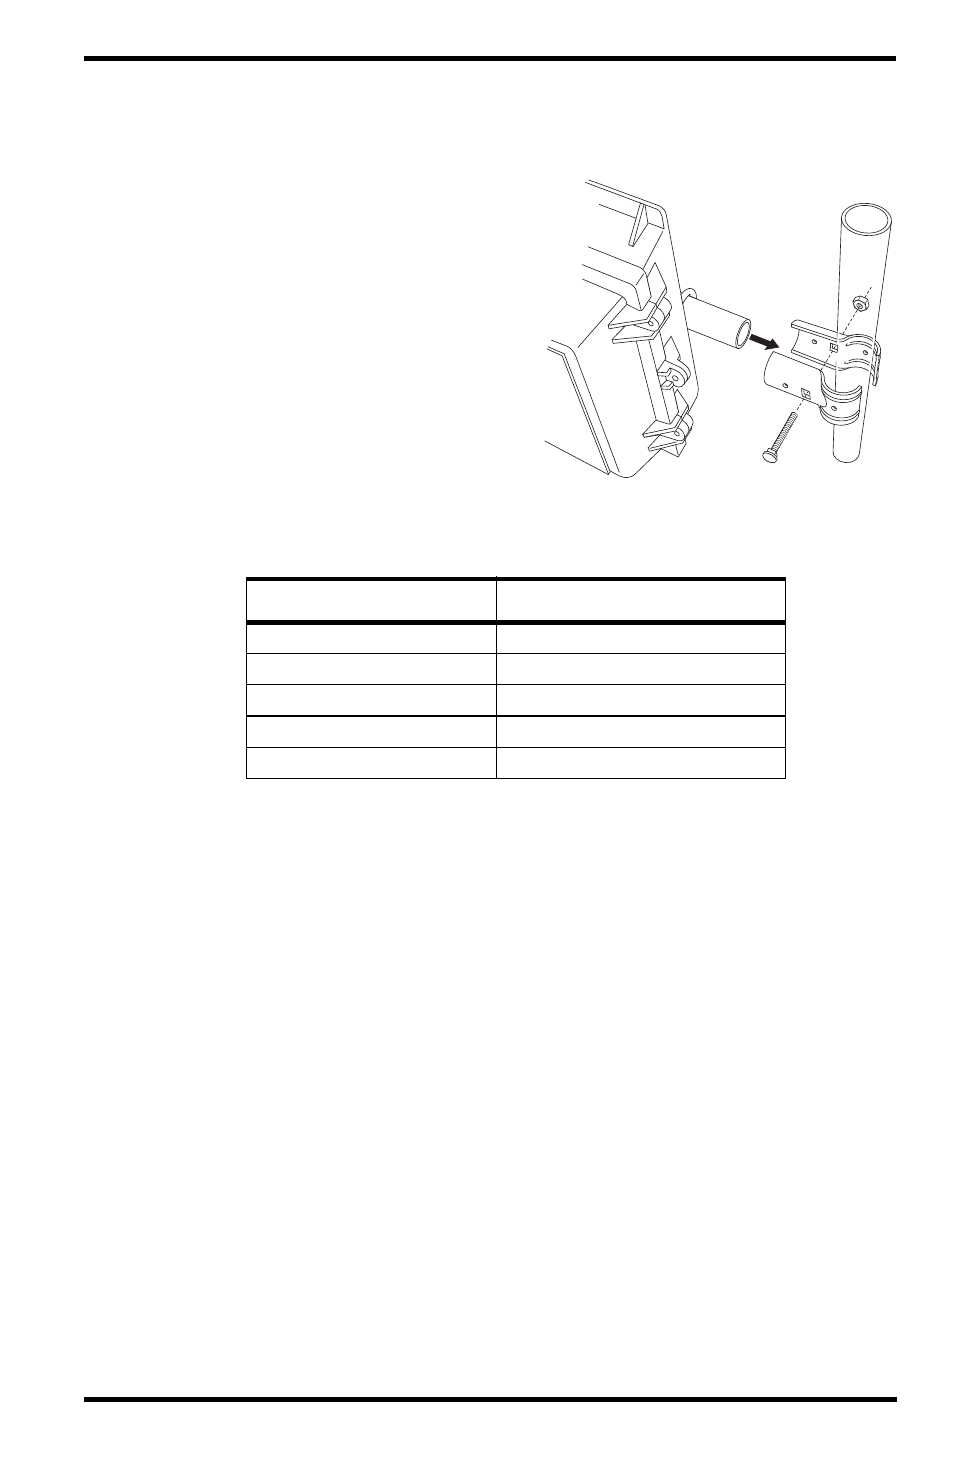
5. Assemble the brace clamp and loosely fasten it to the mounting pole.
6. While gripping the mounting pole/tripod end of the brace clamp with one
hand, slide the arm in as shown below with your other hand and tighten.
The kit can be positioned to face in
any direction depending on which
end of the arm you insert into the
brace clamp
7. Position the solar panel so that it
can retain the maximum solar expo-
sure.
The optimum tilt angle for the panel
(measured from the horizontal) is
determined by the site latitude. See
Table 1 for tilt recommendations.
Using a protractor, adjust the tilt angle of the panel until the angle the panel
makes with the horizontal matches the recommended tilt angle.
8. Tighten the brace clamp using a wrench.
9. Re-tighten the screws that hold the mounting pole to the post.
10. Fit the end cap onto the exposed end of the Solar Power Kit arm.
Connecting the Cables - Cabled Vantage Pro2, Cabled
Weather Envoy, Envoy8X
1. If using a Multi-Purpose Shelter, open the shelter by using a flat head
screwdriver on the two 10-32 flat head screws. If using a Complete System
Shelter, unlatch the two latches on the side of the shelter.
2. Mount the console on the inside of the Complete System Shelter or the
Envoy on the inside of the Multi-Purpose Shelter as shown on the follow-
ing page. If you prefer to mount your console or Envoy elsewhere, see
your shelter’s installation manual for instructions and considerations.
3. Remove the protective vinyl cap from the power cord plug.
T
ABLE
1: S
OLAR
P
ANEL
T
ILT
R
ECOMMENDATIONS
Site Latitude
Recommended Tilt Angle
0° to 4°
10°
5° to 20°
latitude + 5°
21° to 45°
latitude + 10°
46° to 65°
latitude + 15°
65° to 75°
80°
Solar Panel
Shelter
Extension
Tube
Arm
Brace Clamp
Carriage Bolt
and Nut