Dlc location, 2 data link connector and location, 3 obd ii scan tool hookup – Actron KAL9620A User Manual
Page 6
6
9620 Professional OBD II Scan Tool
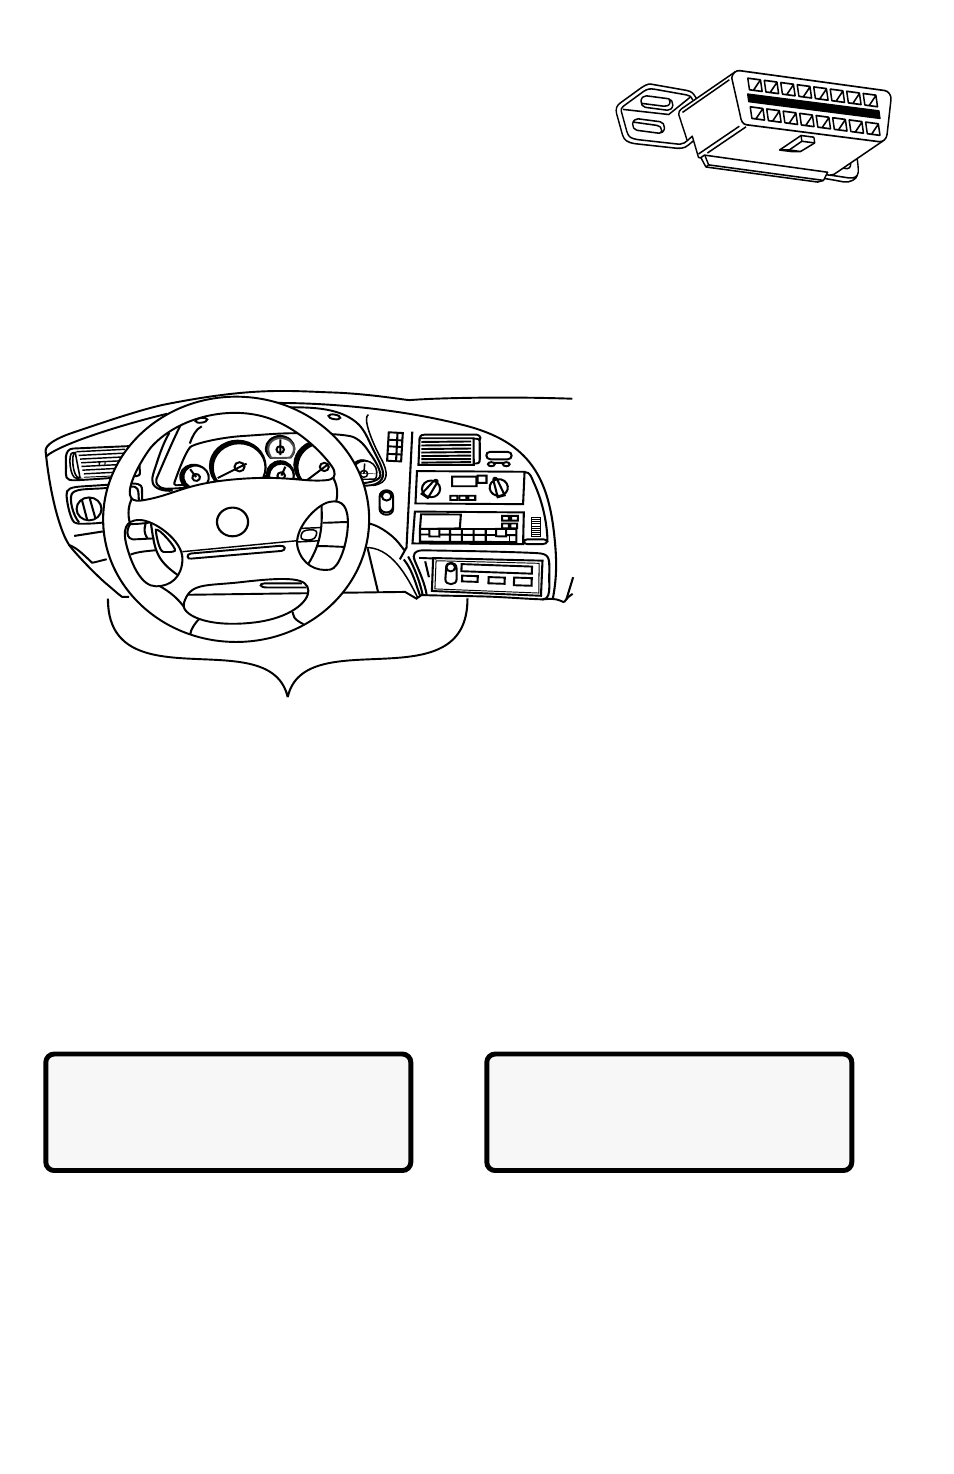
DLC Location
1.2 Data Link Connector and Location
The scan tool communicates with the vehicle PCM via a
data link connector (DLC) also referred to as a J1962
connector. The term J1962 is taken from physical and
electrical specification number assigned by SAE (Society of
Automotive Engineers). A standardized DLC means all compliant
vehicles will use the same DLC with the generic link information available on the same
pins regardless of vehicle make or model. In addition to the connector definitions, is a
guideline on where the connector is to be located in the vehicle. This guideline states
that the DLC should be located under the dashboard on the driver side of the vehicle.
However, not all OBD II DLCs are located under the dash on the driver side. If required,
refer to vehicle service documentation for the DLC location.
1.3 OBD II Scan Tool Hookup
The OBD II cable attached to the scan tool fits the OBD II DLC. Because the OBD II J1962
connector contains dedicated pins for power and ground, only a single cable connection is
required for both scan tool power and PCM communication.
Connect the scan tool to the DLC. This connection will provide power for the scan tool.
The DLC maintains power even when the ignition is turned off. Therefore, connection to
the battery is not required.
When the scan tool powers up, a series of screens are displayed. The screens start with
a Welcome screen and end with a Key Button Help screen.
The screens between the Welcome screen and the Key Button Help screen are for
tool self-tests and software ID. Refer to this software ID when contacting the Actron
technical support line with a problem. To review the key button definitions, push the
(HELP) key; otherwise, press ENTER to continue.
The scan tool requires a minimum of 8 volts to power up. If a problem occurs with power-
up, review Section 4: Help and Troubleshooting Tips.
Welcome To
The Global OBDII
SCANTOOL
Press HELP For Key |
Button Information
Press ENTER To Cont