BMR Suspension TAS011 User Manual
Page 3
3
8. Using a 7/16” wrench, remove the u-joint caps from the rear u-joint. Disconnect the
driveshaft from the rear end and either remove the driveshaft or tie it up out of the way.
9. Using a pair of vise grips, clamp the rubber brake hose above the axle. This will prevent
brake fluid loss when the hose is disconnected from the rear end.
10. Using a ½” wrench, disconnect the brake lines from the brake hose.
11. Support the rear end with jack stands.
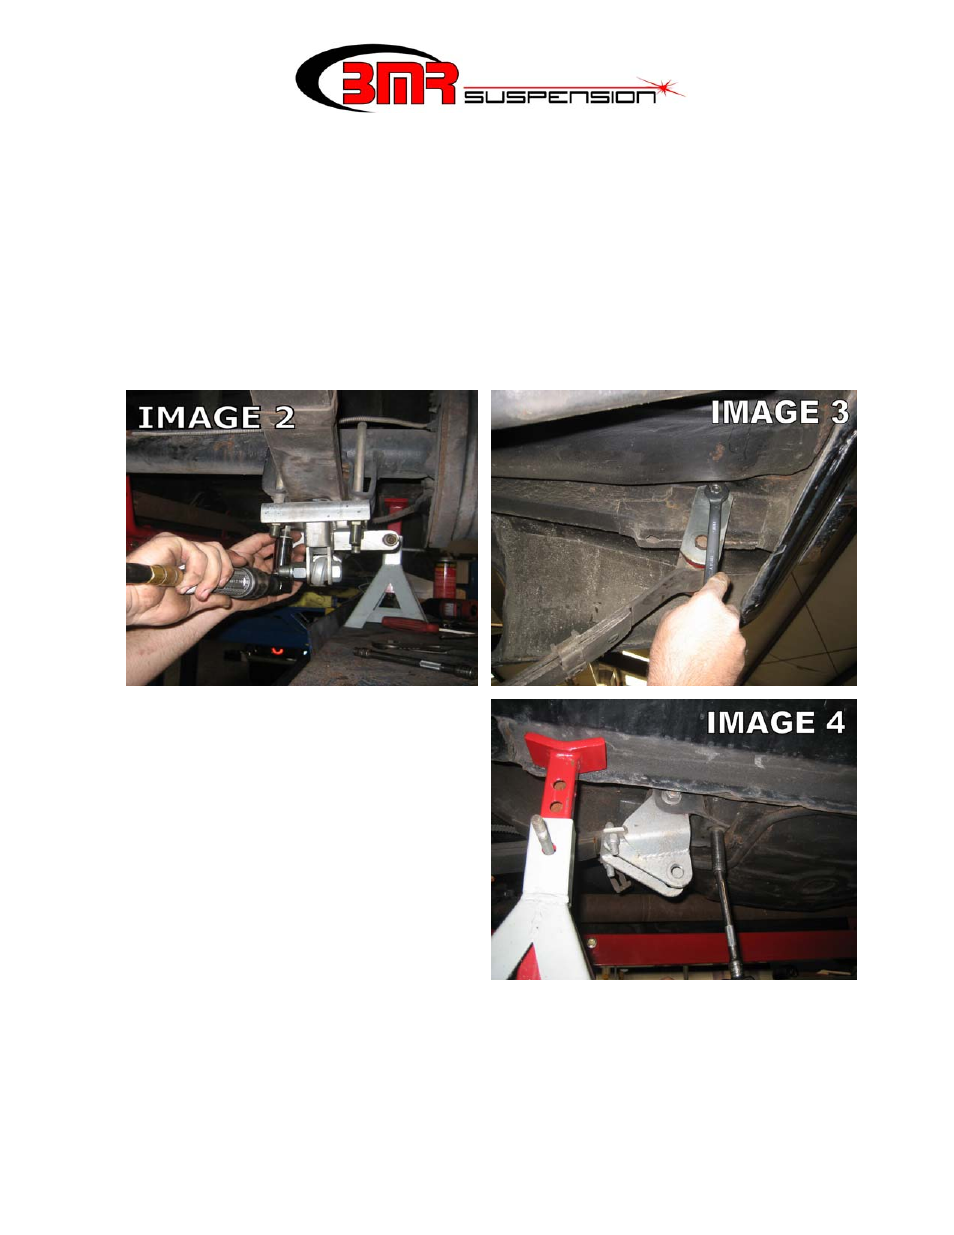
12. Using a 3/4” socket, remove the leaf spring U-bolts on the rear end. (Image 2)
NOTE: the image shown has aftermarket traction bars installed. Factory leaf spring
mounts may appear slightly different in nature.
13. Using a 5/8” socket, loosen and remove the rear leaf spring shackle bolts. Loosen the
upper shackle bolt at the frame and remove the shackles. (Image 3)
14. Using a 9/16” socket, remove the (3)
bolts on the front spring mount of each
leaf spring. (Image 4) NOTE: the image
shown had aftermarket traction bars
installed. Front leaf spring eye may
appear slightly different in nature.
15. Once all bolts are removed, remove the
leaf springs.
16. Remove the rear axle.
17. With everything removed there should
be access to the entire rear floor pan and
axle relief. Remove all muffler hangers
and any additional un-needed brackets
that might interfere with the following installation.
18. The first item to install is the shock cross member. This step can be performed by one
person but is much simpler with a helper. Have a helper hold the shock cross-member up
into place as shown in Image 5 on the next page.