Figure 15 create v-vol wizard pane (2), 15 create v-vol wizard pane (2), Figure 15 – HP StorageWorks XP Remote Web Console Software User Manual
Page 53
53
•
Capacity: V-VOL’s capacity. If you selected MB from the Capacity Unit list, enter a whole number from
46 to 2097151. If you selected block, enter a whole number from 96000 to 4294967296. If you
selected Cyl, enter a whole number from 50 to 2236962.
•
Number of V-VOL: Number of V-VOLs you want to add. Enter a whole number from 1 to 256.
•
Set button: dds V-VOLs to the V-VOL information setting list.
•
Delete button: Deletes selected V-VOLs from the V-VOL information setting list.
•
V-VOL information setting list (middle of pane): Information about the V-VOL(s) you are creating.
• No.: Number
• Emulation: V-VOL’s emulation type
• Capacity: V-VOL’s capacity
•
Back button: Returns to the New V-VOL Group pane while maintaining settings in this pane.
•
Next button: Confirms the setting in this pane, and displays the Create V-VOL wizard pane (2).
•
Cancel button: Cancels the setting in the Create V-VOL wizard pane (1), and closes the pane.
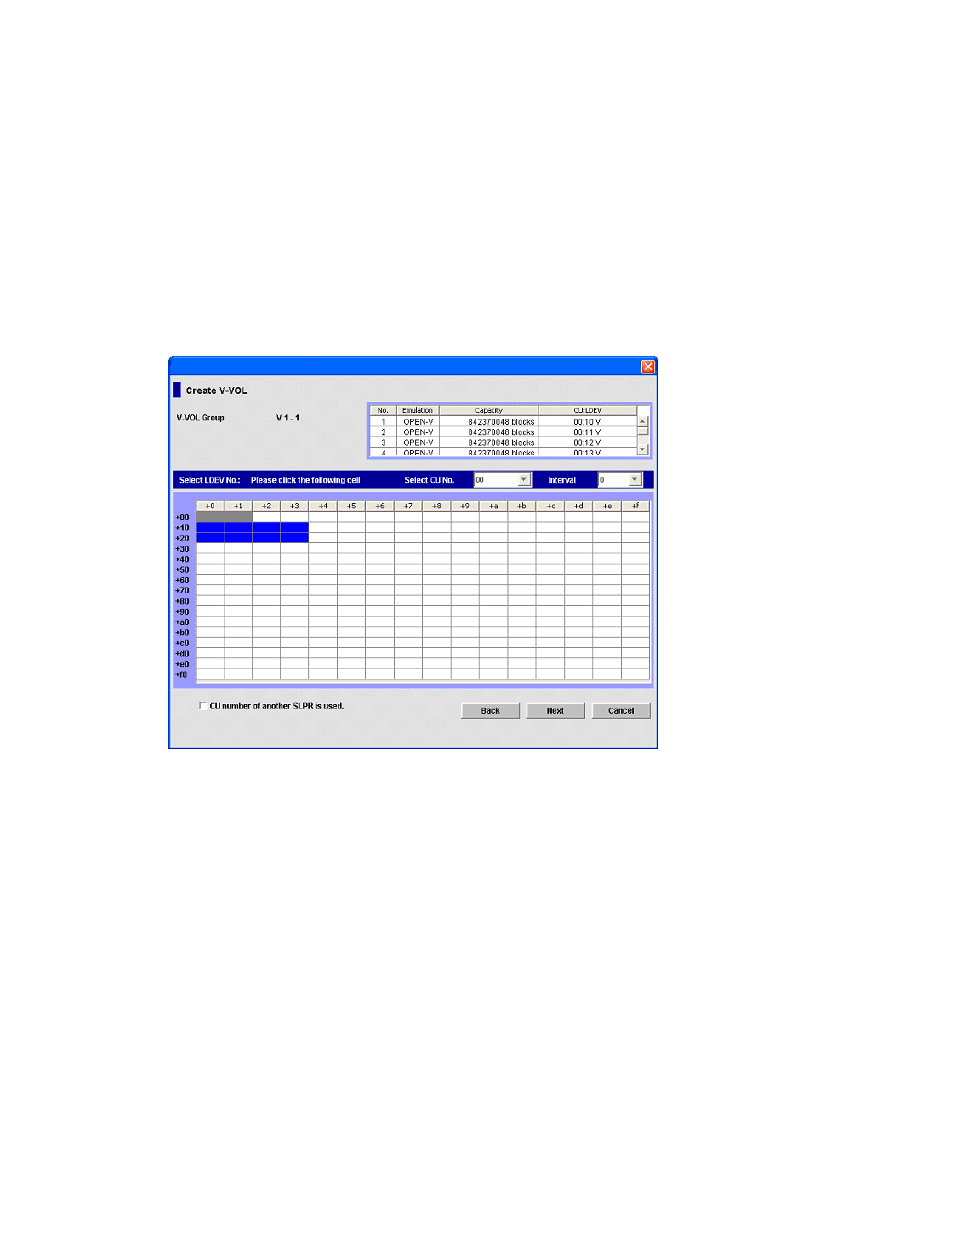
Figure 15
Create V-VOL wizard pane (2)
•
V-VOL Group: V-VOL group ID.
•
V-VOL information setting list (upper-right area of pane): Information about the V-VOLs you are
creating.
• No.: Number
• Emulation: V-VOL’s emulation type
• Capacity: V-VOL’s capacity
• CU:LDEV: V-VOL’s CU and LDEV numbers
•
Select LDEV No.: Settings of LDEV numbers for the CU number selected in Select CU No. Numbers in
the upper end and left side indicate the LDEV number. For example, the LDEV number of the cell
whose upper end is +2 and the left side is +10 is 12.
Gray cells indicate LDEV numbers that are already used for other volumes, white cells indicate unused
LDEV numbers, and blue cells indicate LDEV numbers selected for V-VOLs in this pane.
•
Select CU No.: CU number.
•
Interval: Interval between LDEV numbers to be assigned to newly created V-VOLs. If you select 0, LDEV
numbers are sequential.