Figure 7-8 migrate-step 3 of 4 pop-up window – HP StorageWorks XP10000 Disk Array User Manual
Page 62
62
•
When you finish modifying all intended volumes, go to step 9.
•
If you want to modify more migration target volumes, go to step 7.
7.
Click the Save and Continue button.
8.
From the drop-down list for Source Volume of the volume pair, select the LDEV of the migration source
volume for which you want to modify the candidate target volume.
In the list of candidate migration target volumes, candidate target volumes are displayed for the selected
migration source volume, as shown in Figure 7-7 below. To select the migration target volume, go to step
6.
Figure 7-7
Modify Volume Pair Pop-up Window (drop down list for Source Volume)
9.
Click the Save and Close button.
The Modify Volume Pair pop-up window closes, and then returns to the Migrate-Step 2 of 4 pop-up
window.
10.
In the Migrate-Step 2 of 4 pop-up window, click the Next button.
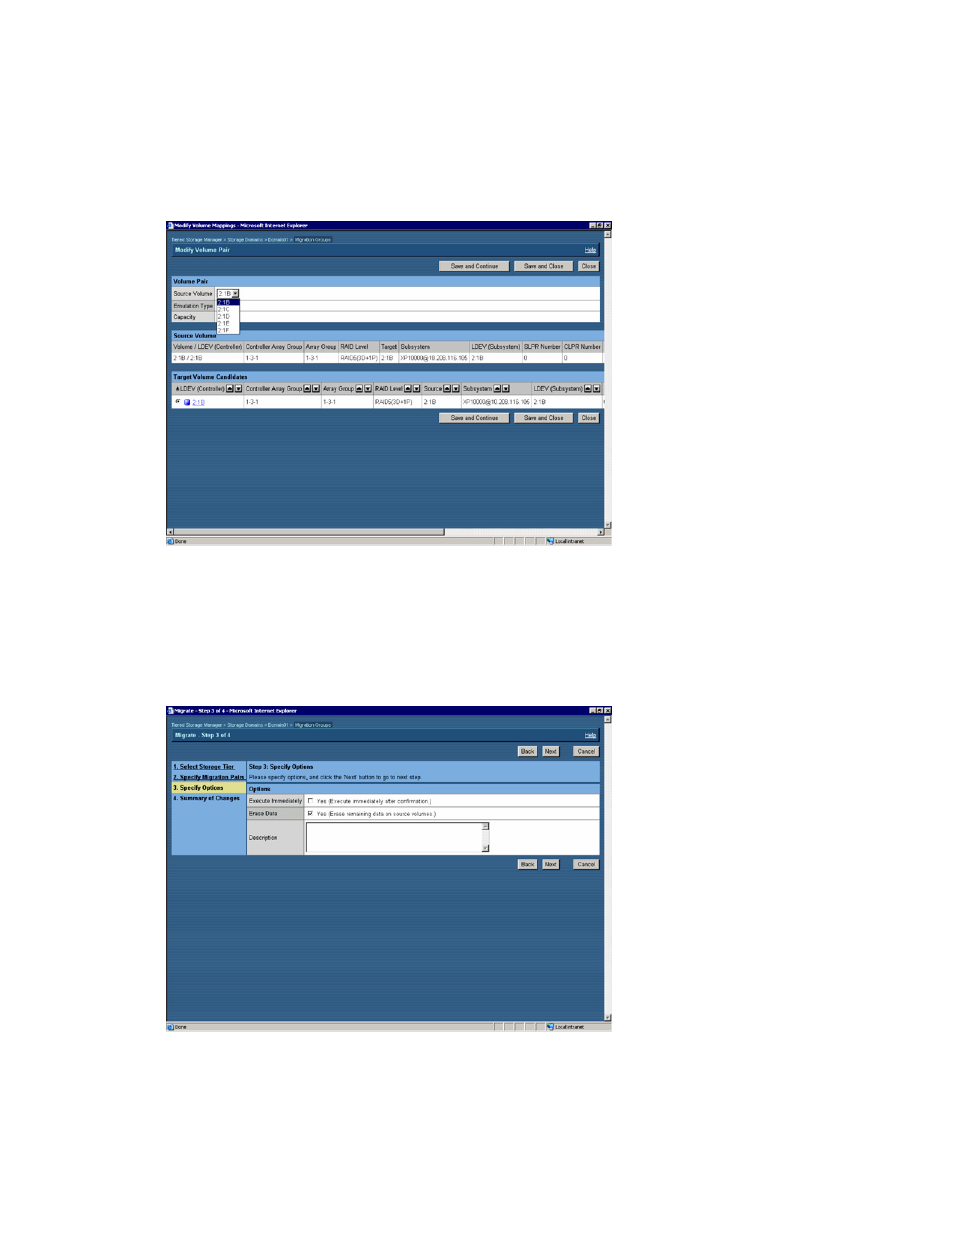
The Migrate-Step 3 of 4 pop-up window displays, as shown in Figure 7-8 below, prompting you to select
the desired migration options.
Figure 7-8
Migrate-Step 3 of 4 Pop-up Window
11.
In the Migrate-Step 3 of 4 pop-up window, set the migration options and Description.
You can select either migration concurrent to task registration or migration subsequent to task
registration. To perform migration concurrent to task registration, select Execute Immediately.
To delete data on the migration source volume after migration, select Erase Data.
In the Migrate-Step 3 of 4 pop-up window, set the Description.