HP Officejet Lx All-in-One User Manual
Page 77
4`9
5.
Optionally, select a range of pages to be faxed.
Note:
If you want to send the fax to more than one recipient, leave the number of copies set to 1 and
see "Sending a Fax to More Than One Recipient."
6.
Click the
OK
button. Messages appear telling you that printing has started, and then the Send Fax dialog
box appears.
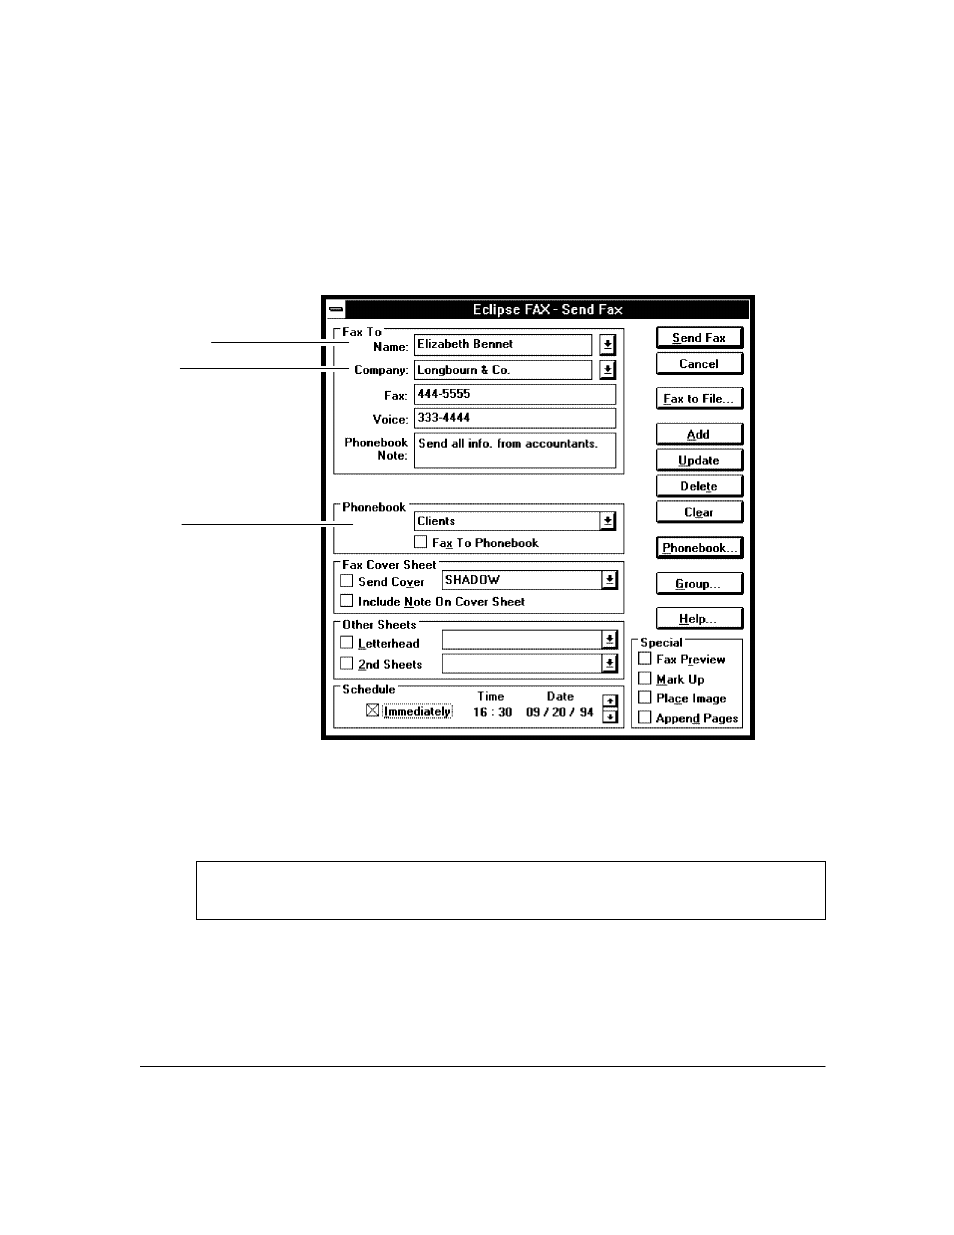
The Name box
The Company box
The Phonebook box
7.
To select the recipient's name from an existing Eclipse FAX SE phonebook, go on to step 8. Otherwise,
do the following:
:
In the
Name
box, type the name of the recipient`which can be a person or a company`as you want
it to appear on the cover page (if you include one).
Using the Phonebook Button
Optionally, you can use the Phonebook button to add, change the name of, or delete a phonebook. See
"Adding, Changing, or Deleting a Phonebook from the Send Fax Dialog Box."
:
Optionally, in the
Company
box, type or select the recipient's company. This information isn't
required, but will be included in the cover page, if you use one.
:
In the
Fax
box, type the recipient's fax number, including prefix and area code, if necessary.