Canon imagePROGRAF iPF9400 User Manual
User's guide
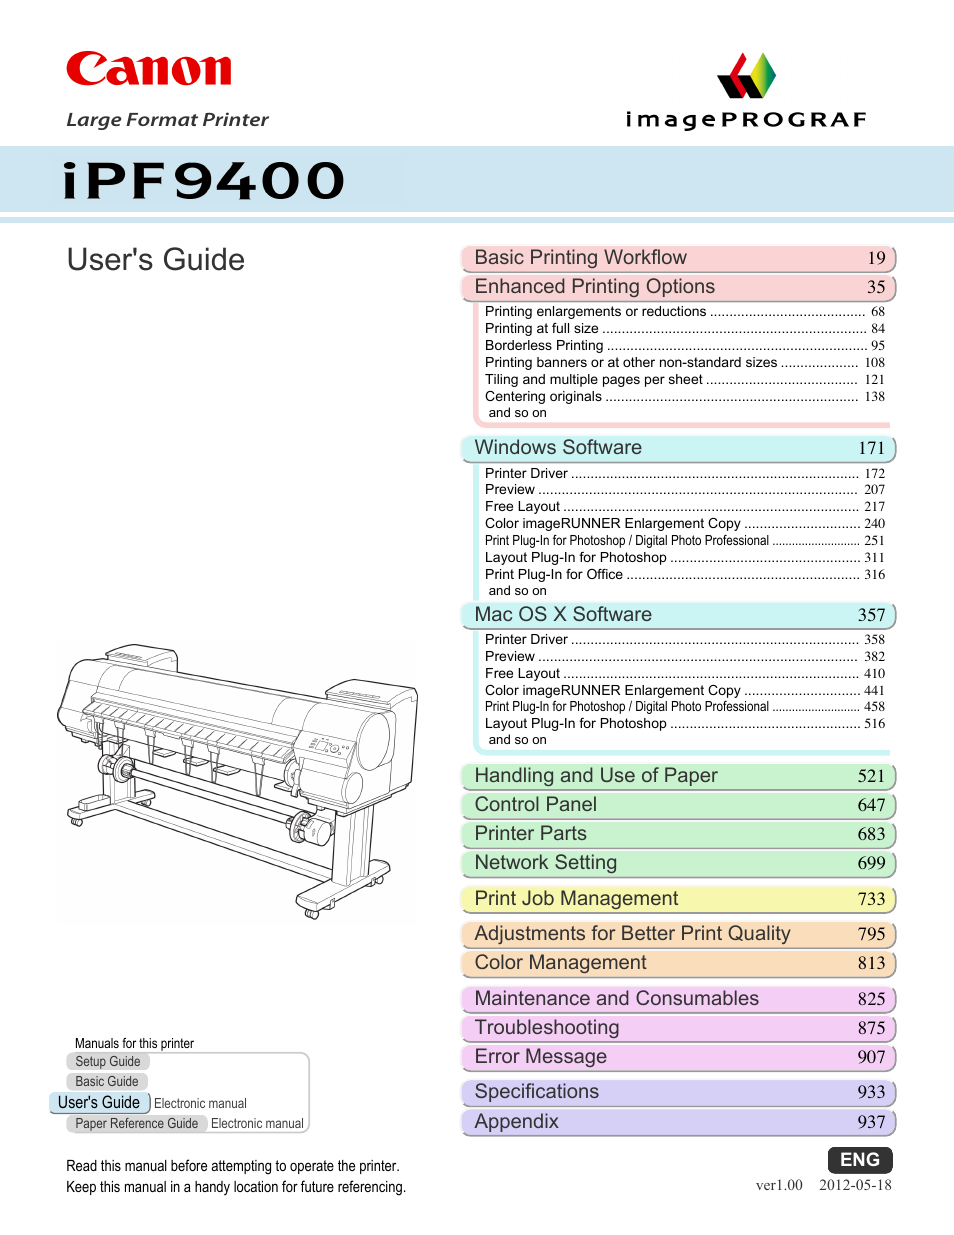
Table of contents
Document Outline
- Cover
- Contents
- Basic Printing Workflow
- Enhanced Printing Options
- Choosing Paper for Printing
- Printing Photos and Office Documents
- Printing Photos and Images
- Printing Photos and Images (Windows)
- Printing Photos and Images (Mac OS X)
- Printing from Photoshop
- Printing Adobe RGB Images (Windows)
- Printing Adobe RGB Images (Mac OS X)
- Printing Office Documents
- Printing Office Documents (Windows)
- Printing Office Documents (Mac OS X)
- Using PosterArtist to Compose Originals
- Adjusting Images
- Adjusting the Color in the Printer Driver
- Fine-Tuning Colors of Photos and Images (Windows)
- Fine-Tuning Colors of Photos and Images (Mac OS X)
- Giving Priority to Particular Graphic Elements and Colors for Printing
- Choosing the Document Type and Printing Conditions (Windows)
- Choosing the Document Type and Printing Conditions (Mac OS X)
- Printing enlargements or reductions
- Resizing Originals to Match the Paper Size
- Resizing Originals to Match the Paper Size (Windows)
- Resizing Originals to Match the Paper Size (Mac OS X)
- Resizing Originals to Fit the Roll Width
- Resizing Originals to Fit the Roll Width (Windows)
- Resizing Originals to Fit the Roll Width (Mac OS X)
- Resizing Originals by Entering a Scaling Value
- Resizing Originals by Entering a Scaling Value (Windows)
- Resizing Originals by Entering a Scaling Value (Mac OS X)
- Printing at full size
- Borderless Printing
- Borderless Printing on Paper of Equivalent Size
- Borderless Printing by Resizing Originals to Match the Paper Size (Windows)
- Borderless Printing by Resizing Originals to Match the Paper Size (Mac OS X)
- Borderless Printing by Resizing Originals to Fit the Roll Width
- Borderless Printing by Resizing Originals to Fit the Roll Width (Windows)
- Borderless Printing by Resizing Originals to Fit the Roll Width (Mac OS X)
- Printing banners or at other non-standard sizes
- Printing Vertical or Horizontal Banners (Large-Format Printing)
- Printing Vertical or Horizontal Banners (Large-Format Printing; Windows)
- Printing Vertical or Horizontal Banners (Large-Format Printing; Mac OS X)
- Printing on Non-Standard Paper Sizes
- Printing on Non-Standard Paper Sizes (Windows)
- Printing on Non-Standard Paper Sizes (Mac OS X)
- Tiling and multiple pages per sheet
- Printing Multiple Originals Next to Each Other
- Printing Multiple Originals Next to Each Other (Windows)
- Printing Multiple Originals Next to Each Other (Mac OS X)
- Printing Multiple Pages Continuously
- Printing Multiple Pages Continuously (Windows)
- Printing Multiple Pages Continuously (Mac OS X)
- Printing Multiple Pages Per Sheet
- Printing Multiple Pages Per Sheet (Windows)
- Printing Multiple Pages Per Sheet (Mac OS X)
- Printing Posters in Sections
- Printing Large Posters (Windows)
- Centering originals
- Conserving roll paper
- Conserving Roll Paper by Rotating Originals 90 Degrees
- Conserving Roll Paper by Rotating Originals 90 Degrees (Windows)
- Conserving Roll Paper by Rotating Originals 90 Degrees (Mac OS X)
- Conserving Roll Paper by Printing Originals Without Top and Bottom Margins
- Conserving Roll Paper by Printing Originals Without Top and Bottom Margins (Windows)
- Conserving Roll Paper by Printing Originals Without Top and Bottom Margins (Mac OS X)
- Checking Images Before Printing
- Other useful settings
- Printing With Watermarks
- Printing with Watermarks— COPY, FILE COPY, and so on (Windows)
- Making the Original Orientation Match the Paper Orientation
- Making the Original Orientation Match the Paper Orientation (Windows)
- Making the Original Orientation Match the Paper Orientation (Mac OS X)
- Using Favorites
- Cutting Roll Paper After Printing
- Cutting Roll Paper After Printing (Windows)
- Cutting Roll Paper After Printing (Mac OS X)
- Windows Software
- Printer Driver
- Printer Driver Settings
- Specifying Paper in the Printer Driver
- Confirming Print Settings
- Checking the Layout in a Preview Before Printing
- Using Favorites
- Accessing the Printer Driver Dialog Box from Applications
- Accessing the Printer Driver Dialog Box from the Operating System Menu
- Main Sheet
- Paper Information on Printer Dialog Box
- Paper Detailed Settings Dialog Box
- View Settings Dialog Box for the Printing Application
- Color Adjustment Sheet: Color
- Object Adjustment Dialog box: Color
- Matching Sheet
- Color Adjustment Sheet: Monochrome
- Object Adjustment Dialog box: Monochrome
- Gray Adjustment Sheet
- Page Setup Sheet
- Output Method Dialog box
- Paper Size Options Dialog Box
- Layout Sheet
- Page Options Dialog Box
- Special Settings Dialog Box
- Favorites Sheet
- Utility Sheet
- Support Sheet
- Settings Summaries Dialog Box
- Device Settings Sheet
- Preview
- Free Layout
- The Features of Free Layout
- Starting Free Layout
- Free Layout Main Window
- Detailed Settings
- Preferences Dialog Box
- Page Options Dialog Box
- Zoom Dialog Box
- Format Dialog Box
- Laying out a Multiple-File Document on One Page
- Laying out a Document Created with Multiple Application Programs on One Page
- Selecting an Object
- Changing the Object Size
- Moving an Object
- Rotating an Object
- Laying out Objects Automatically
- Aligning Objects
- Changing the Object Overlapping Order
- Pasting a Copied or Cut Object
- Folded Duplex Window
- Finished Size Settings Dialog Box
- Binding Settings Dialog Box
- Prints using Folded Duplex
- Color imageRUNNER Enlargement Copy
- The Features of Color imageRUNNER Enlargement Copy
- Starting Color imageRUNNER Enlargement Copy
- Color imageRUNNER Enlargement Copy Dialog Box
- Hot Folder
- Creating a New Hot Folder
- Specifying an Existing Shared Folder as a Hot Folder
- Setting the Print Parameters
- Printing Enlargements of Scanned Originals from a Color imageRUNNER
- Print Plug-In for Photoshop / Digital Photo Professional
- Features of the Print Plug-In for Photoshop/Digital Photo Professional
- Installation Procedures
- Uninstall Procedures
- Starting from Photoshop
- Starting from Digital Photo Professional
- Print Plug-In for Photoshop/Digital Photo Professional Main Window
- Preview Area
- Main Sheet
- Page Setup Sheet
- Color Settings Sheet (Color)
- Color Settings Sheet (Monochrome)
- Print History Sheet
- Support Sheet
- Adjustment pattern setting dialog box
- Paper Detailed Settings Dialog Box
- Set Configuration Dialog Box
- ICC Conversion Options dialog box
- Roll Paper Options Dialog Box
- Size Options Dialog Box
- Curves Dialog Box
- Print History Details Dialog Box
- Utilize Three Types of Previews
- Check Image with Print Area Layout
- Check the original image with Image
- Check Image with Roll Paper Preview
- Print with a Desired Picture Quality
- Adjust the Colors and Print
- Adjust the Colors while Checking the Preview (for Color)
- Adjust the Colors while Checking the Preview (for Monochrome)
- Adjust the Colors by Color Matching
- Print High-Quality Adobe RGB16bit Images
- Prints monochrome photographs with high quality
- Using Adobe CMM
- Printing an Adjustment Pattern and Selecting Adjustment Values
- Perform Black Point Compensation
- Perform Printing Press Simulation Print
- Enlarge/Reduce and Print
- Enlarge/Reduce and Print Matching Output Media Size
- Enlarge/Reduce and Print Matching Width of Roll Paper
- Specify Scaling, Enlarge/Reduce and Print
- Print with No Borders
- Customize Media Settings
- Utilize Print History
- Confirm Print History Details
- Apply Print History to an Image
- Store Print History to Print Preferences
- Delete Print History
- Export Print History from Print Preferences
- Import Print History to Print Preferences
- Delete Print History from Print Preferences
- Set Information to Print with Image
- Layout Plug-In for Photoshop
- Print Plug-In for Office
- Print Plug-In for Office features
- Steps to install
- Steps to uninstall
- When Print Plug-In for Office is not displayed
- To start from Microsoft Word
- Print Matching Roll Width (Word)
- Borderless Printing (Word)
- Multi-Page Printing (Word)
- Register the settings (Word)
- Print Using Registered Settings (Word)
- Portrait Orientation / Landscape Orientation (Word)
- To start from Microsoft PowerPoint
- Print Matching Roll Width (PowerPoint)
- Borderless Printing (PowerPoint)
- Multi-Page Printing (PowerPoint)
- Register the settings (PowerPoint)
- Print Using Registered Settings (PowerPoint)
- Portrait Orientation / Landscape Orientation (PowerPoint)
- To start from Microsoft Excel
- Print Entire Sheet (Excel)
- Print Selected Area (Excel)
- Configuring Binding (Excel)
- Configuring Special Settings
- Printer Driver
- Mac OS X Software
- Printer Driver
- Printer Driver Settings
- Specifying Paper in the Printer Driver
- Confirming Print Settings
- Checking the Layout in a Preview Before Printing
- Using Favorites
- Accessing the Printer Driver Dialog Box from Applications
- Main Pane
- Paper Information on Printer Dialog Box
- Paper Detailed Settings Dialog Box
- View settings Dialog Box for the Printing Application
- Matching pane
- Color Settings Pane: Color
- Object Adjustment dialog box: Color
- Color Settings Pane: Monochrome
- Object Adjustment dialog box: Monochrome
- Gray Adjustment Pane
- Page Setup Pane
- Utility Pane
- Additional Settings Pane
- Support Pane
- Preview
- The Features of Preview
- Starting Preview
- Preview Main Window
- Paper Settings Panel
- Easy Settings
- Advanced Settings
- Output Settings Panel
- Color Settings Panel
- Color Adjustment
- Gray Adjustment
- Matching
- Driver Matching Mode
- ICC Matching Mode
- ColorSync
- Preferences Dialog Box
- Zoom Dialog Box
- Go to Page Dialog Box
- Print with No Borders
- Print on the Center
- Not Print Spaces at the Top/Bottom
- Print Page Rotated 90 Degrees
- Display with Fitting to the Width of the Paper
- Display with All
- Display with Actual Size
- Moving a Page
- Free Layout
- The Features of Free Layout
- Starting Free Layout
- Free Layout Main Window
- Paper Settings Panel
- Easy Settings
- Advanced Settings
- Color Settings Panel
- Color Adjustment
- Gray Adjustment
- Matching
- Driver Matching Mode
- ICC Matching Mode
- ColorSync
- Preferences Dialog Box
- Page Setup Dialog Box
- Zoom Dialog Box
- Format Dialog Box
- Laying out a Multiple-File Document on One Page
- Laying out a Document Created with Multiple Application Programs on One Page
- Selecting an Object
- Changing the Object Size
- Moving an Object
- Rotating an Object
- Laying out Objects Automatically
- Aligning Objects
- Changing the Object Overlapping Order
- Pasting a Copied or Cut Object
- Color imageRUNNER Enlargement Copy
- The Features of Color imageRUNNER Enlargement Copy
- Starting Color imageRUNNER Enlargement Copy
- Color imageRUNNER Enlargement Copy Dialog Box
- Hot Folder
- Creating a New Hot Folder
- Editing a Hot Folder (Setting Print Conditions)
- Deleting a Hot Folder
- Setting the Print Parameters
- Paper Settings Panel
- Easy Settings
- Advanced Settings
- Output Settings Panel
- Color Settings Panel
- Driver Matching Mode
- ICC Matching Mode
- Printing Enlargements of Scanned Originals from a Color imageRUNNER
- Print Plug-In for Photoshop / Digital Photo Professional
- Features of the Print Plug-In for Photoshop/Digital Photo Professional
- Installation Procedures
- Uninstall Procedures
- Starting from Photoshop
- Starting from Digital Photo Professional
- Print Plug-In for Photoshop/Digital Photo Professional Main Window
- Preview Area
- Main Sheet
- Page Setup Sheet
- Color Settings Sheet (Color)
- Color Settings Sheet (Monochrome)
- Print History Sheet
- Support Sheet
- Adjustment pattern setting dialog box
- Paper Detailed Settings Dialog Box
- Set Configuration Dialog Box
- ICC Conversion Options dialog box
- Roll Paper Options Dialog Box
- Size Options Dialog Box
- Curves Dialog Box
- Print History Details Dialog Box
- Utilize Three Types of Previews
- Check Image with Print Area Layout
- Check the original image with Image
- Check Image with Roll Paper Preview
- Print with a Desired Picture Quality
- Adjust the Colors and Print
- Adjust the Colors while Checking the Preview (for Color)
- Adjust the Colors while Checking the Preview (for Monochrome)
- Adjust the Colors by Color Matching
- Print High-Quality Adobe RGB16bit Images
- Prints monochrome photographs with high quality
- Using Adobe CMM
- Printing an Adjustment Pattern and Selecting Adjustment Values
- Perform Black Point Compensation
- Perform Printing Press Simulation Print
- Enlarge/Reduce and Print
- Enlarge/Reduce and Print Matching Output Media Size
- Enlarge/Reduce and Print Matching Width of Roll Paper
- Specify Scaling, Enlarge/Reduce and Print
- Print with No Borders
- Customize Media Settings
- Utilize Print History
- Confirm Print History Details
- Apply Print History to an Image
- Store Print History to Print Preferences
- Delete Print History
- Export Print History from Print Preferences
- Import Print History to Print Preferences
- Delete Print History from Print Preferences
- Set Information to Print with Image
- Layout Plug-In for Photoshop
- Printer Driver
- Handling and Use of Paper
- Paper
- Types of Paper
- Paper Sizes
- Using Paper Other Than Genuine Paper and feed confirmed Paper
- Printing on Paper Other Than Genuine Paper and feed confirmed Paper Using Existing Settings
- Printing on Paper Other Than Genuine Paper and feed confirmed Paper by Adding a Media Type
- Displaying the Paper Reference Guide
- Updating paper information
- Handling rolls
- Attaching the Roll Holder to Rolls
- Loading Rolls in the Printer
- Changing the Type of Paper
- Specifying the Paper Length
- Removing the Roll from the Printer
- Removing the Roll Holder from Rolls
- Feeding Roll Paper Manually
- Keeping Track of the Amount of Roll Paper Left
- Specifying the Ink Drying Time for Rolls
- Specifying the Cutting Method for Rolls
- Cutting the Leading Edge of Roll Paper Automatically
- Reducing Dust from Cutting Rolls
- Handling sheets
- Output Stacker
- Media take-up unit
- Media Configuration Tool (Windows)
- The Features of Media Configuration Tool
- Installation Procedures
- Starting Method
- Media Configuration Tool Main Window
- Editing Media Type Information for Genuine Paper and Feed Confirmed Paper
- Adding Media Types
- Changing Media Names
- Deleting Media Types You Have Added
- Switching Media Types Display Show/Hide
- Changing the Display Order of Media Types
- Using Paper Other than Genuine Paper and Feed Confirmed Paper
- Compatible Paper
- Add Custom Paper
- Delete Custom Paper
- Edit Custom Paper
- Export Custom Media Information
- Import Custom Media Information
- Warnings
- Media Configuration Tool (Mac OS X)
- The Features of Media Configuration Tool
- Procedures for Installing
- Procedures for Uninstalling
- Starting Method
- Media Configuration Tool Main Window
- Editing Media Type Information for Genuine Paper and Feed Confirmed Paper
- Adding Media Types
- Changing Media Names
- Deleting Media Types You Have Added
- Switching Media Types Display Show/Hide
- Changing the Display Order of Media Types
- Using Paper Other than Genuine Paper and Feed Confirmed Paper
- Compatible Paper
- Add Custom Paper
- Delete Custom Paper
- Edit Custom Paper
- Export Custom Media Information
- Import Custom Media Information
- Warnings
- Paper
- Control Panel
- Printer Parts
- Network Setting
- Network Environment
- Using RemoteUI
- Initial Settings
- Configuring the IP Address on the Printer
- Configuring the IP Address Using the Printer Control Panel
- Configuring the IP Address Using ARP and PING Commands
- Configuring TCP/IPv6 Network Settings
- Configuring the Printer Driver Destination (Windows)
- Configuring the Printer Driver Destination (Mac OS X)
- Configuring the Printer's TCP/IP Network Settings With RemoteUI
- NetWare Settings
- Mac OS X Settings
- Other Settings
- Device Setup Utility (Windows)
- Print Job Management
- Status Monitor (Windows)
- Printmonitor (Mac OS X)
- Accounting (Windows)
- Accounting Manager
- Launching the Accounting Manager
- Accounting Manager Main Window
- Job List Area
- Accounting Manager Basic Procedures
- Configuring Unit Costs in Accounting Manager
- Setting the Unit Cost for Ink
- Setting the Unit Cost for Paper
- Setting the Unit Cost for Items Other Than Ink and Paper
- Configuring Units and Display Settings in Accounting Manager
- Automatically Acquiring Print Job Logs at Regular Intervals
- Canceling Regular Print Job Log Acquisition
- Switching Between Displaying Jobs on Printer and Regularly Acquired Jobs
- Exporting Print Job Data as a CSV File
- Displaying Job Properties or Period Properties
- Showing, Saving and Loading Selected Unit Cost Data
- Showing the Total Amount of Ink and Paper Consumed
- Basic Print Job Operations
- Advanced Print Job Operations
- Adjustments for Better Print Quality
- Color Management
- Maintenance and Consumables
- Troubleshooting
- Frequently Asked Questions
- Problems Regarding Paper
- Clearing Jammed Roll Paper
- Clearing a Jammed Sheet
- Roll paper cannot be inserted into the paper feed slot
- Cannot load sheets
- Paper is not cut straight
- Paper is not cut
- The media take-up unit continues rotating
- The size of clear film cannot be detected
- Margins are wide
- When printing on thin roll paper, the printed surface becomes scratched
- Printing does not start
- The printer stops during a print job
- Problems with the printing quality
- Printing is faint
- Paper rubs against the printhead
- The edges of the paper are dirty
- The surface of the paper is dirty
- The back side of the paper is dirty
- Immediately after borderless printing, the trailing edge margin is soiled during regular printing
- Printed colors are inaccurate
- Banding in different colors occurs
- Colors in printed images are uneven
- Image edges are blurred or white banding occurs
- Setting the Blue Switch on the Platen
- The contrast becomes uneven during printing
- The length of printed images is inaccurate in the feeding direction
- Images are printed crooked
- Documents are printed in monochrome
- Line thickness is not uniform
- Lines or colors are misaligned
- Borders appear in borderless printing
- Cannot print over a network
- Installation problems
- Other problems
- Error Message
- Error Messages
- Messages regarding paper
- Paper mismatch
- MediaType Mismatch
- The paper is too small.
- The paper is too small.
- PaprWidth Mismatch
- Paper size not detected.
- Insufficient paper for job
- This paper cannot be used as size is not supported.
- Roll printing is selected.
- Roll printing is selected, but sheets are loaded.
- The roll is empty.
- No sheets.
- Sheet printing is selected.
- Regular printing is selected, but a roll is loaded.
- Paper jam.
- Paper loaded askew.
- Cannot detect papr
- Cannot feed paper.
- Cannot cut this paper.
- End of paper feed.
- Rel lever is in wrong position.
- Rewinding error.
- Media take-up unit ready.
- Turn on the media take-up unit.
- Borderless printng not possible.
- Paper position not suitable for borderless printing.
- Messages regarding ink
- Messages regarding printing or adjustment
- Cannot execute this command. Use other paper.
- Cannot calibrate.
- Excessive temperature or humidity.
- Please execute common calibration.
- Please commn calibrt using above paper.
- Please calibrate using above paper.
- Borderless printng not possible. Paper stretched or shrank.
- Before borderless printing, move the blue platen switch.
- Blue platen switch is dirty.
- Move the blue platen switch No.xx to the right. (xx represents a number)
- Cannot adjust paper feed.
- Check printed document.
- Messages regarding printheads
- Messages regarding the maintenance cartridge
- Messages regarding the hard disk
- Other Messages
- GARO Wxxxx (x represents a number)
- ERROR Exxx-xxxx (x represents a letter or number)
- Hardware error. xxxxxxxx-xxxx (x represents a letter or number)
- Top cover is open.
- Prepare for parts replacement.
- Parts replacement time has passed.
- Unknown file.
- Calibration There is a problem with the multi-sensor.
- Multi-sensor error
- Specifications
- Appendix
- Index