Delete custom paper, Edit custom paper, Delete custom paper edit custom paper – Canon imagePROGRAF iPF9400 User Manual
Page 640: See "edit custom paper, P.640
Delete Custom Paper
Delete Custom Paper
You can delete custom paper that you have already added from printer control panel and from the printer driver of the
PC you are using.
1
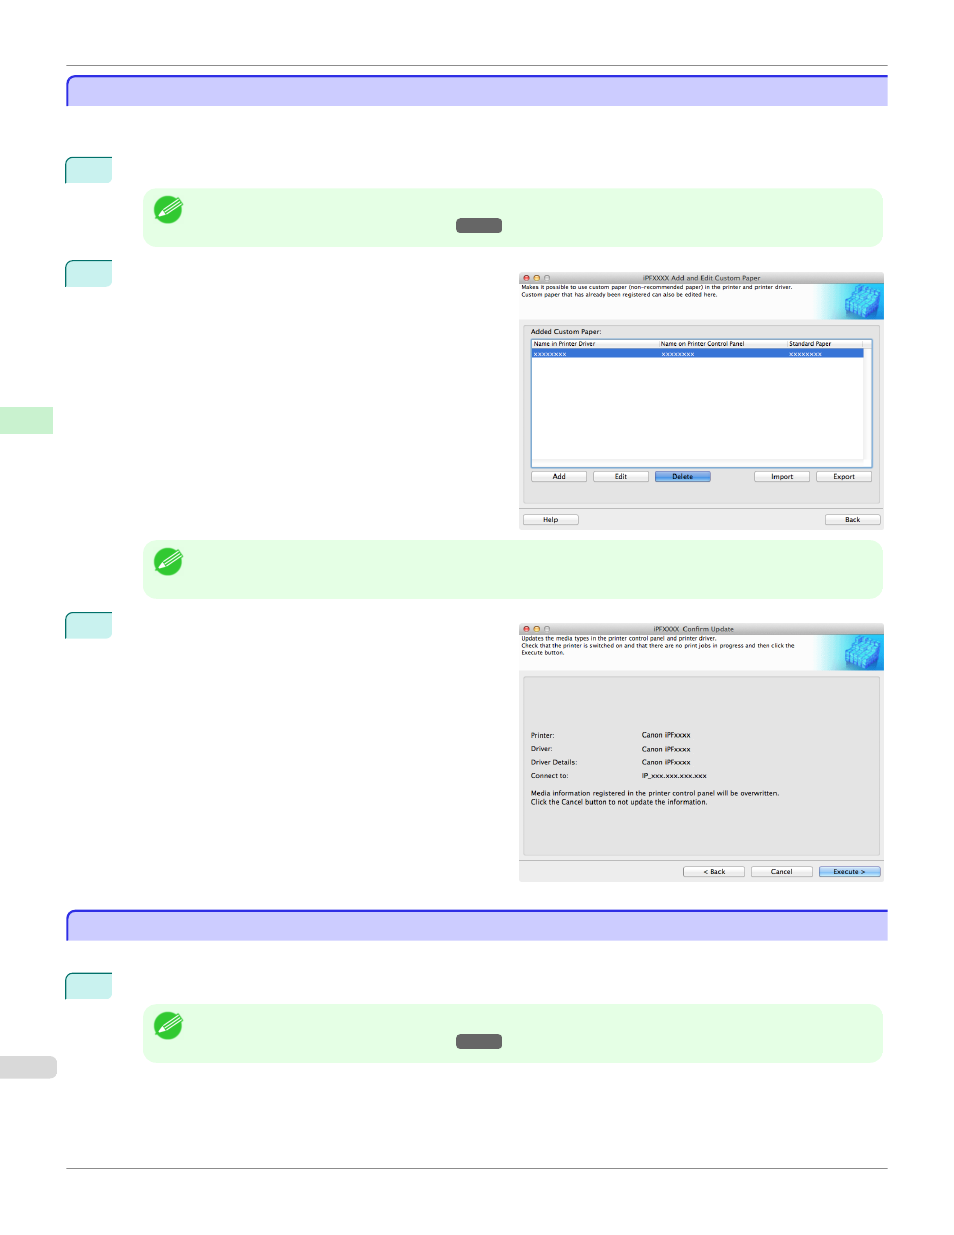
Open the Add and Edit Custom Paper dialog box.
Note
•
For details on the procedure for opening the Add and Edit Custom Paper dialog box, see "Using Paper Other than
Genuine Paper and Feed Confirmed Paper."
2
Select the paper you want to delete from the Added
Custom Paper list and then click the Delete button.
Note
•
You can select multiple paper.
3
The Confirm Update dialog box is displayed.
Confirm the updates and then click the Execute button.
The custom paper is deleted from the control panel of
the printer and from the printer driver of the PC you are
using.
Edit Custom Paper
Edit Custom Paper
You can change the settings of custom paper you have already added.
1
Open the Add and Edit Custom Paper dialog box.
Note
•
For details on the procedure for opening the Add and Edit Custom Paper dialog box, see "Using Paper Other than
Genuine Paper and Feed Confirmed Paper."
Delete Custom Paper (Mac OS X)
iPF9400
Handling and Use of Paper
Media Configuration Tool (Mac OS X)
640