Step 2, Installing the printer driver, Windows – Brother HL-4070CDW User Manual
Page 38
Installing the Printer Driver
36
STEP 2
Windows
®
W
indow
s
®
Wire
le
ss
Ne
tw
o
rk
9
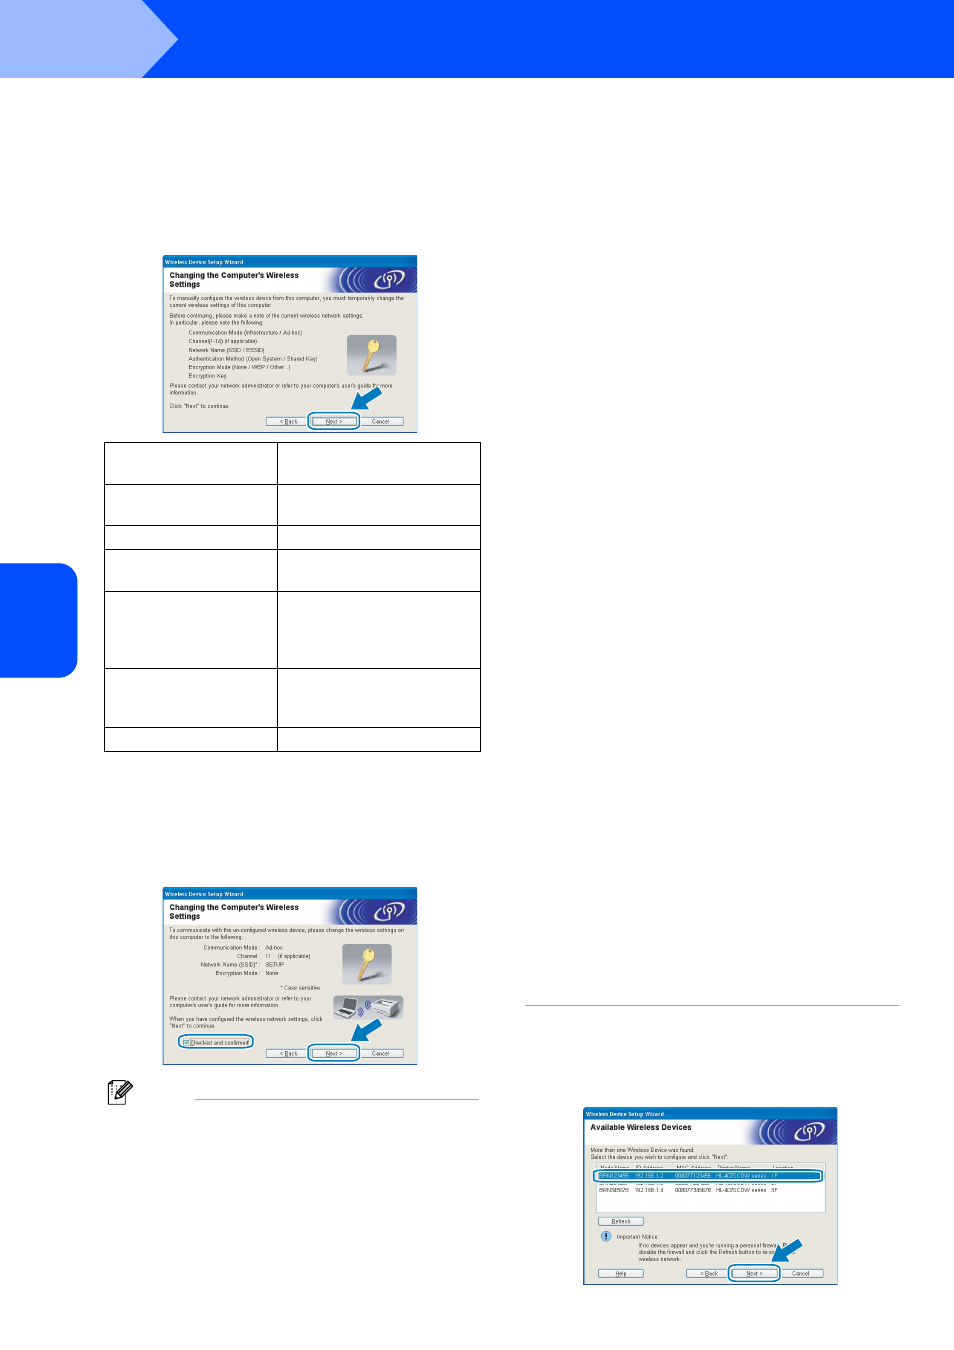
You need to temporarily change your
computer’s wireless settings. Follow the on-
screen instructions. Make sure you take notes
on all the settings such as SSID or channel of
your computer. You will need them to return
your computer back to its original wireless
settings, and then click Next.
10
To communicate with the un-configured
wireless printer, temporarily change the
wireless settings on your computer to match
printer’s default settings shown on this screen.
Check the box after you confirm these settings,
and then click Next.
Note
• If a message to restart your computer appears
after the wireless settings have been changed,
restart your computer and then go back to step
and continue with the install skipping steps
9 and
10.
• For Windows Vista™ users:
You can temporarily change the wireless settings
on your computer, following the steps below:
1
Click Start and then Control Panel.
2
Click Network and Internet and then
Network and Sharing Center icon.
3
Click Connect to a network.
4
You can see the SSID of the wireless printer
in the list. Select SETUP and click Connect.
5
Click Connect Anyway and then Close.
6
Click View status of
Wireless Network Connection (SETUP).
7
Click Details.... and check the
Network Connection Details. It may take
a few minutes to change from 0.0.0.0 to
169.254.x.x IP address to be shown on
screen (where x.x. are numbers between 1
and 254).
• For Windows
®
XP SP2 users:
You can temporarily change the wireless settings
on your computer, following the steps below:
1
Click Start and then Control Panel.
2
Click Network and Internet Connections
icon.
3
Click Network Connections icon.
4
Select and right click
Wireless Network Connection. Click
View Available Wireless Networks.
5
You can see the SSID of the wireless printer
in the list. Select SETUP and click Connect.
6
Check the Wireless Network Connection
status. It may take a few minutes to change
from 0.0.0.0 to 169.254.x.x IP address to be
shown on screen (where x.x. are numbers
between 1 and 254).
11
Choose the printer you wish to configure, and
click Next. If the list is blank, check if the
access point and the printer are powered on,
and then click Refresh.
Item
Record the current wireless
computer settings
Communication mode:
(Infrastructure / Ad-hoc)
Channel: (1-14)
Network name: (SSID /
ESSID)
Authentication method:
(Open system / Shared
key / WPA/WPA2-PSK /
LEAP)
Encryption: (None / WEP
/ WPA / TKIP / AES/
CKIP)
Encryption key: