Step 2, Installing the printer driver, Windows – Brother HL-4070CDW User Manual
Page 34
Installing the Printer Driver
32
STEP 2
Windows
®
W
indow
s
®
Wire
le
ss
Ne
tw
o
rk
9
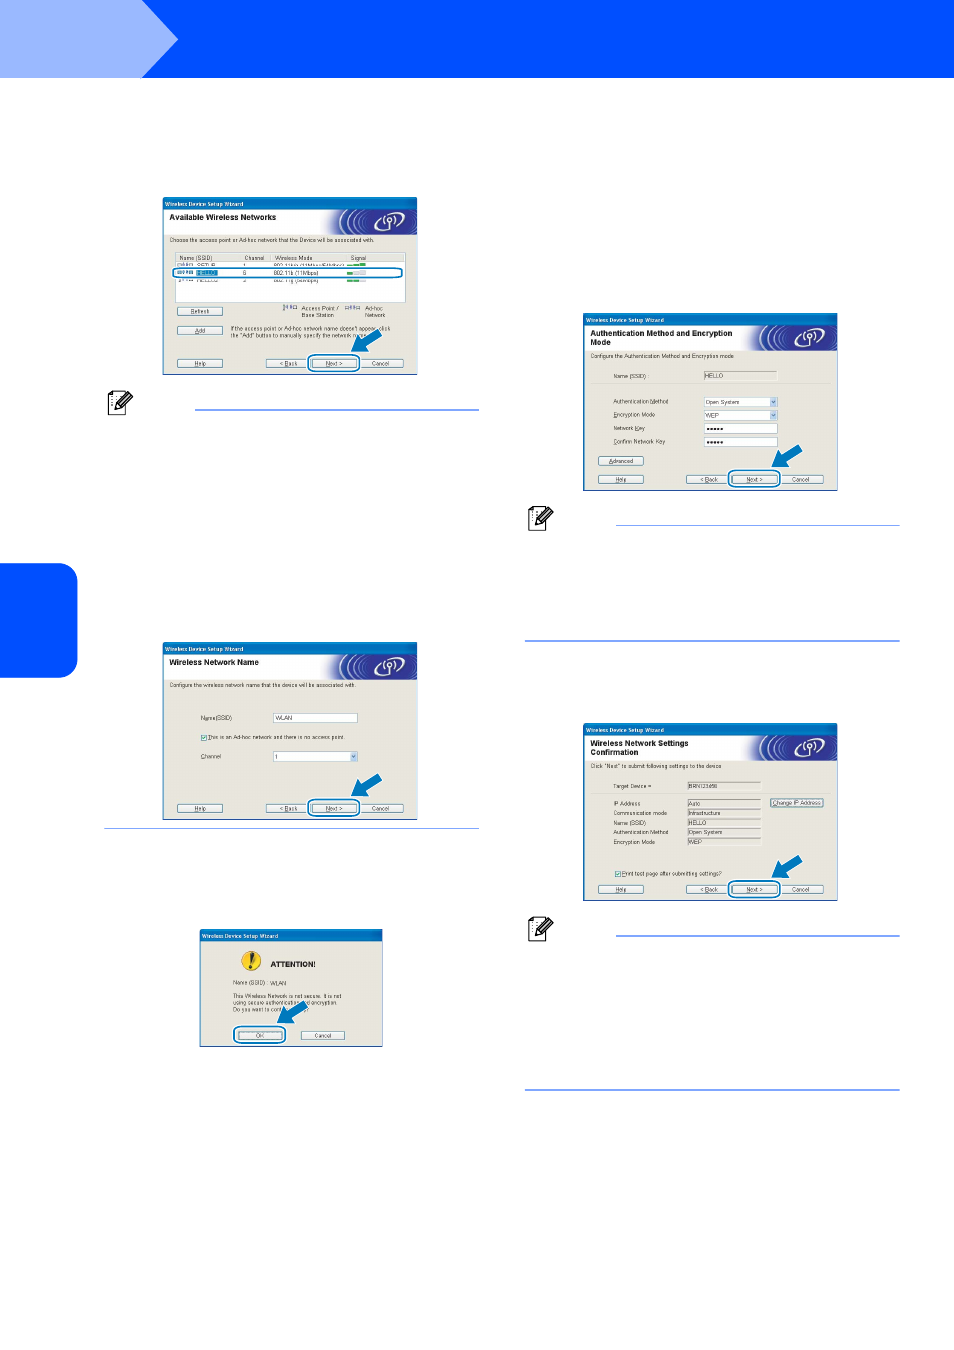
The wizard will search for wireless networks
available from your printer. Choose the access
point you wish to associate the printer with, and
then click Next.
Note
• "SETUP" is the default SSID of the printer. Do not
choose this SSID.
• If the list is blank, check that the access point has
power and is broadcasting the SSID, and then see
if the printer and the access point are within range
for wireless communication. Then, click Refresh.
• If your access point is set to not broadcast the
SSID you can manually add it by clicking the Add
button. Follow the on-screen instructions for
entering the Name (SSID) and the Channel
number.
10
If your network is not configured for
Authentication and Encryption, the following
screen will appear. To continue configuration,
click OK and go to
11
If your network is configured for Authentication
and Encryption, the following screen will
appear. When configuring your Brother
wireless printer, you must ensure that it is
configured to match the Authentication and
Encryption settings of your existing wireless
network. Choose the Authentication Method
and Encryption Mode from the pull-downs in
each setting box. Then enter the Network key
and click Next.
Note
• If you want to setup more than WEP key1, click
Advanced.
• If you do not know the Authentication or
Encryption settings for network, contact your
network administrator.
12
Click Next. The settings will be sent to your
printer. The settings will remain unchanged if
you click Cancel.
Note
• If you want to manually enter the IP address
settings of your printer, click Change IP Address
and enter the necessary IP address settings for
your network.
• The control panel settings will be automatically
changed to
WLAN when the wireless settings are
sent to your printer.