Dwyer ULTM User Manual
Page 8
3.4 Temperature Readings
Navigate to the T° symbol on the toolbar and press Enter (+). The following table
will be displayed:
The table is explained in the Chapter 8 reference guide section: “Temperature
Sensors, Units and Display” (p.17). Press reset to reset recorded high / low
temperatures, or press done to return to the measurement screen.
3.5 Ultrasonic Echo Conditions
Navigate to the dB symbol and press enter (+). You will be presented with the
measured echo amplitude and the maximum amplitude available. The amplitudes
are presented in dB relative to a system threshold amplitude. Echo amplitude
should be above threshold amplitude for reliable measurement. Echo strength
between 3 dB and 8 dB (maximum) is reliable. Echo amplitude refers to the echo
measured just prior to navigating through the toolbar. Press done to return to the
measurement screen.
3.6 Product Identification Details
From the measurement screen, navigate to the ID symbol on the toolbar and press
Enter (+). Product information will be displayed: serial number and part number.
Press Back to return to the measurement screen or navigate to one of the options:
Software Information (SW), Hardware Information (HW), or Manufacturing Date
Information (Date). SW screen will display firmware versions of the embedded
application and of the embedded boot-loader. Press Back to return to the previous
menu. HW screen will display product information regarding sensor type and model
type. Press Back to return to the previous menu. Date screen will present the date
of manufacturing. Press Back to return to the previous menu.
4. Quick Setup
Set ULTM for operation by a quick 7-step wizard-driven procedure using the basic
menu option.
Note: Configuration using the display and keypad supports metric units only. For
English units, use the PC configuration method as described in the Chapter 5
describing Configuration with a PC (p.9).
A. Turn on ULTM and wait for the measurement screen to show up. Navigate
through the toolbar and select setup.
B. Scroll and select Basic Setup from the Main Menu.
C. Scroll and select application (Low power or High power). For additional details
about the application type refer to the reference guide under Chapter 8:
“Application Type” (p.15).
D. Determine distance to empty level. For additional details about the empty level,
see the reference guide section Chapter 8: “Application Dimensions and
Constraints” (p.14). When you are done press Done.
E. Determine distance to the full level. For additional details about the full level, see
the reference guide section Chapter 8: “Application Dimensions and
Constraints” (p.14). When you are done press Done.
F. Scroll and select value to display. For additional details about value-to-display,
see the reference guide section: Chapter 8: “Distance Units and Value to
Display” (p.15).
G. Skip or perform false echo search. See the section “False Echo Scan” in
Chapter 8, the reference guide chapter (p.16).
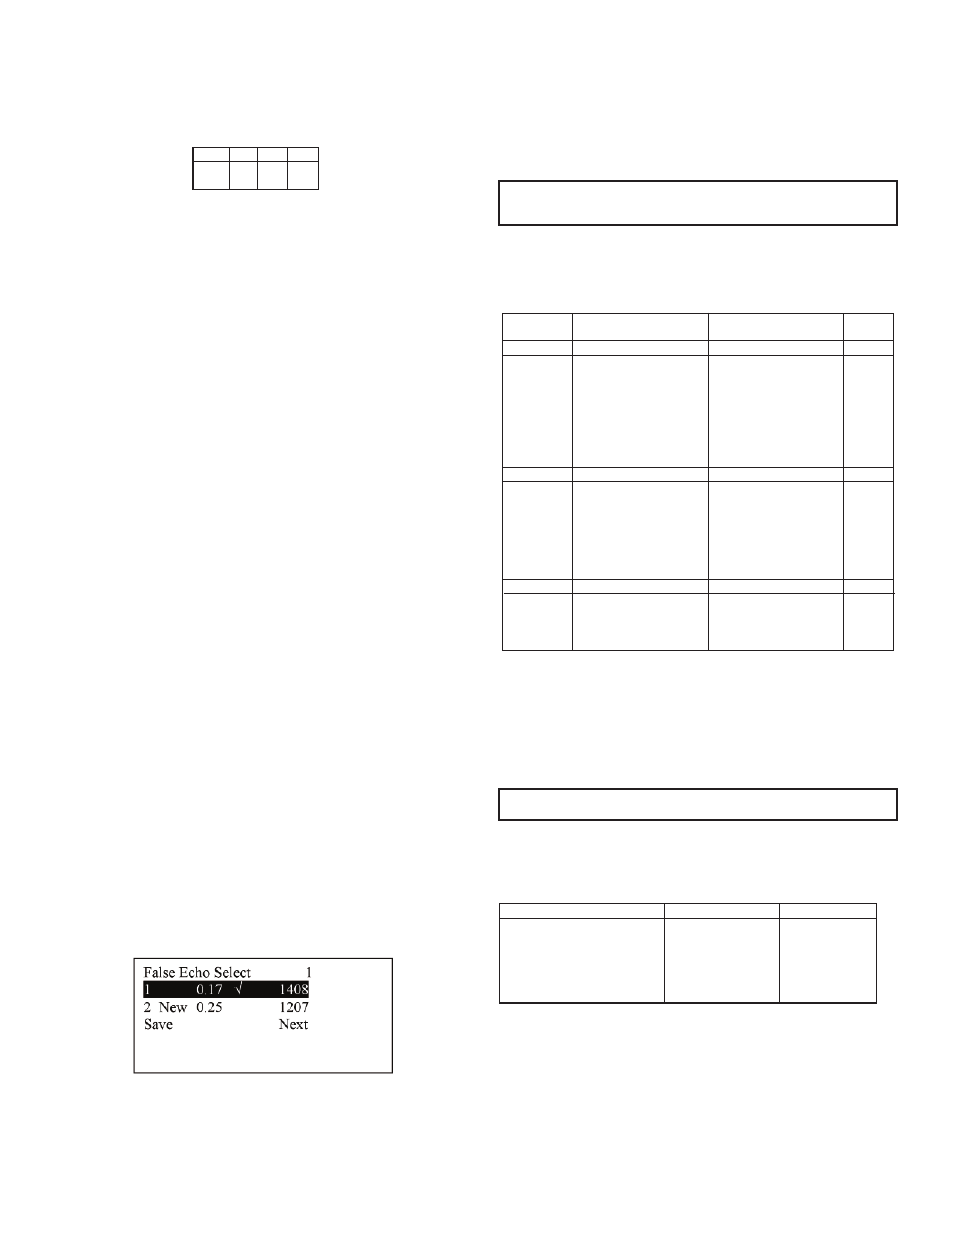
5. False Echo Scan
Perform a false echo scan when obstructions are nearby the target or sensor.
Preferably, false echo scan should be performed when the tank is empty. If you
choose to perform false echo scan, wait for about a minute and then you will be
presented with a list of echoes.
Scroll through the listed echoes and press Enter (+) on each echo you would like
to ignore during measurement. Each such echo will be designated by a √ sign. The
number of selected echoes is presented on the top-right edge of the screen. Press
Save to store your selection and Next to proceed to the next sub-menu. To un-
select an echo, scroll to that echo and press Enter (+) again. If you choose to
perform false echo scan a second time, new echoes which were not identified
during the first scan will be reported as “new”.
The ULTM is now ready for measurements.
Parameters which are not determined during quick setup procedure will take their
default value and may be modified later using the Advanced Setup menu.
6. Advanced Settings
ULTM supports a set of advanced settings. These settings are classified under
three categories: GSM, Algorithm and Device state. The following items may be
modified under each category:
To execute any of the advanced settings, follow these steps: Turn ON ULTM and
wait for the Measurement screen to show up. Navigate and select Setup. Then
scroll and select Advanced Setup from the Main Menu. Now select the required
category (GSM, Algorithm or Device state) and follow the screen instructions.
When done, scroll and press **back** to return to the Main Menu, then scroll and
select the measurement display.
Each item may either present a selection of sub-items to choose from or may
require entry of a numeric field.
7. Settings Available in PC Configuration Only
Some advanced settings are available in a PC configuration only and cannot be
configured with the display/keypad. These settings are defined in the following
table.
Page 7
Figure 17: False Echo Scan Screen.
Category
GSM
Algorithm
Device state
Sub Menu Items
Destination phone number
Reporting interval
Full and empty alerts
Theft/Refill alerts active
once value is set for rate
and level
Far blocking distance
Near blocking distance
Filling rate
Temperature units
Reset to defaults
Operating hours
See Section in Chapter 8
Reference Guide…
“Destination Phone
Number”
“GSM reporting Interval”
“Theft Alerts”
“Refill Alerts”
“Application Dimensions &
Constraints”
“Application Dimensions &
Constraints”
“Filling Rate”
“Temperature Sensors,
Units and Display”
“Reset and Operating
Hours”
“Reset and Operating
Hours”
Notes
1-Enable
0-Disable
1-Enable
0-Disable
If you are not sure what sub-item to select or how the numeric field should be
modified, leave the default values as is.
Note: Always verify then re-verify that your basic settings are correct including
distance to empty level, distance to full level, level or distance choice. Most wrong
readings originate from incorrect basic setup.
Setting
Units
Value to Display
USB Monitoring
Tank Shape and Dimensions
Theft and Refill Alerts for Volume
Programmable Timer Switch
Options
Meter, feet, liter, gallon
Volume
Enable and disable
Cubic, cylindrical
Level and duration
PC Command
UNT
VAL
ENDT, DSDT
CUB, CYLV, CYLH
ATF, ARF
LPST
Sens:
Int
Ext
Reset
Cur
29.5
29.4
High
31.0
32
Low
26
23.3
Done
Figure 16: Temperature Readings.