Integrated pit lid hanger installation kit, Vault installation – Badger Meter ORION Classic (CE) User Manual
Page 19
Installation Manual
Integrated Pit Lid Hanger Installation Kit
ORION endpoints can be installed below composite and plastic lids that have an integrated hanger for AMR/AMI endpoints
using the Integrated Pit Lid Hanger Installation Kit (64394-009) .
To install an ORION endpoint to a composite or plastic lid with an integrated hanger, follow these steps and refer to
Figure 10
.
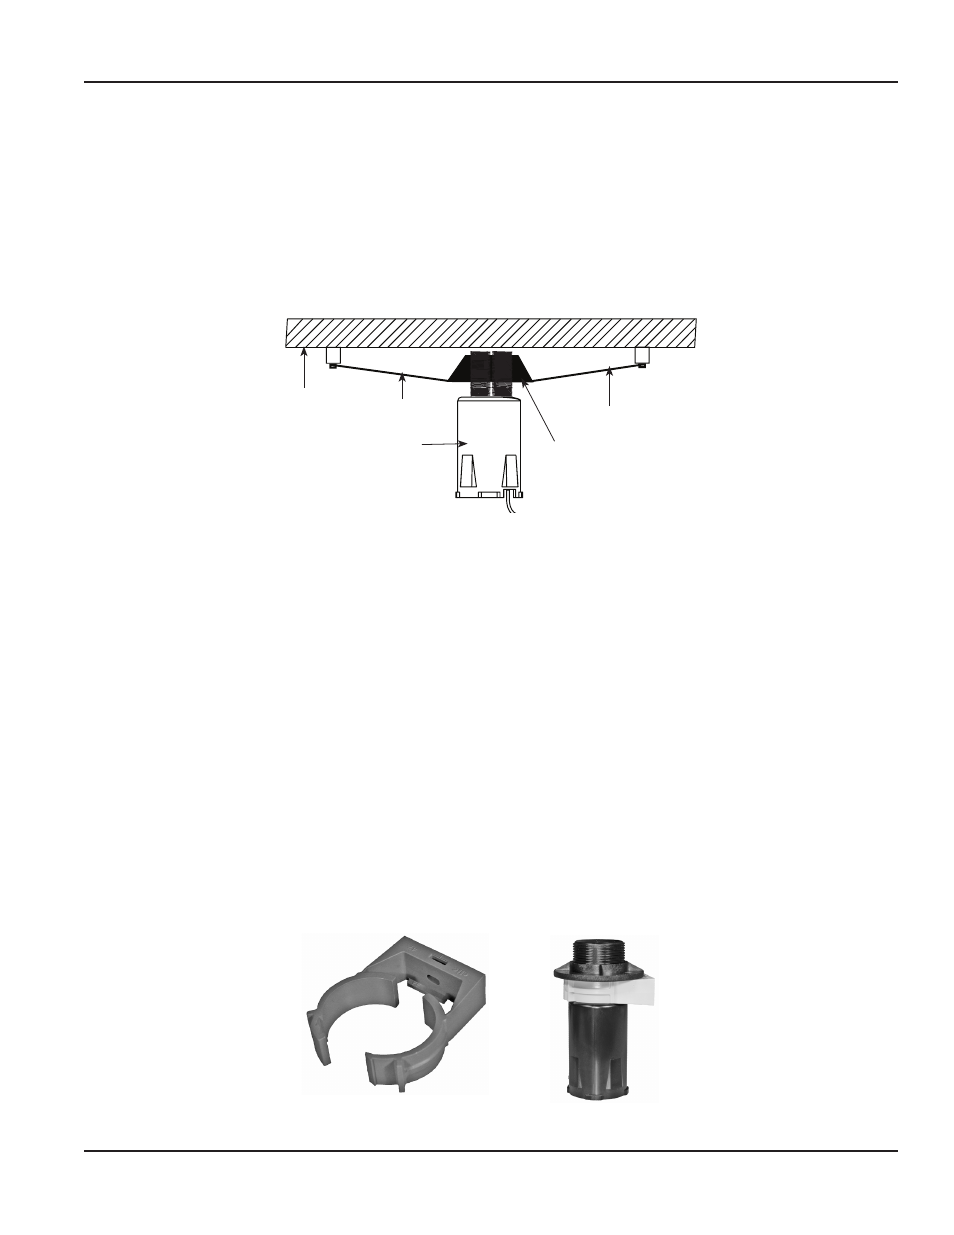
1 . Thread the lock nut onto the top of the ORION endpoint as shown .
2 . Slide the endpoint into the lid bracket .
3 . Tighten the lock nut so that the endpoint is held firmly in place .
Figure 10: Integrated pit lid hanger installation
VAULT INSTALLATION
For a deep vault installation, Badger Meter offers a Vault Installation Kit (64394-008) that can be used to mount the
endpoint to the side of the vault .
To install an ORION endpoint in a deep vault, follow these steps and refer to
Figure 11
.
1 . Mount the C-clamp on the side of the vault . Select a location inside the vault, close to the top, that will not be
damaged when access to the meter is required .
2 . Place the neoprene spacer supplied in the installation kit around the endpoint, approximately 1/2 inch from the top
of the endpoint .
3 . Thread the lock nut on the endpoint until it makes contact with the neoprene spacer as shown in
Figure 11
.
4 . Insert the endpoint into the C-clamp as shown .
5 . Close the C-clamp and lock it in place so that it closes over the neoprene spacer and securely holds the endpoint .
NOTE:
N
ORION radio endpoints perform best with a clear line of sight . Performance varies by installation and
lid construction .
C-Clamp
C-Clamp around endpoint
Figure 11: C-Clamp and placement
Lid bracket
Lid bracket
Meter pit lid
ORION endpoint
Lock nut
Page 19
June 2014