Connecting ac power to the charger – Fire-Lite CHG-120F Battery Charger User Manual
Page 11
Connecting AC Power to the Charger
Installing the Charger
CHG-120F Instruction 03/21/01 PN 50888:B0
11
Connecting AC Power to the Charger
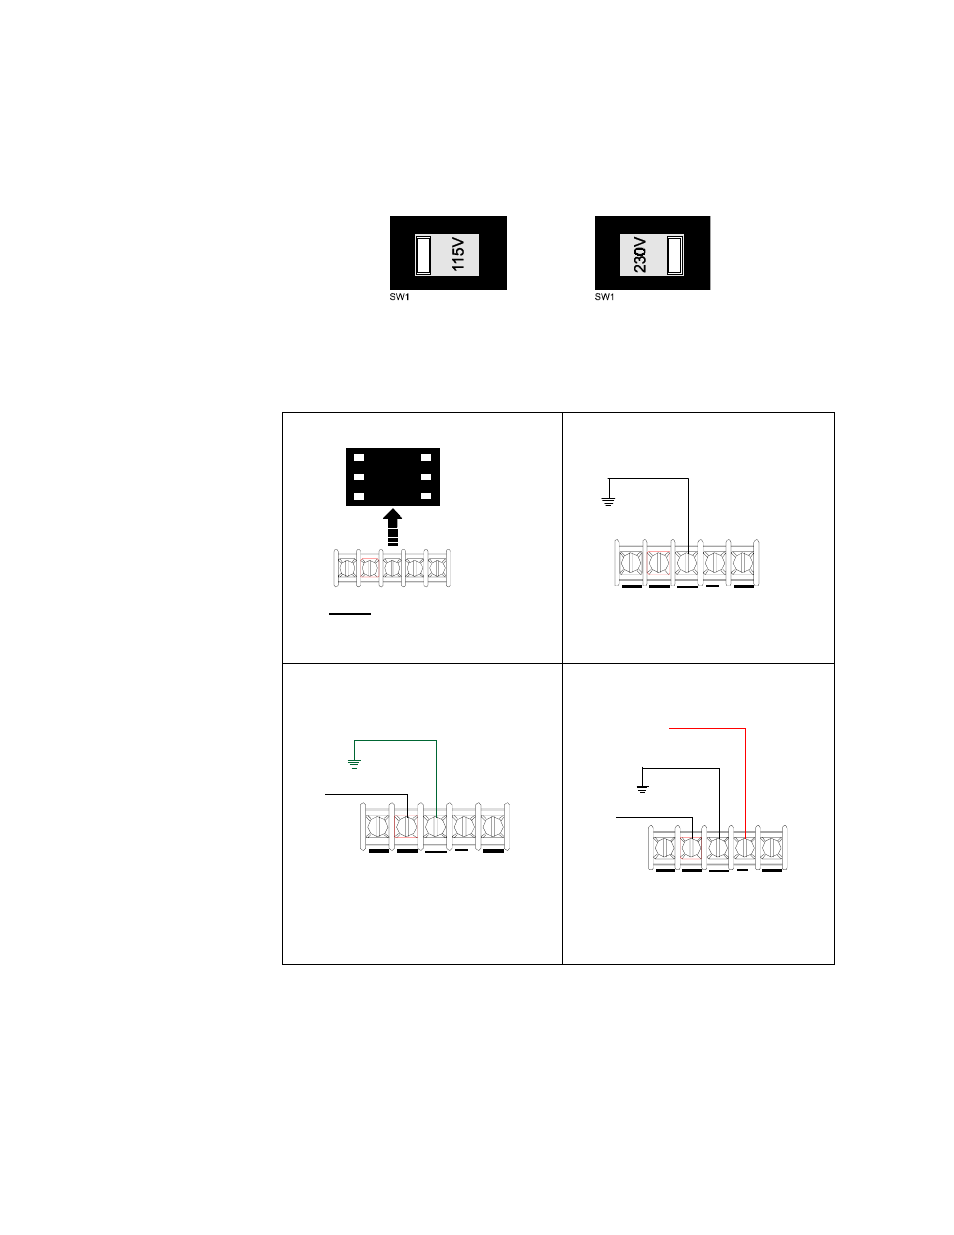
Caution: Before connecting AC power to the charger—make sure to set the Voltage Select
Switch (SW1) on the charger (Figure 2) to match your AC power source (120 VAC or 240
VAC). Figure 3 shows the voltage selection positions for SW1:
Figure 3 Using SW1 to Select AC Voltage
Figure 4 shows the steps for connecting the charger to the main AC power source.
Figure 4 Connecting AC Power to the Charger
SW1 set to 120 VAC
operation
SW1 set to 240 VAC
operation
Note: The charger is rated
for 120 VAC or 240 VAC
operation. Therefore, 115V
on SW1 indicates 120 VAC
operation; and 230V,
indicates 240 VAC
operation.
Step 1: Remove the plastic insulating cover
from TB1.
Step 2:
Connect the Earth ground line to
TB1.
Step 3: Connect the Primary Neutral line to
TB1.
Step 4: Connect the Primary Hot line to TB1.
Check all connections, then replace the
plastic insulating cover.
TB1
Plastic
insulating cover
(PN 02114)
TB1
Earth ground (
EARTH
)
TB1
Earth ground (
EARTH
)
Neutral line in (
NUTRL
)
Earth ground (
EARTH
)
Neutral line in (
NUTRL
)
Primary Hot line in (
HOT
)
TB1