Triton RT2000 X2 Installation Manual User Manual
Page 36
36
M
ODEL
RT2000 (X2) I
NSTALLATION
G
UIDE
I
NSTALLING
THE
R
ECEIPT
P
APER
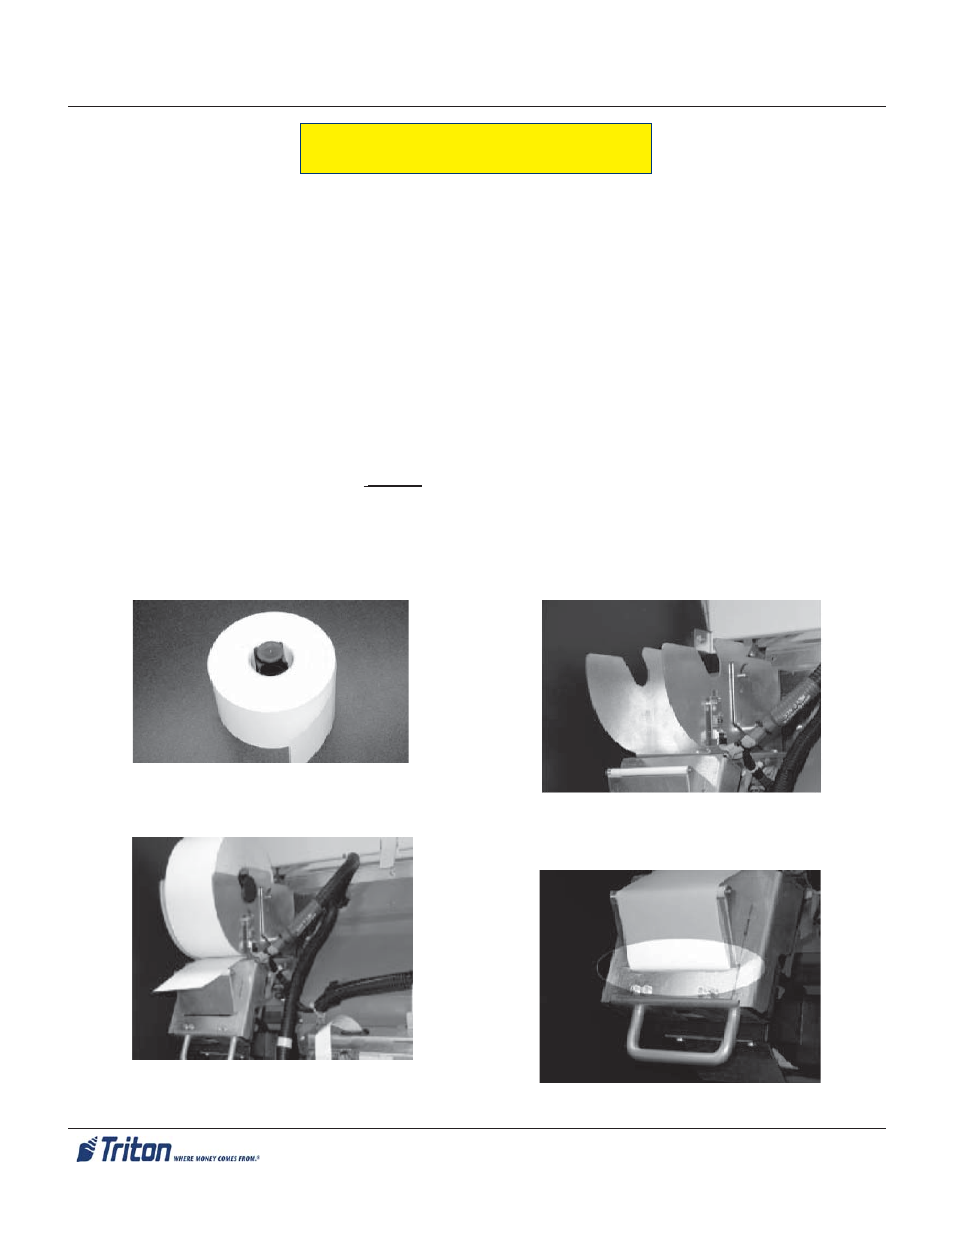
The receipt paper and paper spool are included in the accessory box.
1. Open the sleeve cabinet door and turn the power switch on the power supply to the ON (I) position.
2. Unwind about 18 inches from the end of the roll of paper and use scissors to cut off. Make sure all of
the paper roll has the glue removed.
3. Install the 6 inch roll of thermal paper on to the paper spool as shown in Figure 1.
4. Place the spool and paper on to the paper support bracket (Figure 2) by sliding slotted ends of the spool
onto the support bracket as shown in Figure 3.
5. Make sure the paper feeds off the bottom of the roll.
6. Once installed, take the end of paper roll and feed into the slot on the printer paper entrance shown in
)LJXUH 2QFH WKH SDSHU LV GHWHFWHG E\ WKH SULQWHU LW ZLOO DXWRPDWLFDOO\ SLFN LW XS DQG ¿QLVK IHHGLQJ
into the printer.
Figure 1. Spool inserted into roll of paper.
Figure 3. Paper loaded on support
bracket support (Bottom feed).
Figure 2. Paper support bracket.
Figure 4. Feed paper into slot.