Installation instructions, Installing on the spreader – SnowEx PWX-250 User Manual
Page 14
© Trynex International 2012 (REV A) F50766
14
Installation Instructions
Installing on the Spreader
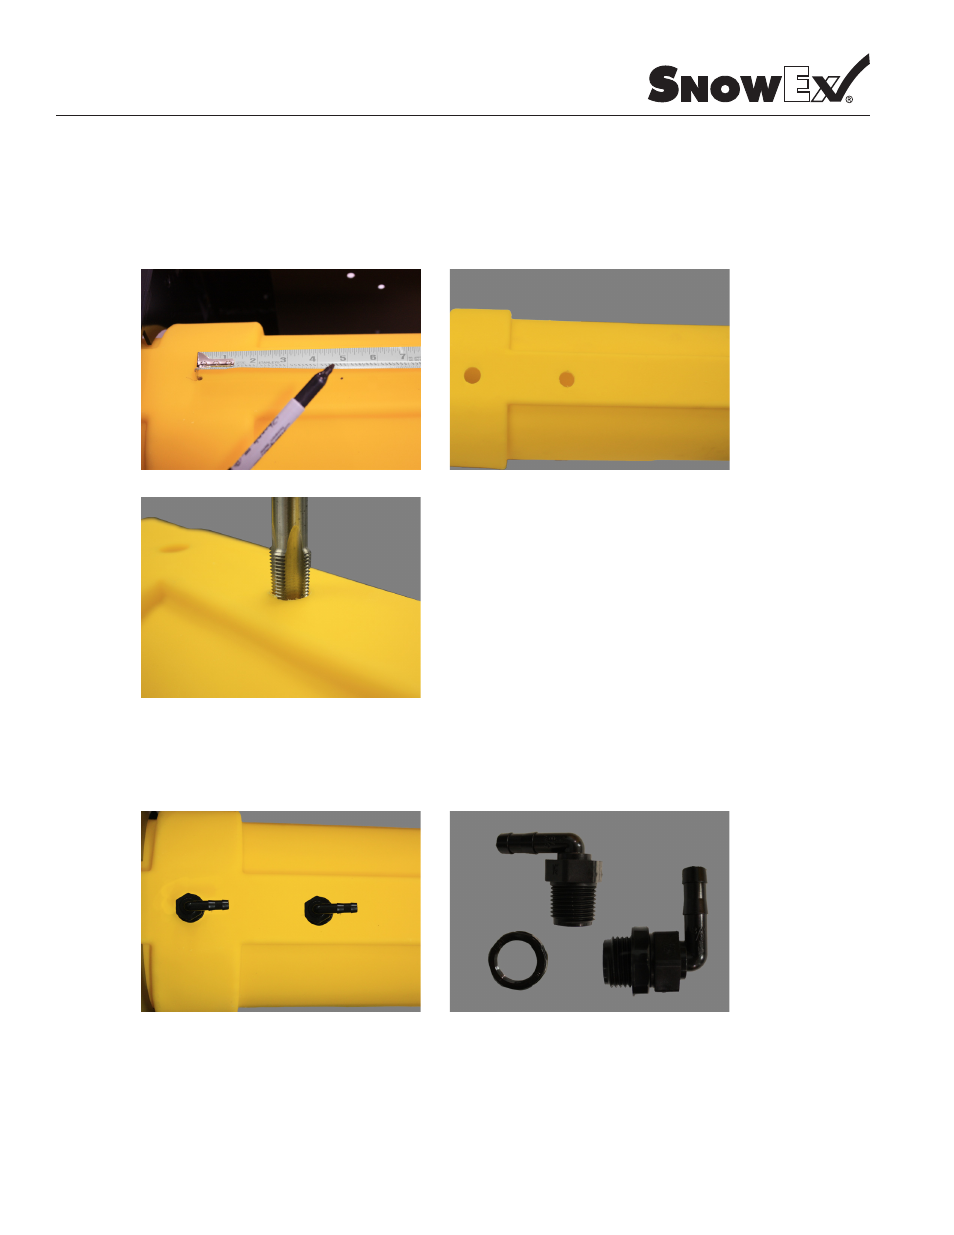
Make a mark at the center point of where the side and top ribs meet on the Auger Discharge Tube. Measure from
this point and make another mark 4-3/4” away. Both marks should be centered on the top rib in the Auger Tube.
Drill a 9/16” hole at both these marks. Make threads in these holes with a 1/2” - 14 NPT Tap.
Step 13:
Thread Plastic Nut onto each Hose Barb [D5377] from the Kit. Thread into the holes just drilled and tapped. Adjust
the Nut [D6781] against the plastic so both Hose Barbs face the rear of the Spreader once tightened.
Step 14:
1/2”-14 NPT Tap...
Drill...
9/16” Drill Bit...
Permanent Marker...
Tape Measure...
Channellocks...
Adjustable Wrench...