Hired-Hand Farm Hand Series: Data Shuttle Launch Pad User Manual
Page 4
Part No. 4801-0165 Rev 7-02
Data Shuttle Launch Pad
2
Select MENU:
5.1 Starting Launch Pad
The Launch Pad software will place an ICON in your Windows Start-up window.
Double click on this icon to start Launch Pad, or use the Start icon from the Windows
main screen. The Launch Pad flash screen will appear momentarily.
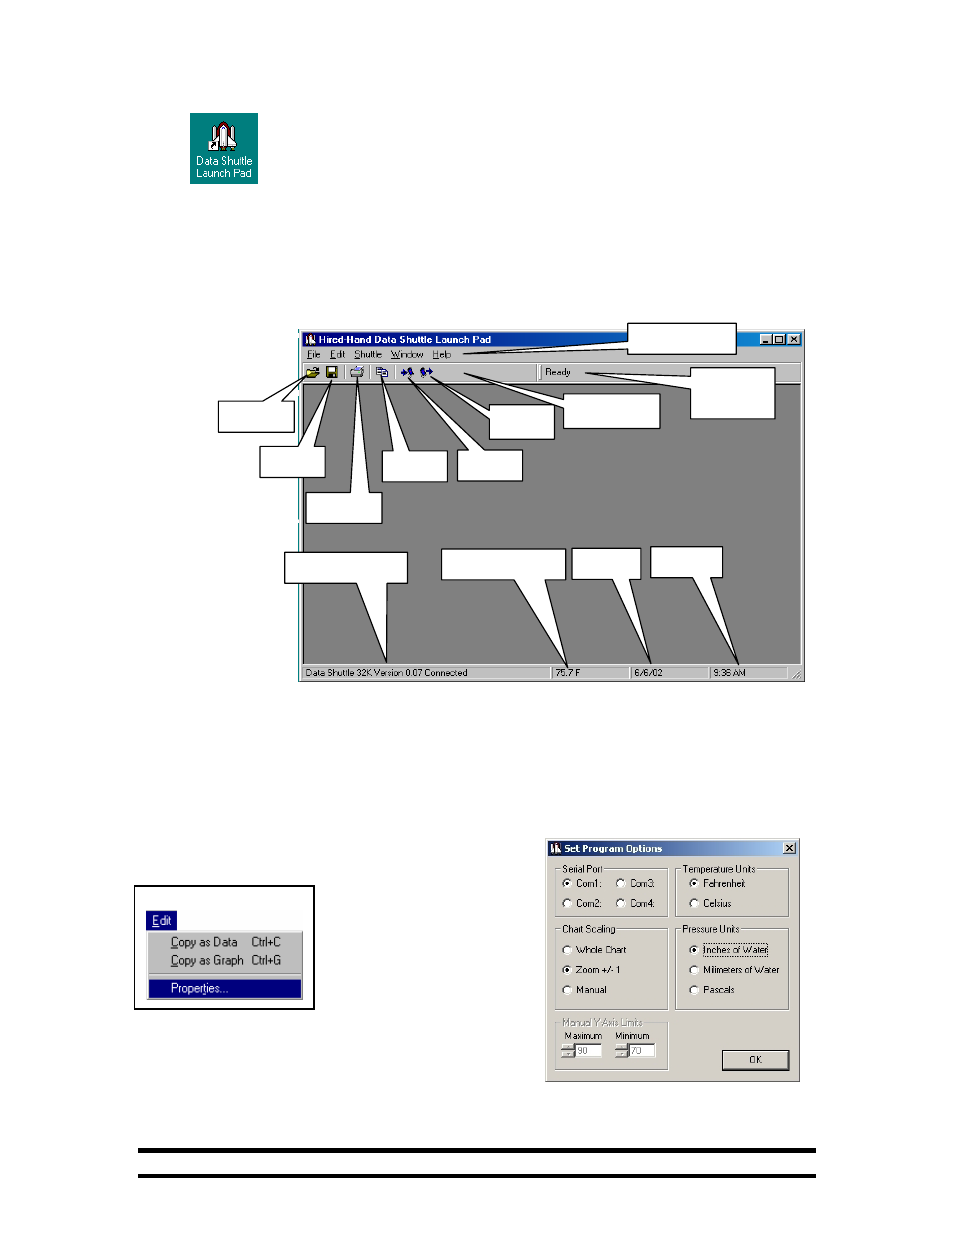
5.2 Launch Pad Main Window
After the flash screen, the Hired-Hand Data Shuttle Launch Pad main window will appear.
When starting Launch Pad it is recommended that you verify the time and date as displayed in the
lower right of the title screen. Since Launch Pad uses the internal clock of the computer for
loading and reading the Data Shuttle, this information must be correct. Consult your computer
documentation for setting the time and date.
The Main window has a Menu Bar at the top with drop-down menu lists that are selected by
clicking on the menu items with the mouse. Below the Menu Bar is a Tool Bar with six icons that
can be used as shortcut options. All of the options in the Tool Bar can also be obtained from the
Menu Bar. At the bottom of the screen, the Shuttle Status will display the Shuttle type and version
when connected to the computer communications port. The current temperature being read by the
Shuttle is shown plus the current time and date.
6. Setting the Communications Port
Select the Communications
Port Edit menu. Clicking on
the Properties item brings up
the Set Program Options
window. When the Launch
Pad software is first run,
Communications Port 1 is
selected as the default. If it is
necessary to change the port number, the Launch Pad
software must be re-started for the new port setting to take
effect. For a discussion of the Temperature and Pressure
Units, Chart Scaling and Manual Y-Axis Limits, see Section
15.
Date
Time
Temperature
Open
Save
Copy
Load
Read
Menu Bar
Shuttle Status
Tool Bar
Port
Status